Tutorial Preview
Highlights
Here we have carefully selected the key parts from the entire tutorial and condensed it into an 9 min long video. More than enough to get you started without taking too much tim
1. The design
Paul talks us through his design idea and starts to explain how he’s going to assemble the gravity-defying structure. Paul is doing his best to keep it all made of cake, using only a fraction of polystyrene cake dummy.
2. Assembling the stand
Paul now assembles the stand and you’ll be pleased to know it’s actually quite easy, albeit a little messy… dry mess, however. Once the stand has dried securely it’s time to move onto getting the cake ready.
3. Preparing the cake
Paul now shows us how to get the cake cut and ready to be placed onto the stand, in preparation for it to be ganached. Just watch out for cross contamination with the cake and polystyrene, as it really does get everywhere
4. Ganaching the cake
Now it’s time to tackle this slightly awkward shape with some ganache. Just make sure that you brush off any loose polystyrene before ganaching, and be careful not to move any into the cake. It’s all about being food safe. Once you’ve slapped it all on, go over lightly with a metal scraper and stick it in the fridge. Later cut away the excess to get nice neat edges.
5. Finishing the ganache
Paul finishes off the ganaching of the cake by going over it with warm water and a pastry brush. He then massages it slightly with his hands.
6. Covering the cake
Paul goes on to cover the cake in white sugarpaste using 1.2kg all together. He uses tylo powder mixed with hot water as glue to help attach the panels of sugarpaste. A good technique to is to pull the sugarpaste away from the knife as you cut away excess.
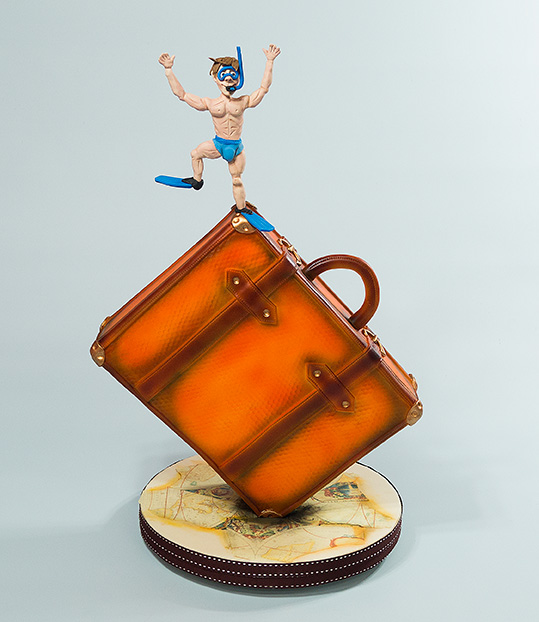
7. Starting on the model
Paul starts by working on the legs. He has a picture of a rather muscle bound model in front of him to help him along the way. You may want to find a more every day torso as your reference, as it can make things easier. Creating defined muscles can be quite tricky.
8. Working on the model Pt 2
Paul moves on to the torso, adding definition to the stomach as well as the shoulders and chest area. It’s a slow process and needs to be if you want it to look good. Lots of small and careful adjustments, and smoothing as you go. Get used to using your fingers and have an image to study in front of you. You could make life easier by adding clothes to your figure, but Paul is up to the challenge.
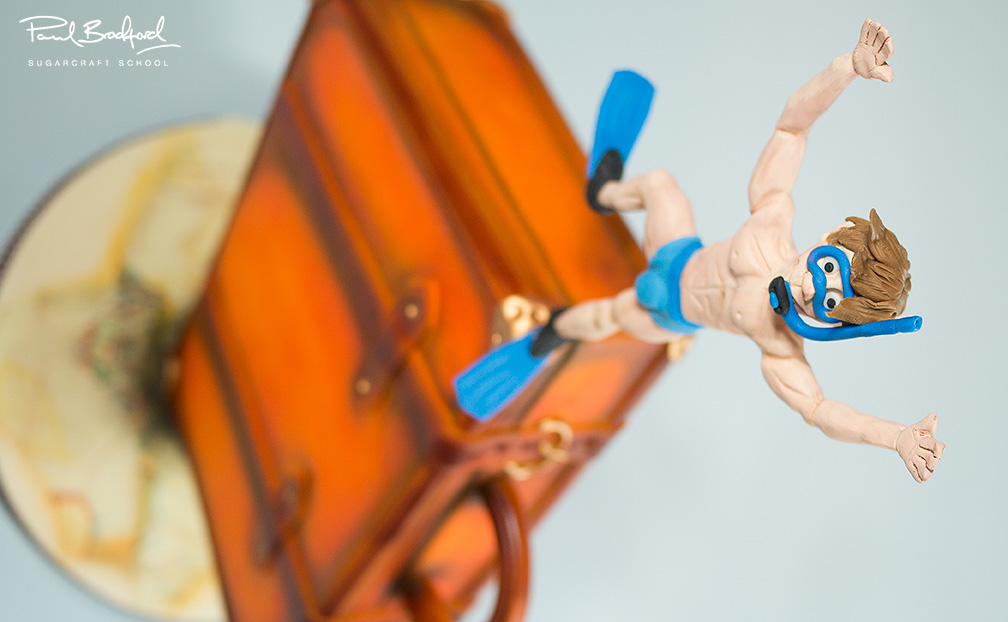
9. Working on the model Pt 3
In this lesson Paul adds the arms and shows us how to develop realistic shapes and detail using the sugar shaper tools.
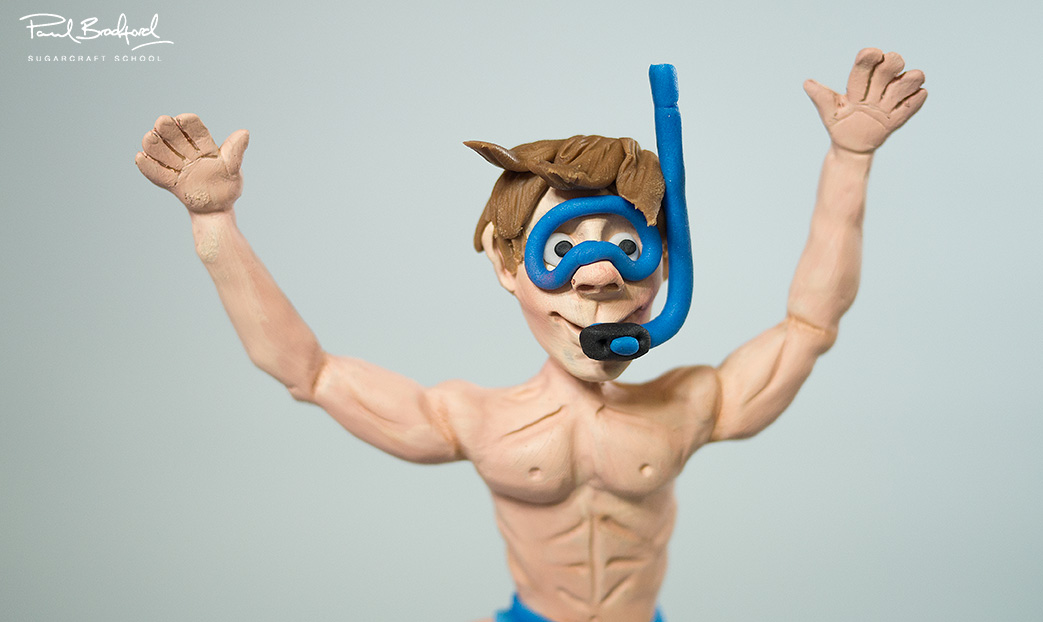
10. Lesson 10 Working in the model Pt 4
Here Paul adds the head. You may be pleased to know that as a snorkelling mask will be added, there is no real need to get overly detailed when creating the face, but the practise is always good. Paul sandwiches small oval pieces of modelling chocolate around the wire and then gradually builds up the face without adding any additional chocolate apart from the ears. Modelling tools at the ready!
11. Working on the model Pt 5
Paul now makes the hands for the models and opts for the simpler style of hands. All you need is five fingers, that are in proportion and the thumbs are in the correct place. It’s always advisable to create both hands at the same time.
12. Working on the model Pt 6
Paul decides modelling chocolate perhaps isn’t the most realistic skin tone and so gets painting. He uses a mixture of dusts mixed with alcohol, but later on discovers that using white with champagne dusts works best. He then adds the swimming trunks which proves to be both challenging and entertaining. It’s time to let the model dry properly before finishing it, so now we shall go back to the cake.
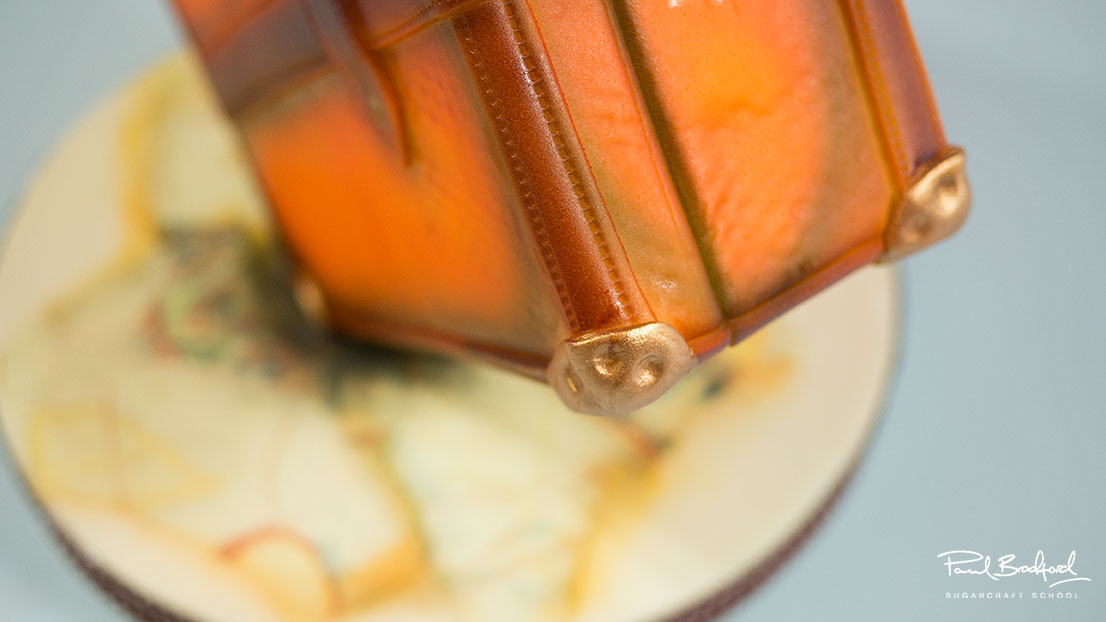
13. Decorating the suitcase pt 1
Hopefully you won’t have had the same issue as Paul with having to leave the cake aside so long as the sugarpaste as firmed a little too much, making it difficult to texturise. Usually you can use a cake smoother to imprint the texture, but Paul is having to use his hand which can cause issues. He then cuts out strips of thin sugarpaste using a ribbon cutter and adds them around the edges of the cake. Now all the outside edges have been put on, Paul begins to add the final details such as the metal protectors on the corners as well as some stitching detail and buckles. It’s really coming together now.
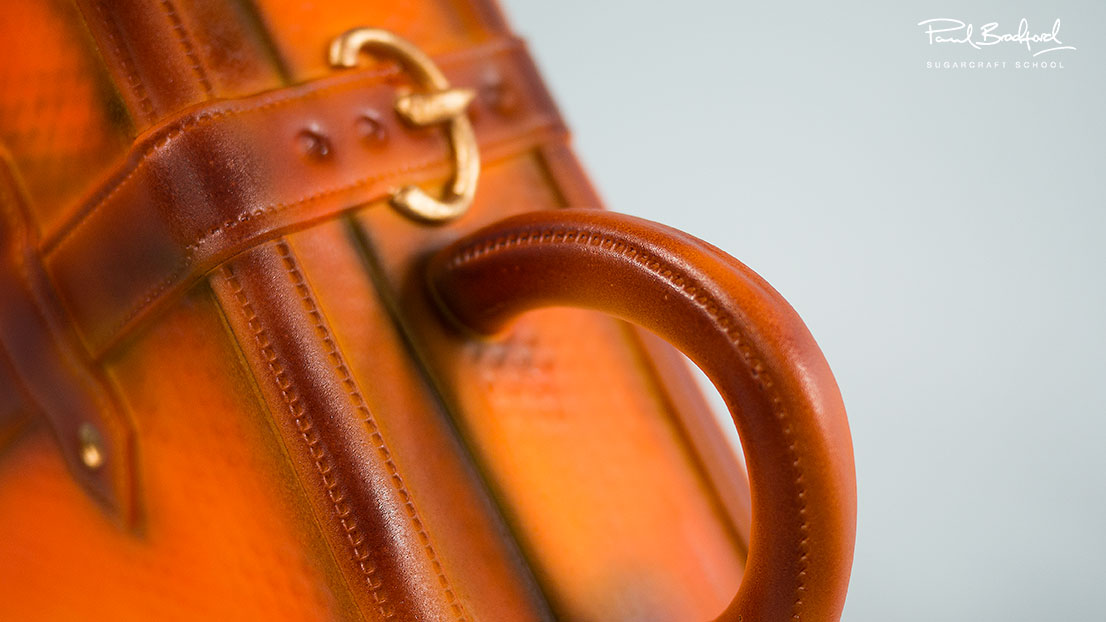
14. Decorating the suitcase pt 2
Paul adds the final straps and the handle using a very simple but effective technique involving 20 gauge wire and florist tape. He then turns to the mighty airbrush to help add beautiful tones and really bring out the texture. Don’t worry if you don’t have one – a large paintbrush will do you just fine. When using the black with the paintbrush be very careful as it can easily cause disaster if you are over zealous. It’s always good to have images in front of you to use as a reference.
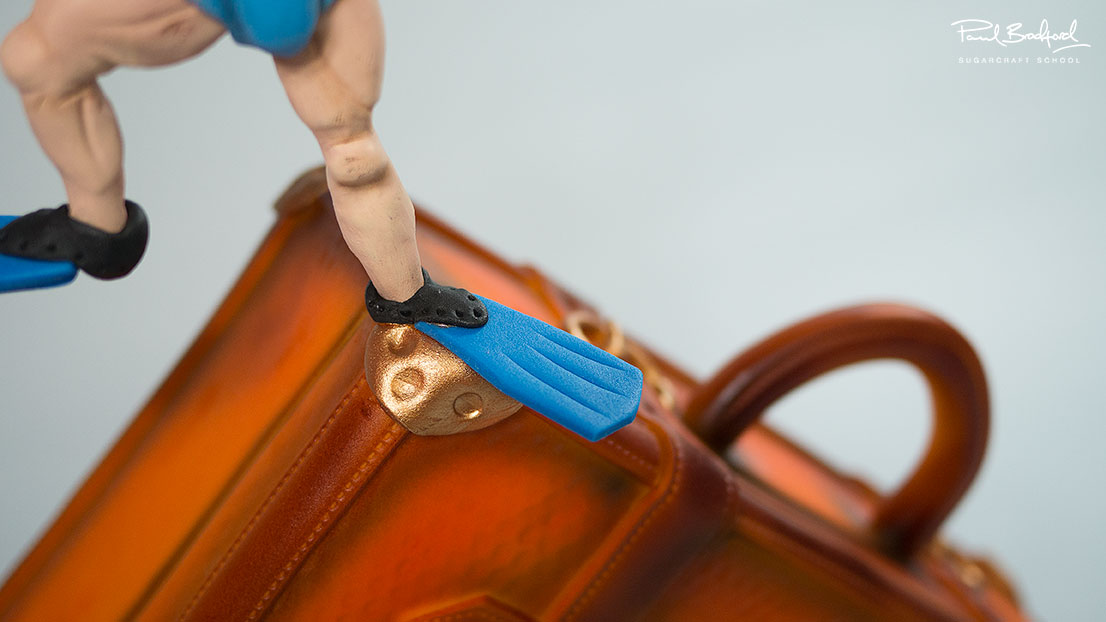
15. Finishing the model
In this lesson, Paul adds the models flippers, snorkel and hair and then goes around his face and body with a little dust to highlight certain areas. All we have to do now is cover the board and add the model, and then we’re done.
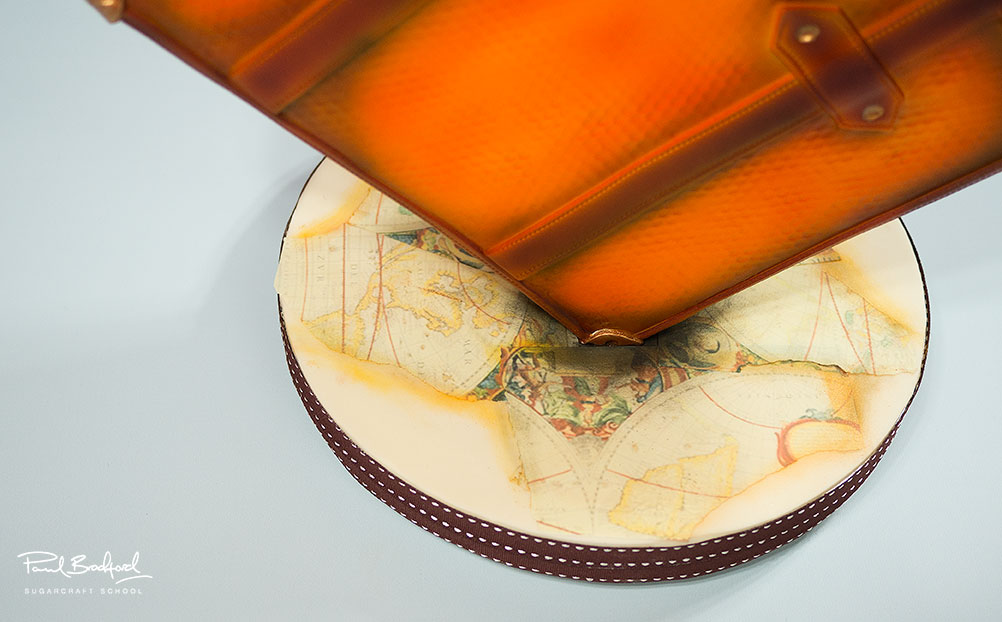
16. Finishing touches
Paul uses an edible printer to print of an old map which he rips up and adds to the covered board and then dusts around it with lovely oranges and brown shades. Then it’s the final touch… adding the model and attaching his last items – and it’s all done!
17. Other ideas
Here Paul shares some other ideas you can try your hand at when making this cake. We’re sure you have some of your own great ideas and we’d love to see what you come up with.
Please share your pics with us on our Facebook page.
18. Pro lesson
In this lesson, Paul shares some insider information about the cost to make this cake, as well as pricing, portions and other vital information for any professional cake designer.
We’d love to see your take on the Wanderlust Suitcase Cake – so share your snaps with us on our Facebook page!