About 47% of people consider themselves home bakers, though mastering the art of tempering chocolate can be taxing for even the most experienced amateur. While many succeed with basic sponge cakes, the real challenge begins when you want those professional, glossy decorations that don’t melt the moment a finger touches them. Tempering is simply the process of heating and cooling chocolate to stabilize the cocoa butter crystals.
It is a scientific dance of temperature and agitation. If you skip this step, your hard work results in a dull finish and a soft, tacky texture. You need patience, a digital thermometer, and a bit of grit to get it right.
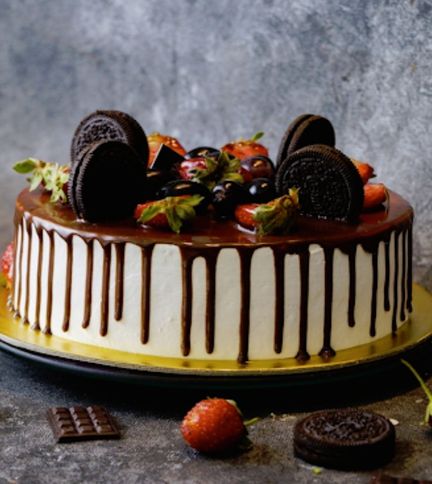
Image Source: Pexels
The Seeding Method Simplified
The seeding method is the most reliable way to achieve a perfect temper without specialized industrial machinery. You begin by melting two-thirds of your chocolate over a gentle bain-marie until it reaches a specific peak temperature. For dark chocolate, you want to hit between 114°F and 118°F to ensure all existing fat crystals are fully melted.
Once you reach that peak, remove the bowl from the heat and stir in the remaining third of unmelted “seed” chocolate. These stable crystals act as templates, teaching the molten pool how to solidify correctly. It takes time, the process is slow, and consistency is the only way to win.
Using high-quality chocolate makes a massive difference in how the fat behaves during this cooling phase. You should look for options like Purdys to ensure you have enough cocoa butter content for a fluid, workable consistency. Low-quality chips often contain vegetable fats that refuse to snap regardless of your technique.
Creating Professional Decorations
Working with tempered chocolate requires a cool environment and a steady hand to prevent premature setting. You can spread the tempered liquid thinly onto acetate sheets to create modern shards or elegant curls for your cake tops. Humidity is your greatest enemy here, as moisture causes the sugar to crystallize and ruins the glossy surface.
Check your kitchen conditions before you start:
- Keep the room temperature between 60 and 70 degrees
- Ensure all spatulas and bowls are bone dry
- Work in small batches to maintain the heat
Once your decorations are shaped, let them set at room temperature rather than rushing them into a fridge. Cold air can cause condensation, which leads to sugar bloom and a grainy mouthfeel. If your chocolate stays shiny and releases easily from the acetate, you have successfully mastered the temper.
It all sounds like hard work, and while we’ve been working with chocolate for around 5,000 years, mastering tempering still takes time and effort, even with modern tools. Trust us, the payoff is worth it.
Avoiding The Common Pitfalls
Even experienced bakers run into trouble when the chocolate thickens too quickly. This usually happens because the temperature has dropped below the working range, which is roughly 88°F to 91°F for dark varieties. You can gently use a hairdryer on a low setting to nudge the temperature back up without breaking the temper.
Watch the bowl, keep stirring constantly, and remember that precision is the key to success. If the chocolate develops white streaks after a few hours, it means the stable Beta crystals didn’t form correctly. You can always chop it up and start the process over, especially if the cake recipe itself is a simple one.
There is no limit to how many times you can re-temper, provided you don’t burn the solids. Practice makes the finish perfect, and each attempt teaches you more about how your specific brand of chocolate reacts to heat.
Store Your Finished Masterpieces
Proper storage ensures your decorations remain crisp and beautiful until the cake is served. Avoid airtight plastic containers that might trap residual heat or moisture from the air. A cool, dark pantry is almost always better than a refrigerator for long-term stability.
You can read more about perfecting your cake-making technique on our blog, so don’t go anywhere else for all things baking-related.
