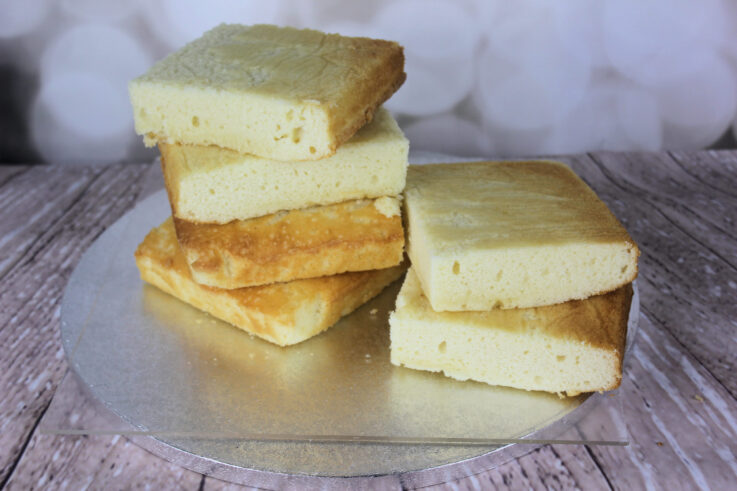
1Divide your cake into 6 even portions. Slice it in half down the longest length and cut each section into 3 squares.
Arctic Antics by Emma Ball
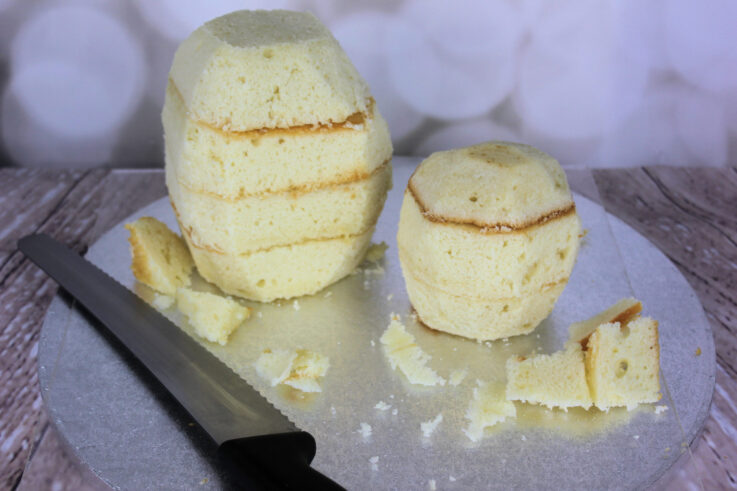
2Carefully slice one portion in half, then stack up 3 ½ portions and carve away at the edges to create a barrel shape of cake ready to use as the polar bears body. Use the remaining 2 ½ portions to carve into a ball for the polar bears head.
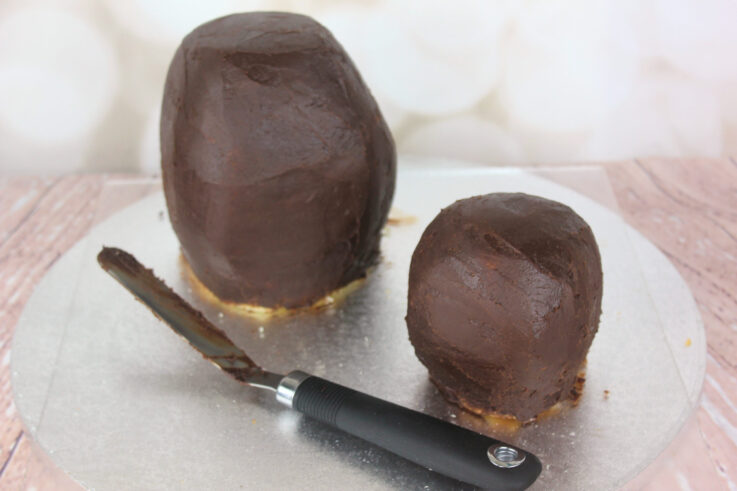
3Fill each section with jam and buttercream and the coat the entire outer edge in dark chocolate ganache and allow this to set.
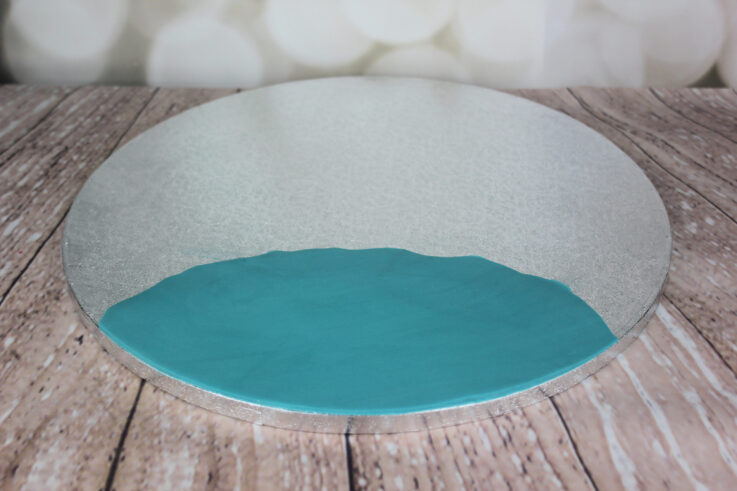
4Whilst the ganache is setting, roll out some blue sugarpaste, fairly thin and use to coat one edge of the cake drum as shown. Smooth the icing flat to blend into the board.
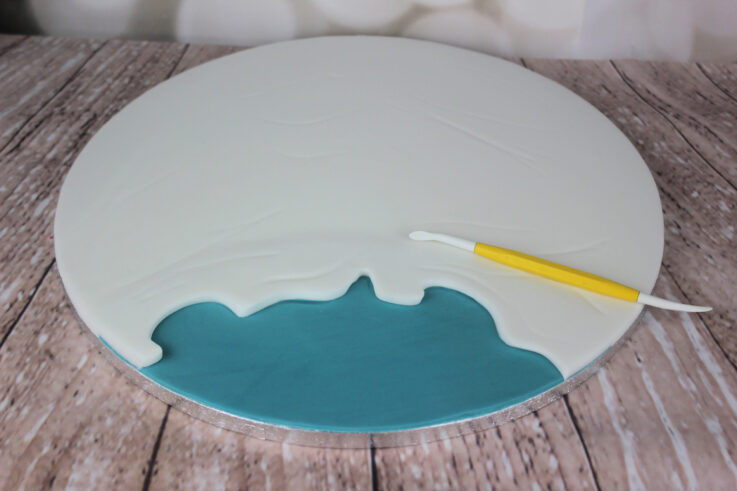
5Next, roll out some white sugarpaste and cover the entire board. Use a sharp knife to cut away a section at the front, exposing the blue icing underneath creating an ice puddle. Use a dredsen tool to mark lines and waves all over the board for some added texture.
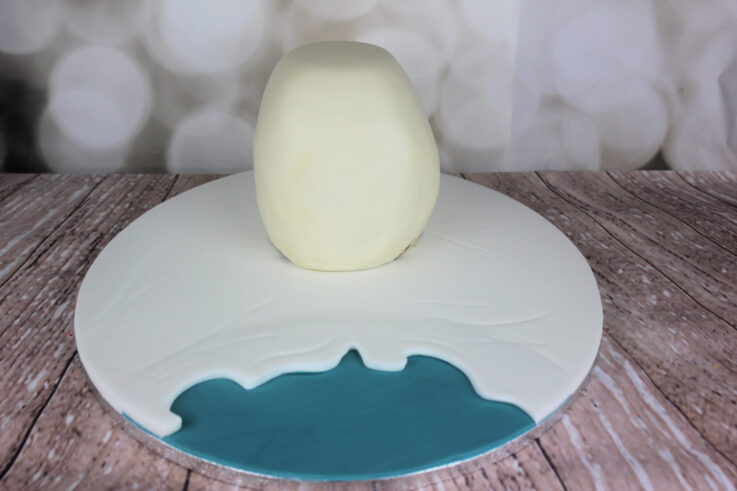
6Cover the larger cake with ivory sugarpaste. Don’t worry too much if you struggle to get the sugarpaste smooth as you’ll be decorating on top of this base and will result in covering most of it up. Gently place the cake onto the board behind the blue puddle.
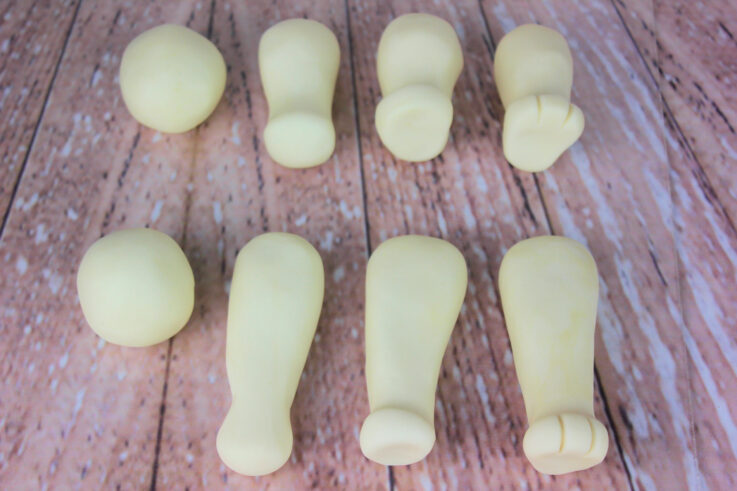
7Taking a good plum sized amount of ivory sugarpaste, roll it into a chunky carrot shape. Apply extra pressure at the thinner end to help start shaping the icing into a foot. At the smaller end squeeze the icing together and slightly stretch it upwards keeping it nice and rounded. Use a sharp knife to make two cuts creating the bears toes. Make two of these feet, then with another plum sized amount of ivory sugarpaste roll it into a slightly longer carrot shape than we did for the feet. Repeat the same steps to stretch out the paws and cut in the toes. Again, make two of these for the bears front legs.
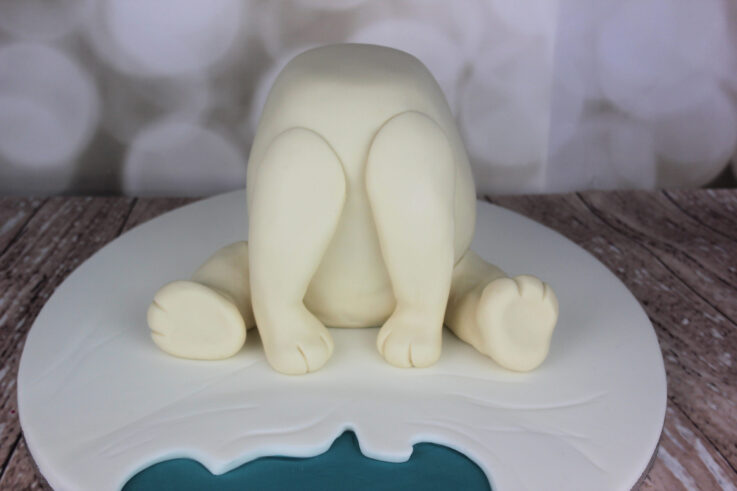
8Place the bears feet at either side of the base of the bears body. Don’t be afraid to bend the icing slightly so the feet are sitting in the position you want. It looks super cute when you tilt one foot slightly. Use a little bit of water at the front of the bears body and gently press on the bears front paws, again teasing them slightly into place.
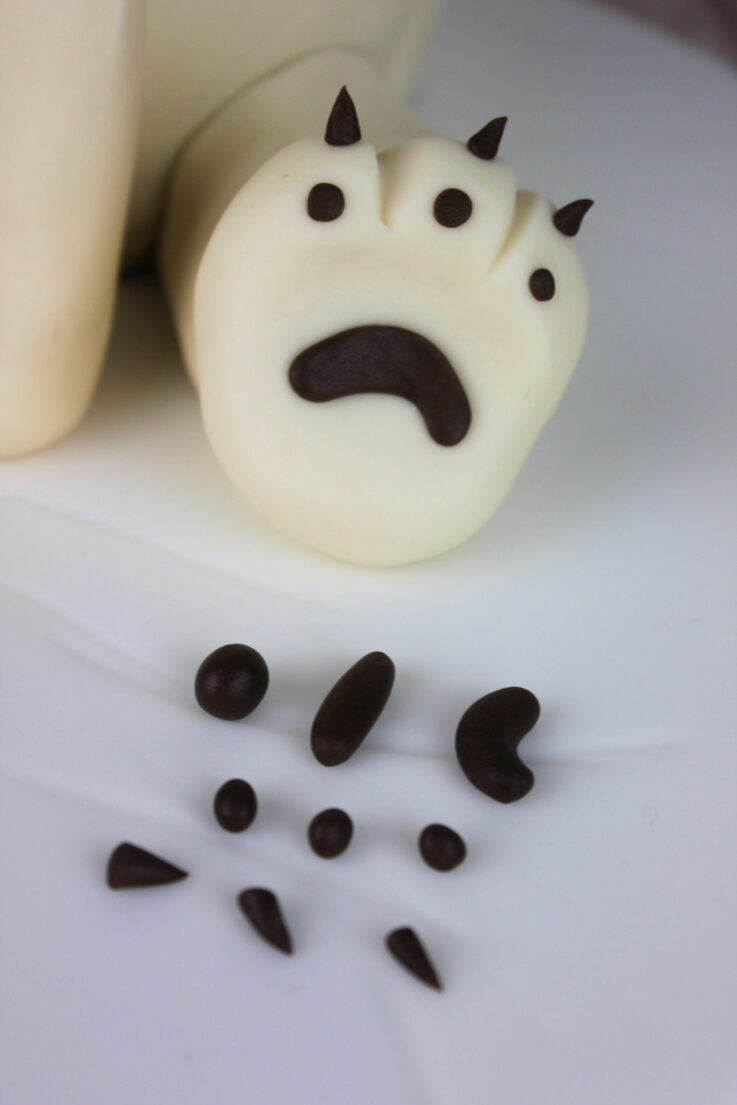
9Use some chocolate sugarpaste and roll out small sausages, balls and cones to add extra details to the bears paws. Stick them on as shown using a small amount of water.
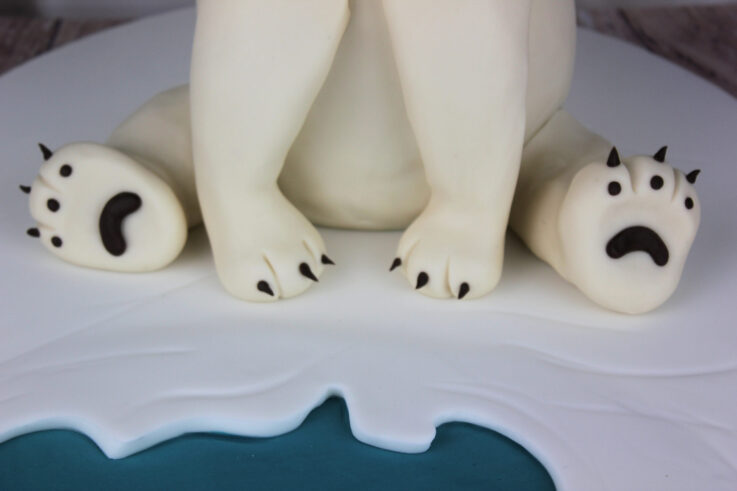
10Don’t forget to add a few ‘cone’ shaped claws to the bears front paws too!
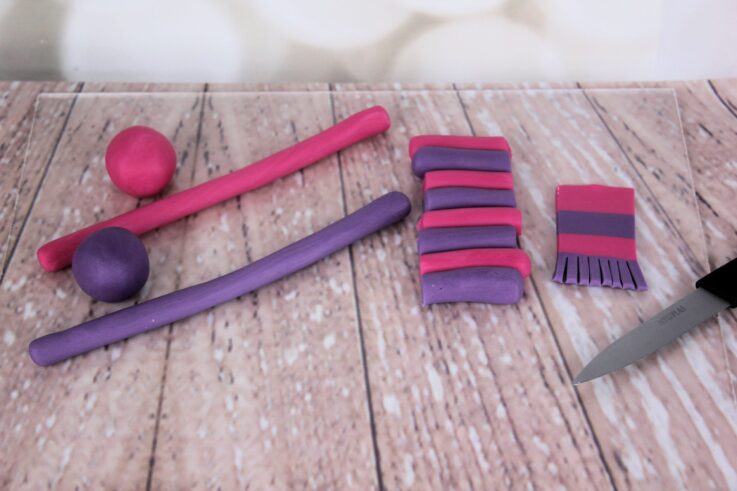
11Before we pop on the bears head we’re going to make his scarf. Using equal amounts of pink and purple sugarpaste, roll each colour into a smooth ball. Roll each of these into a long sausage and lay the two colours side by side gently pressing them together. Cut the sausages into sections roughly an inch long the whole way down the sausage. Line all the sugarpaste up so it’s all alternative colours. Slowly roll over this with your rolling pin, stretching out the icing and bonding the colours together to create a cool stripe effect. Cut out long strips and with a sharp knife cut small indents in at two different ends to make the tassels at the end of a scarf.
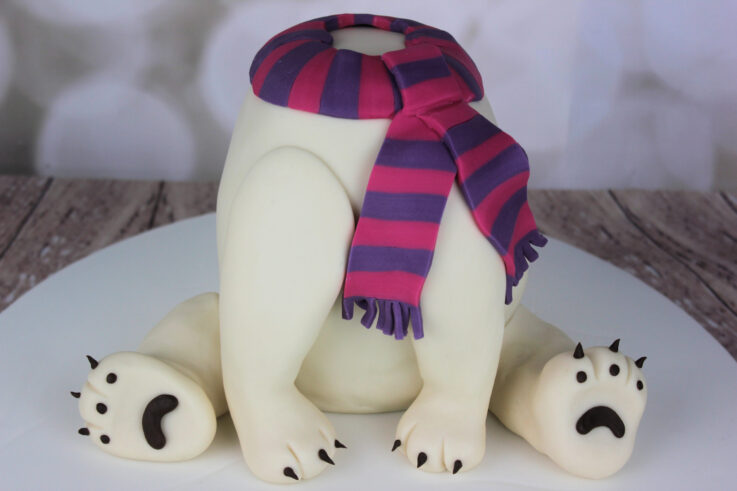
12Use some water to stick some of the stripy icing around the top of the bears body. Gently stick on the two pieces with the tassel at the front. To complete the scarf, cut out a small square section and place it on top of where all the points of the scarf meet making the illusion of the scarf’s knot.

13Cover the second cake with ivory sugarpaste. Place this on top of the scarf. Using two long sticks of dowelling, feed them through the top of the head (where the ears will be) all the way down to the bottom of the body.
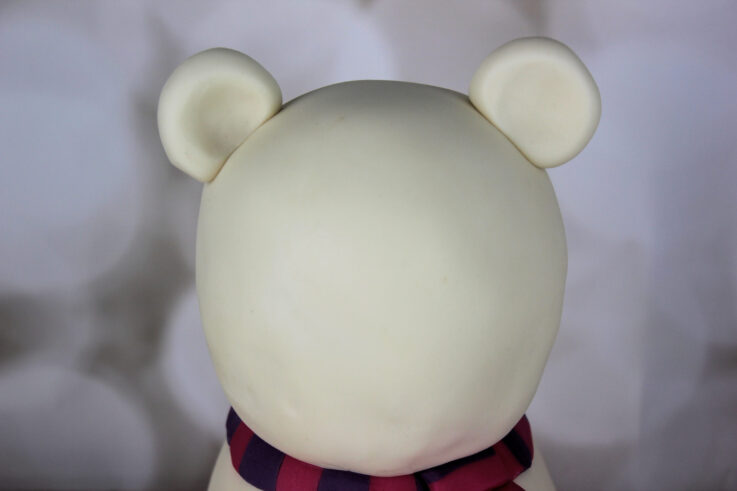
14Trim down the dowelling so only ¼” is sticking out from the bears head. Roll a small cherry sized ball of ivory sugarpaste into a ball and flatten slightly into a chunky disc. Carefully feed this onto the dowel to create the bear’s ear. Repeat on the opposite side.
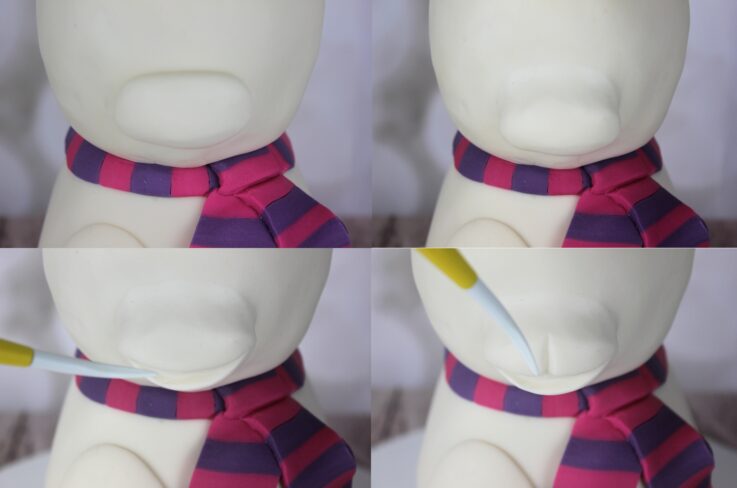
15Roll a cherry sized ball of ivory sugarpaste into a small chunky sausage shape. Place this at the front of the bears face and use your thumb to gently smooth it into the face in a slow upwards motion. Take extra care to not press too hard, making sure you keep all the volume in the bear’s nose. Using the pointed edge of the dredsen tool carve in the bear’s smile. Using the same tool gently press a small line in the centre of the top lip which will eventually lead up to the bear’s nose.
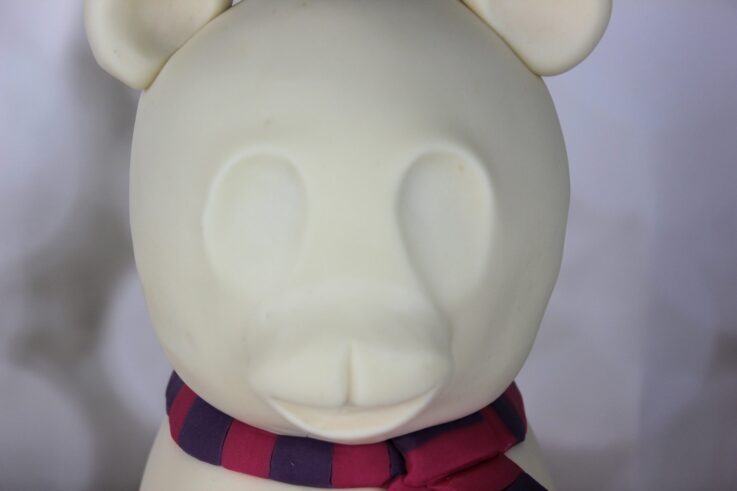
16Use your thumbs to gently press in two eye sockets for the bear, as shown.
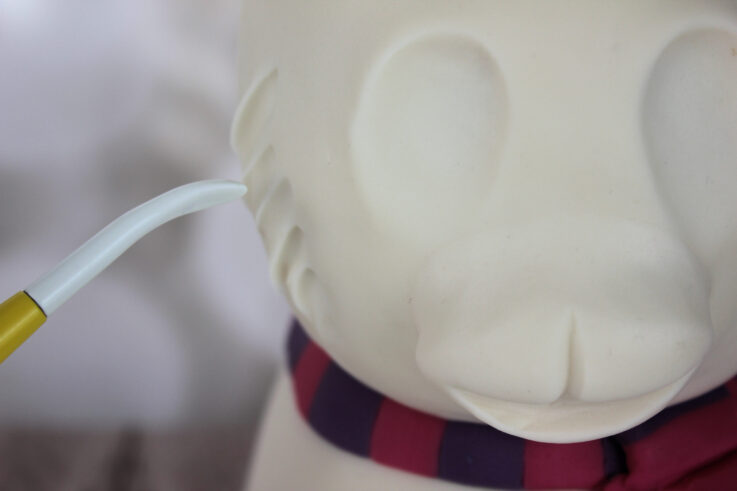
17use the flat edge of the dredsen tool to stretch out some of the sugarpaste on the bears cheek’s, giving him a slightly fluffy fur effect.
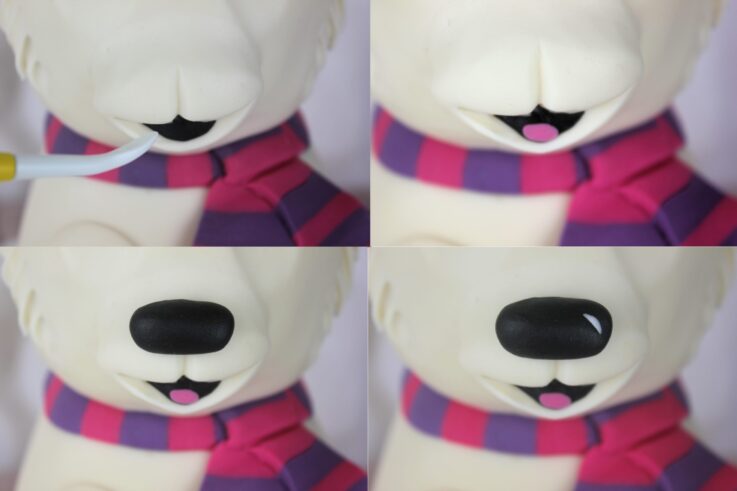
18To complete the bear’s mouth, add a small ball of black sugarpaste inside and use the flat edge of the dredsen tool to stretch it and smooth it out inside. Roll a really small sausage of pink sugarpaste and press it inside his mouth at the bottom. Take a cherry sized amount of black sugarpaste and roll it into a small chunky sausage. Use some water to stick this just above the mouth, giving the bear his nose. Lastly add a tiny sausage of white sugarpaste on the edge of the nose to give it a cartoon shine.
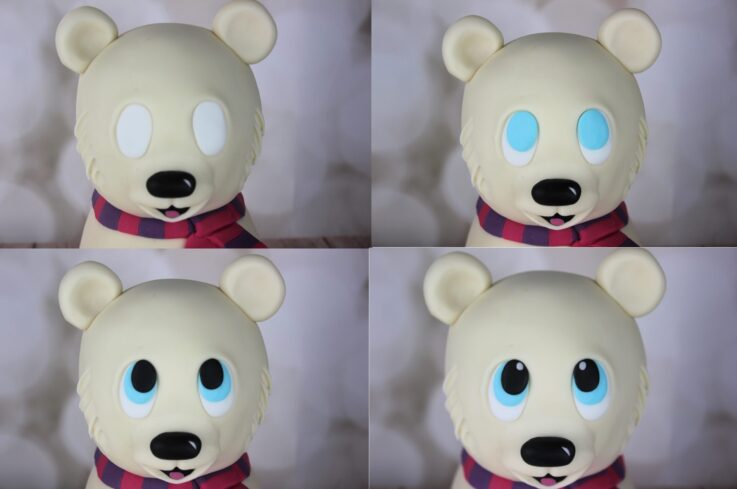
19Fill the eye sockets you made earlier with white sugarpaste. When the white is in place, roll out two ovals of blue sugarpaste and press these into the top of each eye. Add two small ovals of black sugarpaste on top of these and finally add two small white dots to add even more to the cartoon effect.
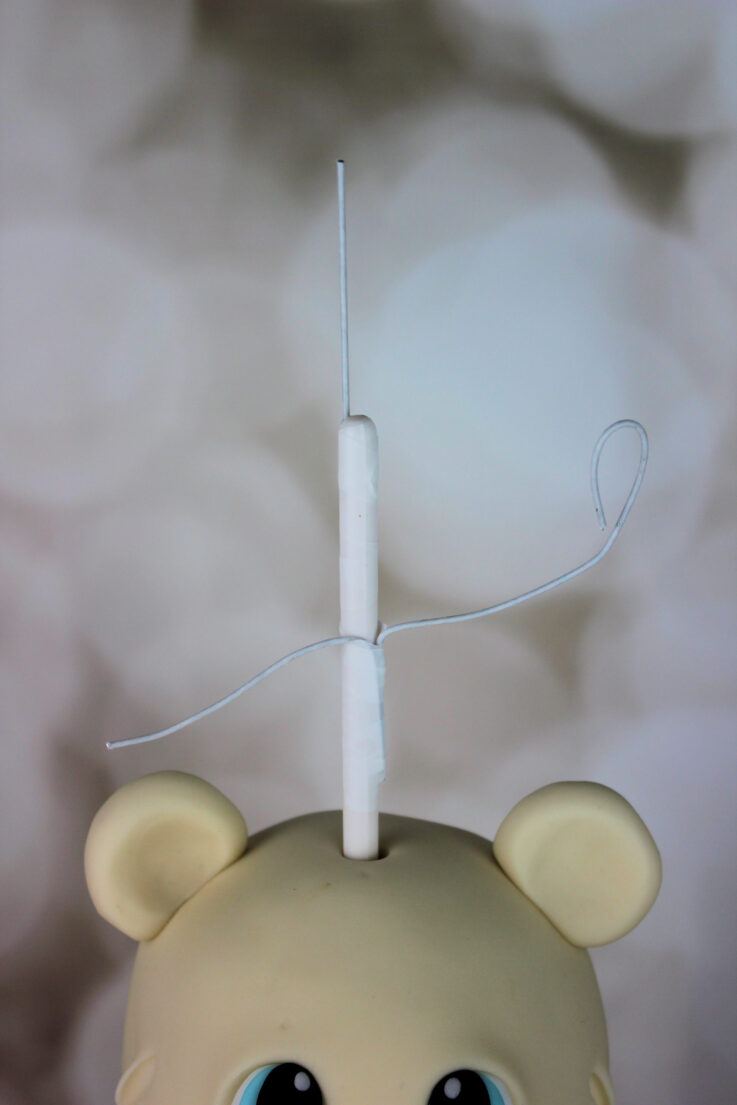
20It’s now time to make the structure for our little balancing penguin. Using a long stick of dowelling, thread it through the entire bear’s body and head. Trim down so there is 4” left of dowelling exposed above the bears head. Take an 18-gauge wire and tape this to the dowel using the parafilm. Trim down so there’s 2” of wire above the end of the dowel. At the centre of the dowel tape 2 x 18-gauge wires and branch them out to the sides. Trim them down but keep one wire 1” longer so that you can loop it over at the end which will be the support for the penguin’s present to sit onto.
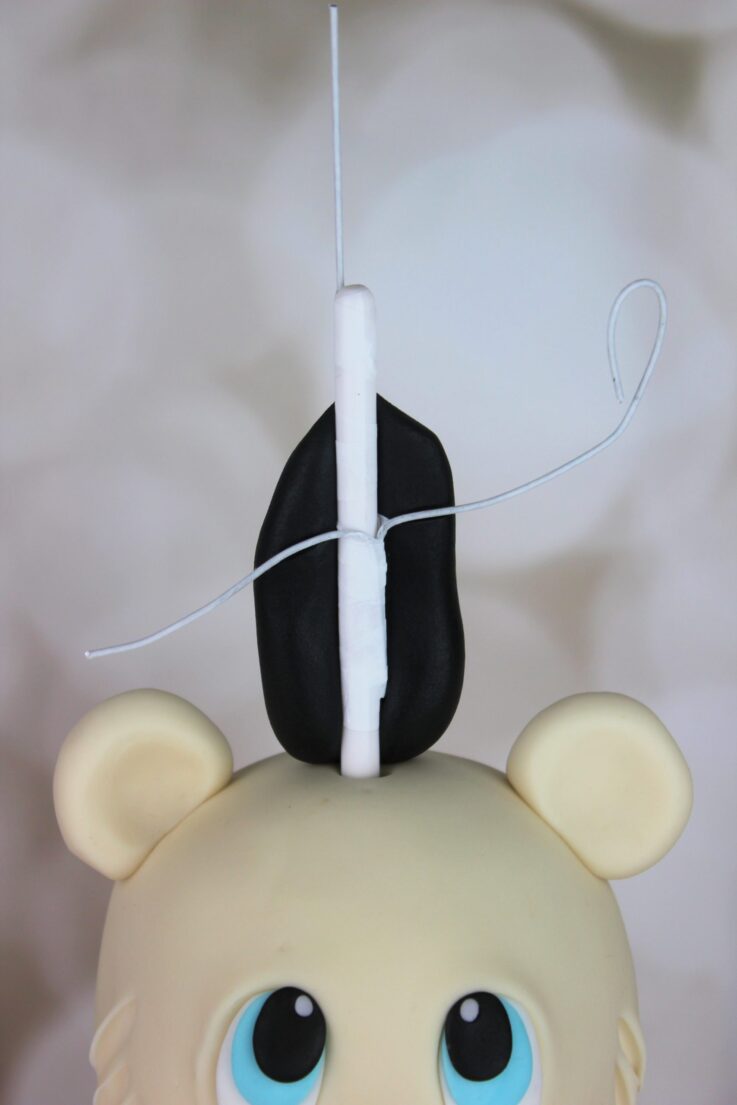
21Now the support is all made we can start building the sugarpaste around it to make our little penguin! First take a plum sized amount of black sugarpaste and roll it into a chunky sausage. Place this behind the structure and gently press it along the dowelling.
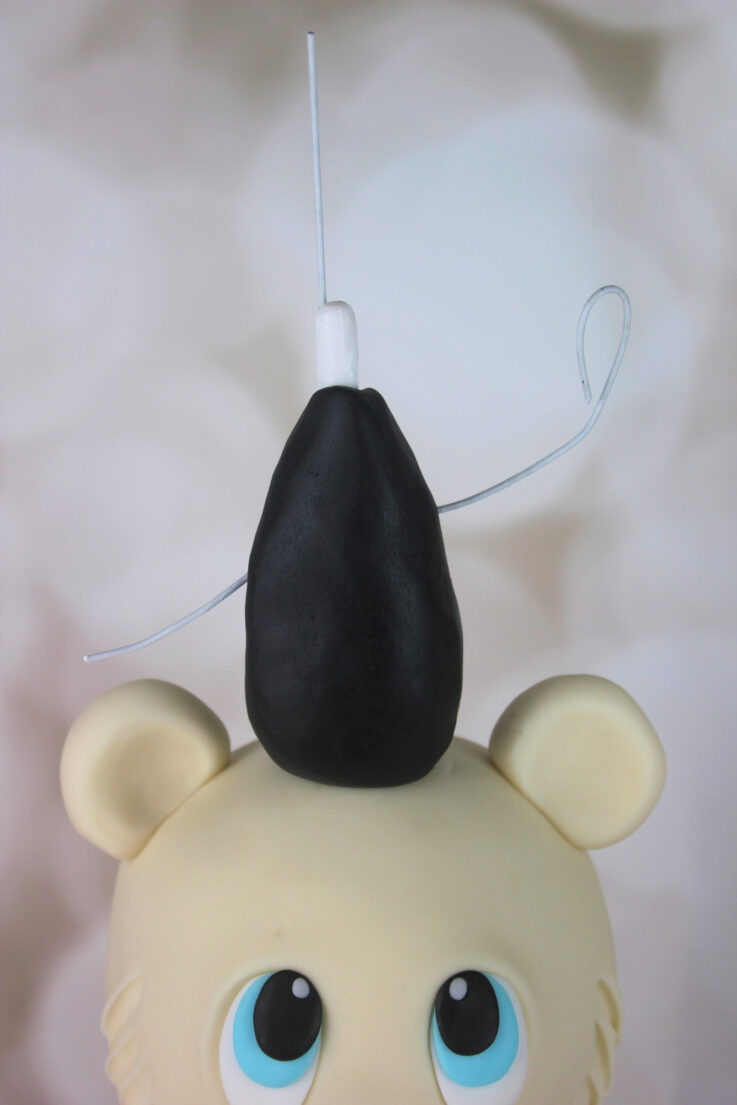
22Roll a second plum sized sausage of black sugarpaste and this time press it into the front of the dowelling. Pinch the two halves together and smooth out the joint using your fingertips in small circular motions. This will secure the shape of the penguin body around the structure.
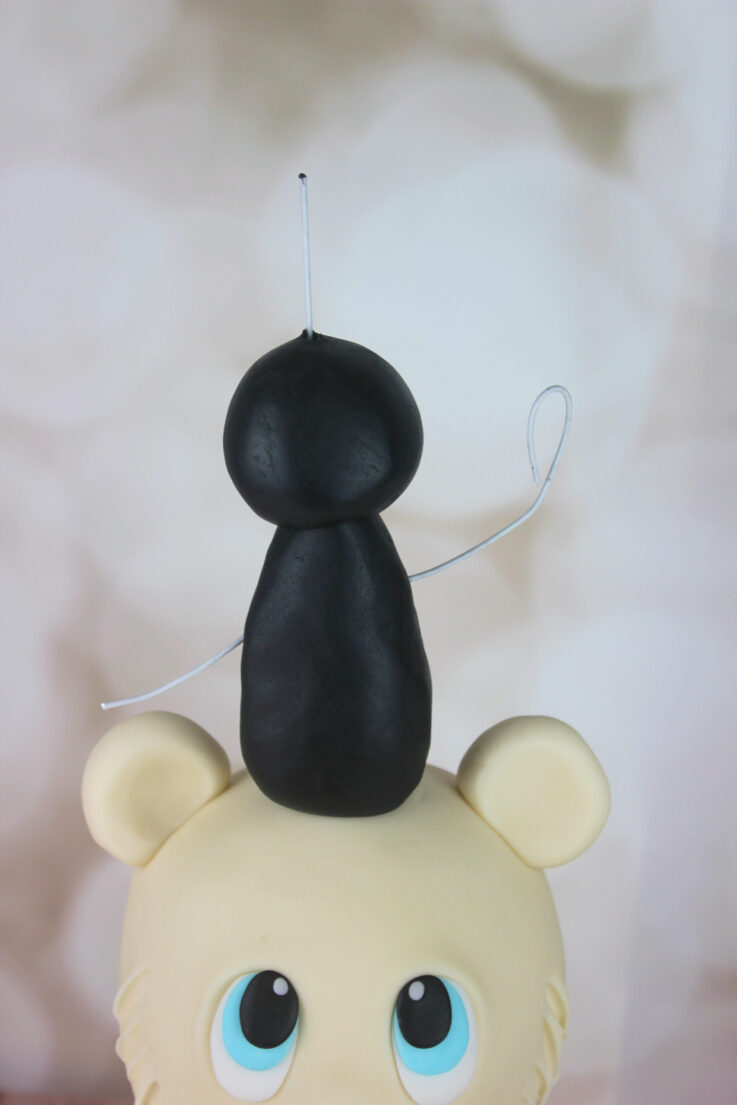
23Roll another plum size amount of black sugarpaste into a ball. Feed this along the top wire and secure it onto the top of the dowel to make the base of the penguins’ head.
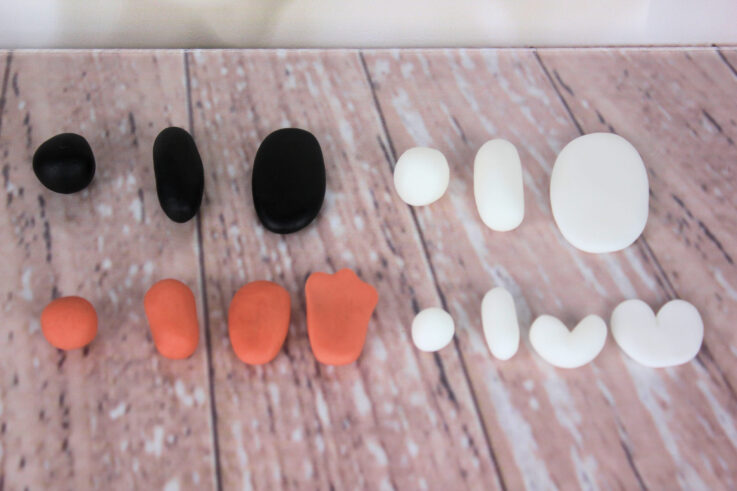
24Roll two cherry size balls of black sugarpaste into little chunky sausages and flatten them down to make our penguin wings. Then roll out two small balls of orange sugarpaste into little chunky sausages and flatten these too, carefully pinch and stretch one edge to shape out 3 toes. Roll a cherry sized ball of white sugarpaste into a sausage shape and flatten down, plus a pea-sized amount of white sugarpaste using the same method this time adding a slight bend to the sausage making it more ‘L’ shaped before flattening.
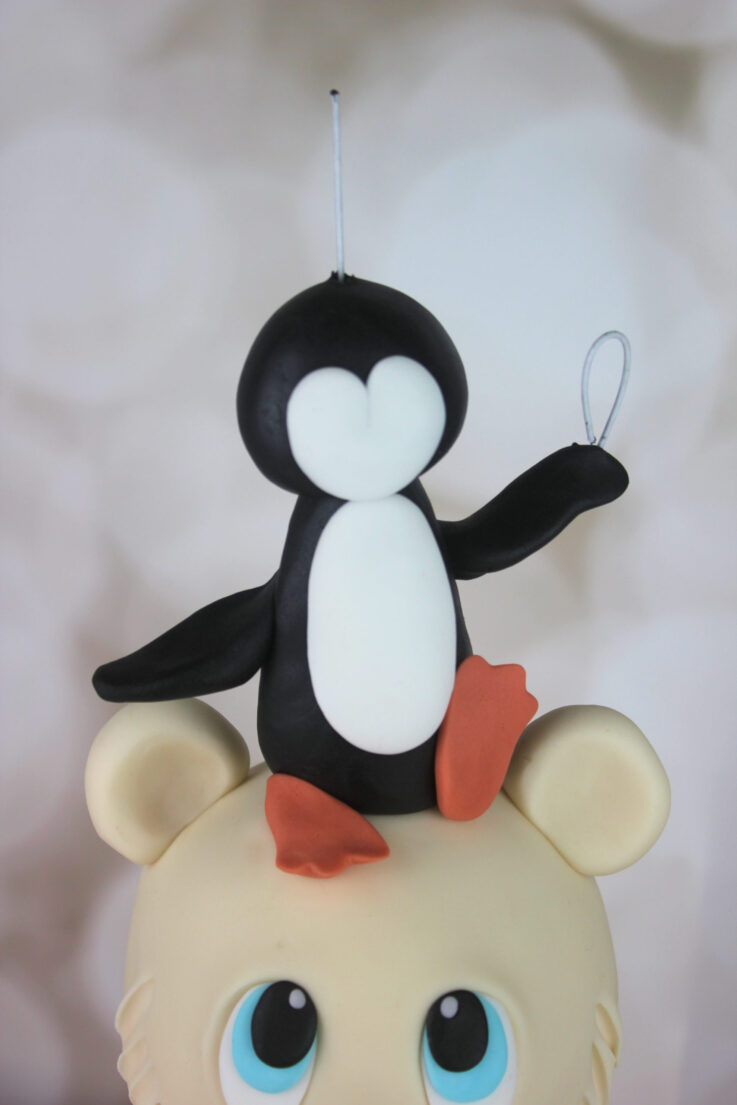
25Take all the pieces you’ve just made and assemble them onto the penguin’s body. Gently tease the wings around the wires to help keep them in place. Stick on the belly and face, smoothing them onto the black sugarpaste. Lastly, use a small amount of water to stick on his little feet.
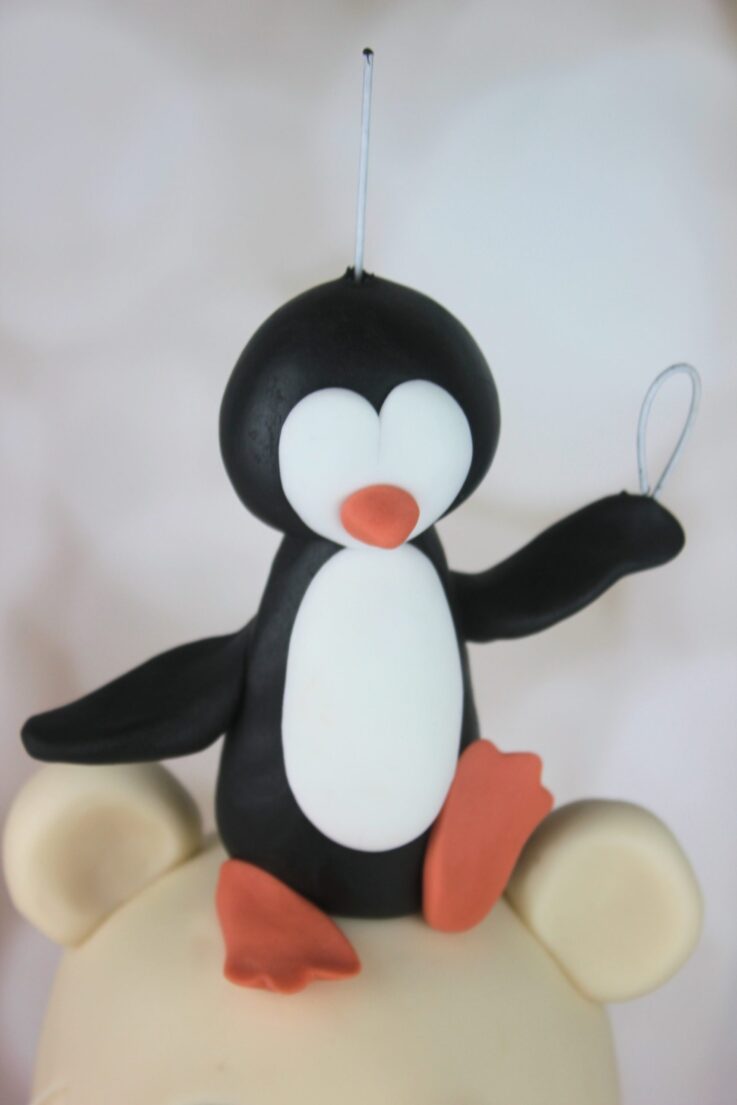
26Take a pea sized amount of orange sugarpaste and shape it into a small cone. Stick this onto the centre of the penguin’s face creating his beak.
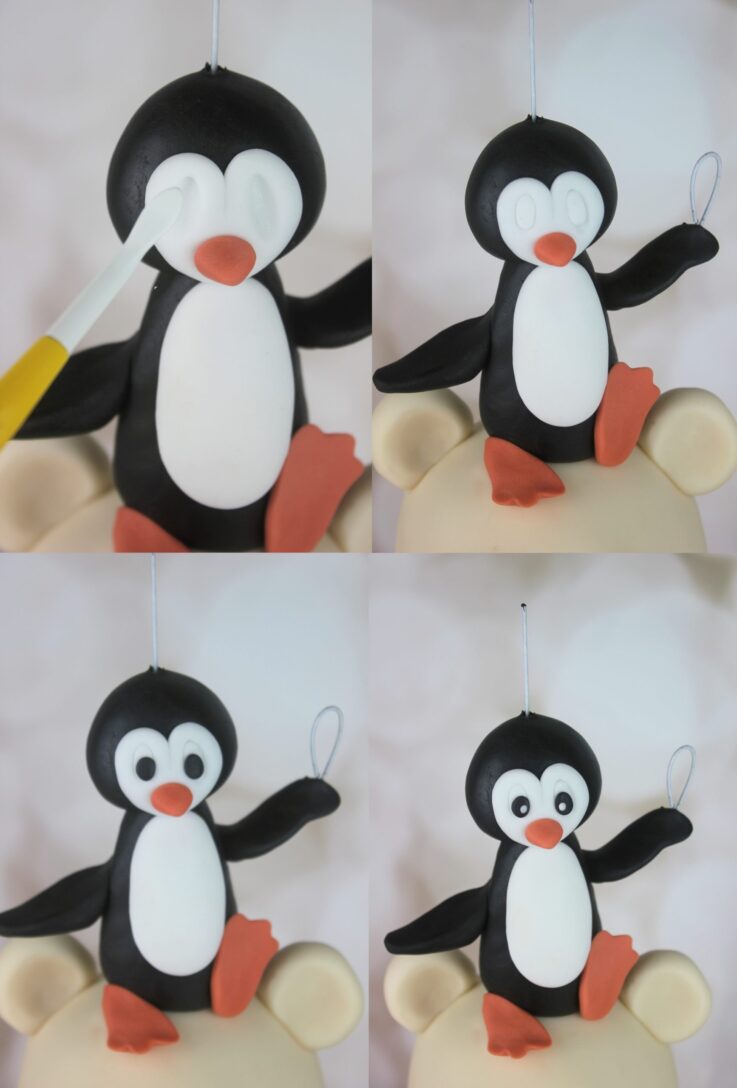
27Use the flat edge of the dredsen tool to gently press in two eye sockets and fill these with white sugarpaste. Add two small balls of black sugarpaste and then add two tiny balls of white sugarpaste to complete his cartoon look eyes.
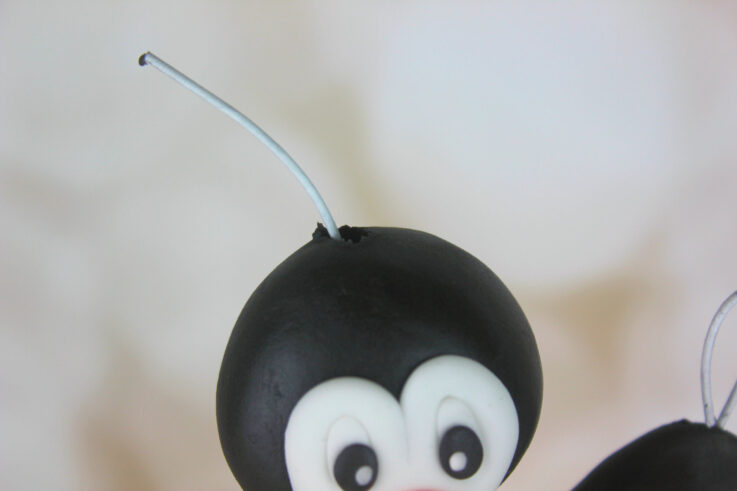
28Gently use the wire cutters to bend back the top wire slightly so when we place the hat on it will curve at a slight angle.
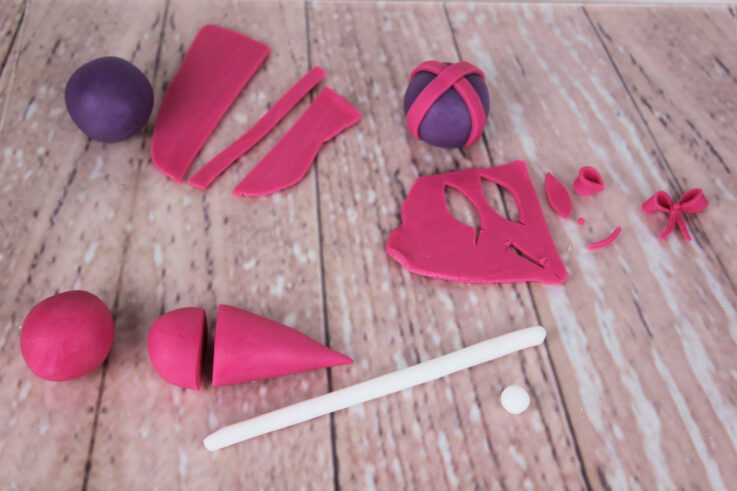
29Roll a cherry sized ball of purple sugarpaste. Leave aside whilst you roll out some pink sugarpaste. Slice out two thin strips and place the paste in a cross over the purple ball. You now need to cut out two very small eye shapes and two small rectangles of pink icing. Fold the eye shapes in half to make a bow for the top of the parcel. Use the small rectangles as the tail from the bow and finish it off with a tiny ball of pink sugarpaste pressed down in the centre of the bow. Next roll a cherry sized amount of pink sugarpaste into a big chunky carrot shape. Slice off the thick rounded edge to make a nice cone shape. Roll a small pea sized ball of white sugarpaste and a small thin sausage of white sugarpaste and leave to the side ready to use when your assembling the Christmas hat.
Gently tease the small present onto the exposed loop of wire securing it into place. Feed the cone of pink sugarpaste onto the top wire above the penguin’s head. Stick the tiny ball of white at the very top of the cone and stick the white sausage along the base of the cone completing the hat.
Gently tease the small present onto the exposed loop of wire securing it into place. Feed the cone of pink sugarpaste onto the top wire above the penguin’s head. Stick the tiny ball of white at the very top of the cone and stick the white sausage along the base of the cone completing the hat.
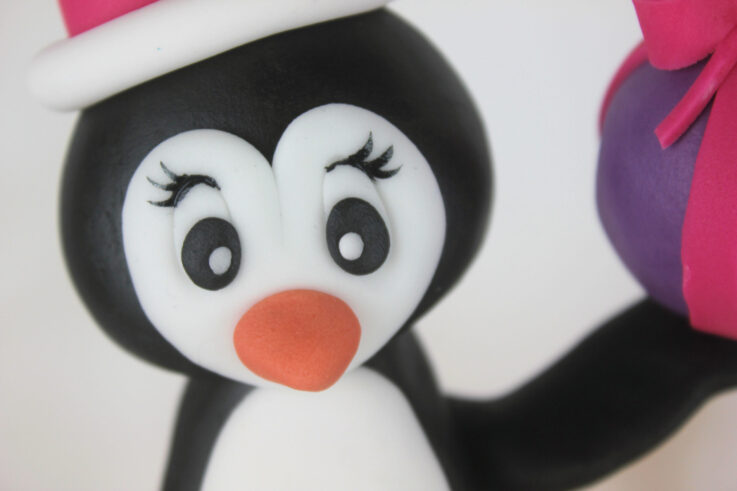
30Use a 00 size paint brush and the rainbow dust metallic black, carefully paint on some eyelashes at the top of the penguin’s eyes.
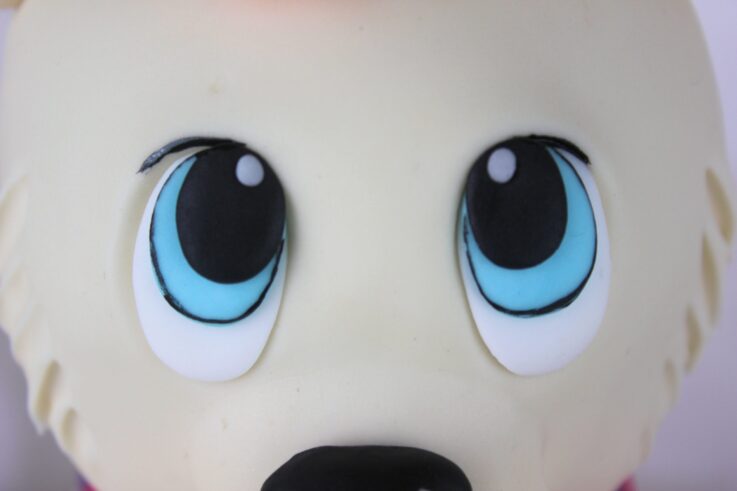
31Using the same paint, slowly paint a thin line around the blue in the bear’s eyes and along the bear’s upper eyelid.
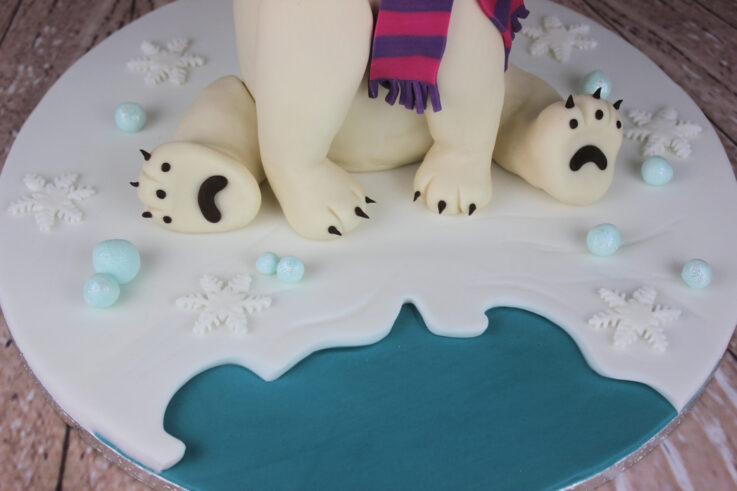
32Thinly roll out some white sugarpaste and cut out some snowflakes. Mix some white sugarpaste and blue sugarpaste together and roll it out into various sized balls, covering them in glitter. Dot the snowflakes and the balls randomly around the cake board.
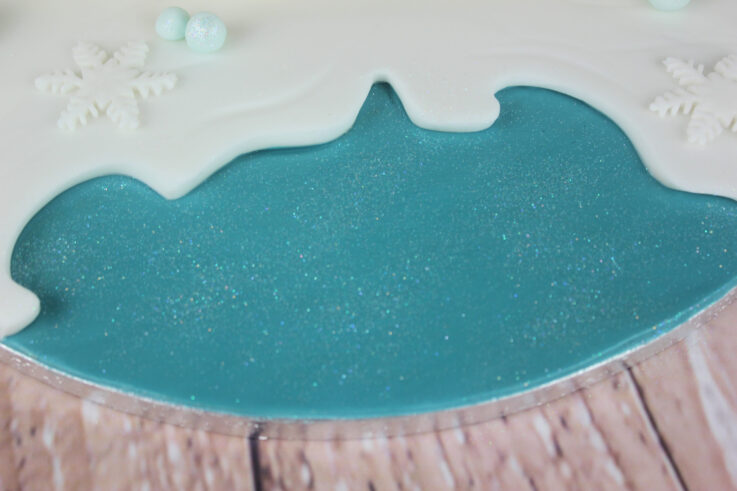
33Paint the blue icing on the board with some clear piping gel to give it a glisten of a water effect and top it off with some extra glitter.

34Finally add some ribbon around your board to complete a super cute cake to share with your family and friends !
