FREE TUTORIAL – Honey Bear cake topper with Rose Macefield

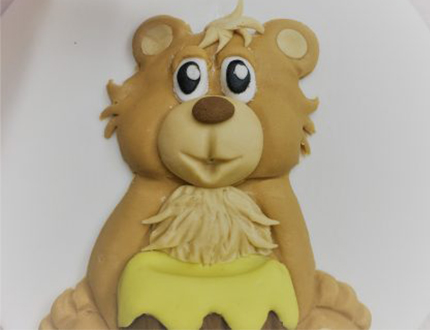
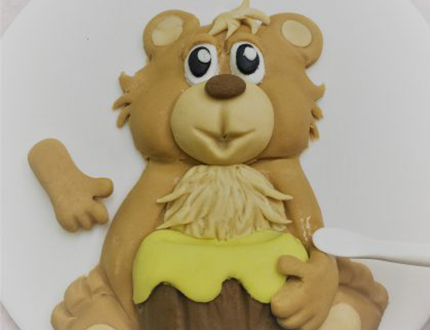
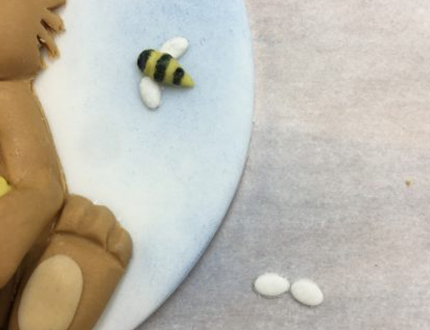
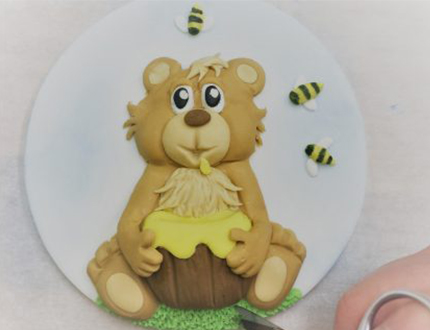
Learn how to make this bas-relief pastillage Honey Bear cake topper with Rose Macefield

Tutorial – Honey Bear

Level – Intermediate

Time – 2 hours

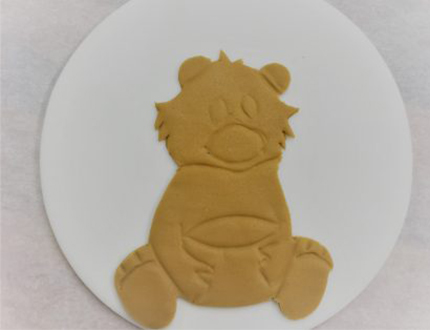
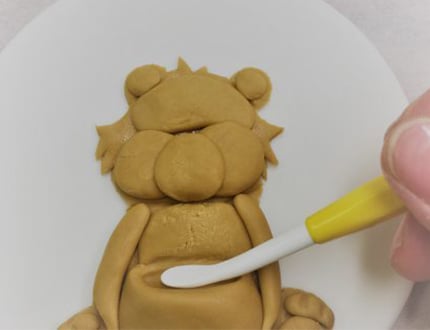
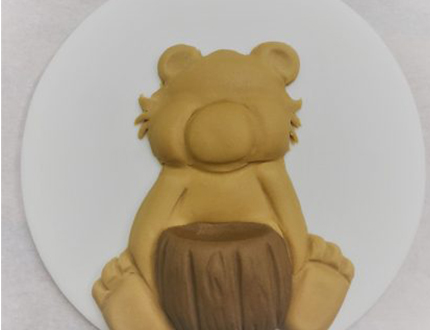
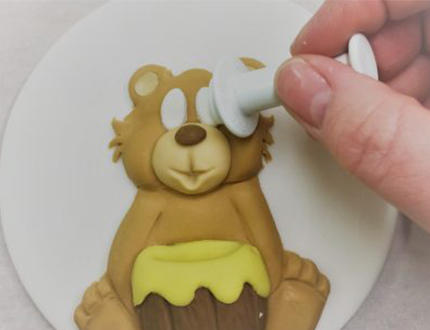
Perfect for use as a cake topper, this bas-relief sculpted bear is perfect for a whole host of cakes. In the following step by step, renowned cake decorator Rose Macefield shows you exactly how you make it!

Who is Rose Macefield?

Since decorating her first cake in 2007, Rose now has a spectacular list of international awards under her belt including Cake International, Overall Best in Show 2013 and an amazing Cake Masters award for Overall Best In Show 2014! Rose also regularly contributes articles and tutorials to Cake Craft & Decoration Magazine and of course us at Cakeflix where she has 5 feature length cake tutorials for you to chose from.

Rose will be heavily involved in this year’s Cake International where she will be working on the Saracini exhibit as well as judging the show.

Cake International is an excellent place to get inspiration and education and somewhere to meet and greet so many cake artists.
Tickets are selling fast so to be sure to get yours for the TICKETS LINK.

Start your 7-day FREE trial today for instant access to Rose & 50+ other world class tutors work.

Bear 1
1Cut out the bear design. Roll out teddy brown modelling paste thinly and use the template to cut out the shape. Place it on a pastillage plaque. Use a Dresden tool to mark out the main sections of the paste.
Bear template (click to see template)
Bear 2
2Pad out the areas of the bear with modelling paste using more padding in the areas that need more depth.
Bear 3
3Brush all the padded areas with water and roll out more modelling paste thinly and cover the bear. Trim away the excess neatly and use the Dresden tool to define the shapes. Cover the barrel with a very thin layer of dark brown modelling paste and use the Dresden tool to emboss the wood effect.
Bear 4
4Cover the top of the barrel with yellow paste for the honey. Cover the mouth with light brown paste and add pads to the ears and feet. Emboss the mouth shape with the Dresden tool and add a little oval shaped nose. Cut out two white eyes with an oval cutter.
Bear 5
5Finish the eyes by adding a brown oval shape and a tiny white circle. Add some light brown paste to the chest area and emboss with the Dresden tool to create fur. Roll some tiny pieces of fur and attach to the head and the chest.
Bear 6
6Model the hands and attach to the barrel. Blend these into the arms by using a little water and the Dresden too.
7With a soft brush dust the background of the plaque with a light blue dust colour. Make 3 little bees by rolling a yellow cone shape and painting them with black stripes. Cut out the bee’s wings from white paste using a small oval cutter. Attach them onto the plaque with water.
Bear 8
8Add a strip of green sugarpaste to the base of the plaque and texture with scissors for a grass effect. Dust sections of the bear with brown dust to add depth to the final design.

What you will need?

5inch round pastillage plaque.

Bear template (click to see template)

Ingredients

Modelling paste – 150g teddy bear brown, 50g dark brown, 15g light brown, 15g yellow. 10g green, 5g white.

Dusts – light blue, chocolate brown.

Food colour pen – black.

Equipment

Small rolling pin

Craft knife

Soft paintbrush

PME oval plunger cutters

Dresden tool

Equipment

Small rolling pin

Craft knife

Soft paintbrush

PME oval plunger cutters

Dresden tool

14 Day Free Trial