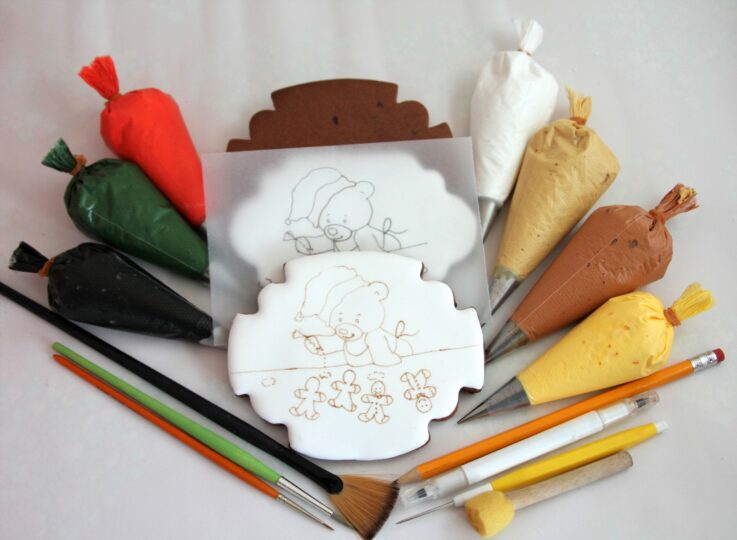
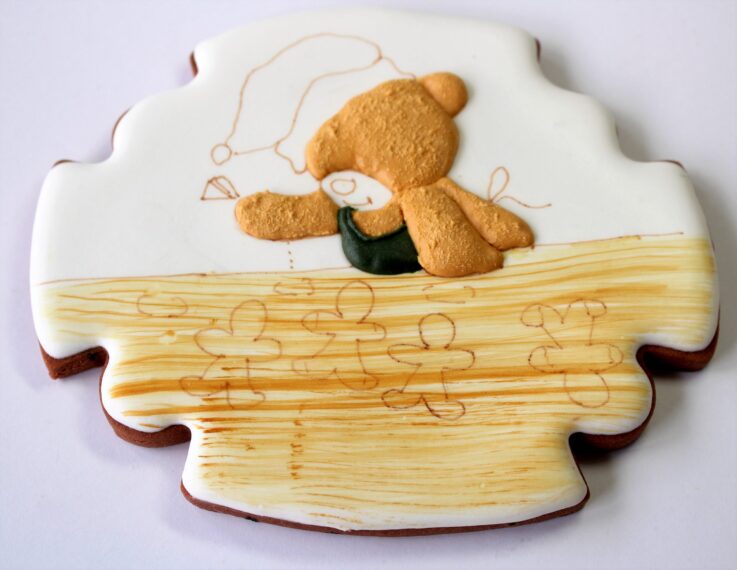
1Draw the selected design into the flooded and dried cookie surface or transfer it with a small piece of tracing paper. Get all the piping bags done prior to start.
It’s Christmas! – Cookies Explained by Marta Torres

2Using a brush nº 2 and the caramel gel, colour very diluted, paint the area (table) as shown
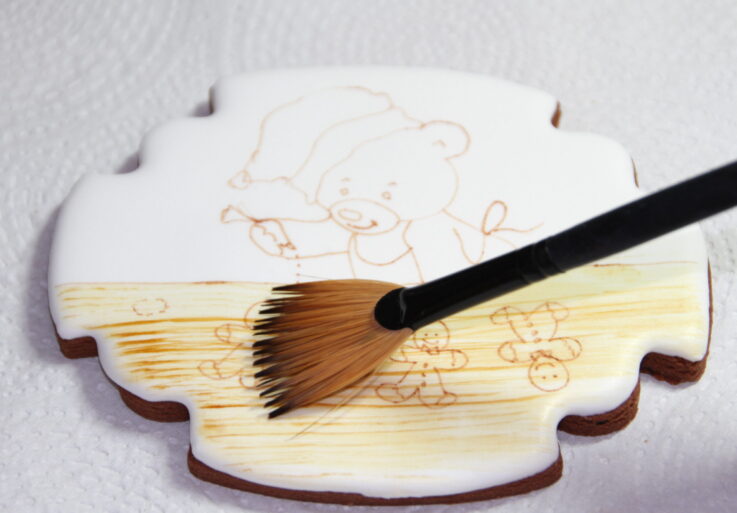
3With the “fan” brush and caramel gel colour slightly concentrated, paint over the previously painted area in order to make lines to resemble a wood vein effect
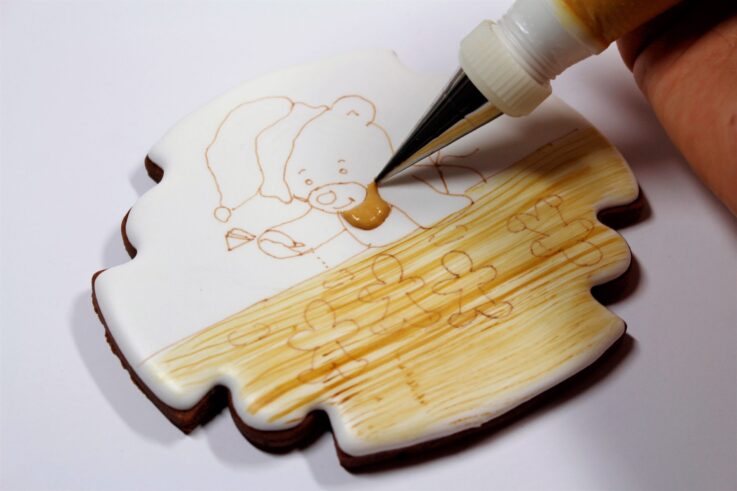
4With the caramel royal icing bag and tip nº 1.5 fill the shown area and finish with the scribe tool to smooth it out.
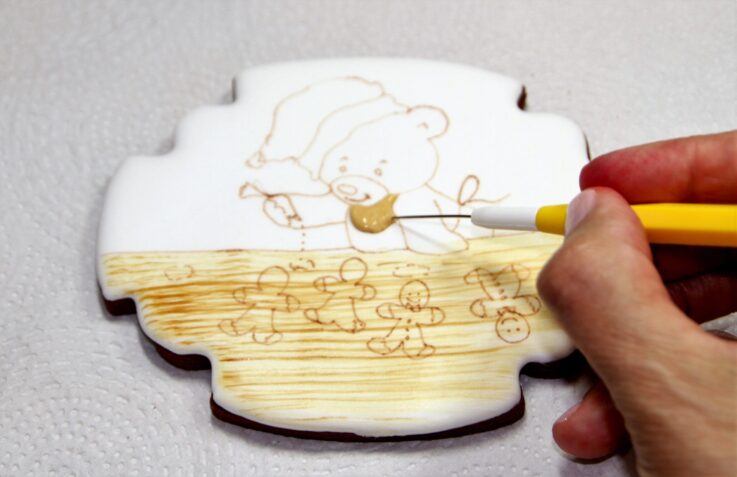
5Finish with the scribe tool to smooth it out.
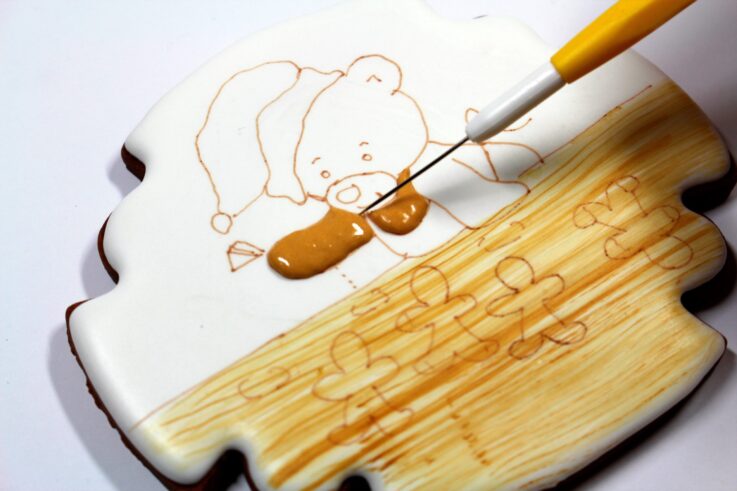
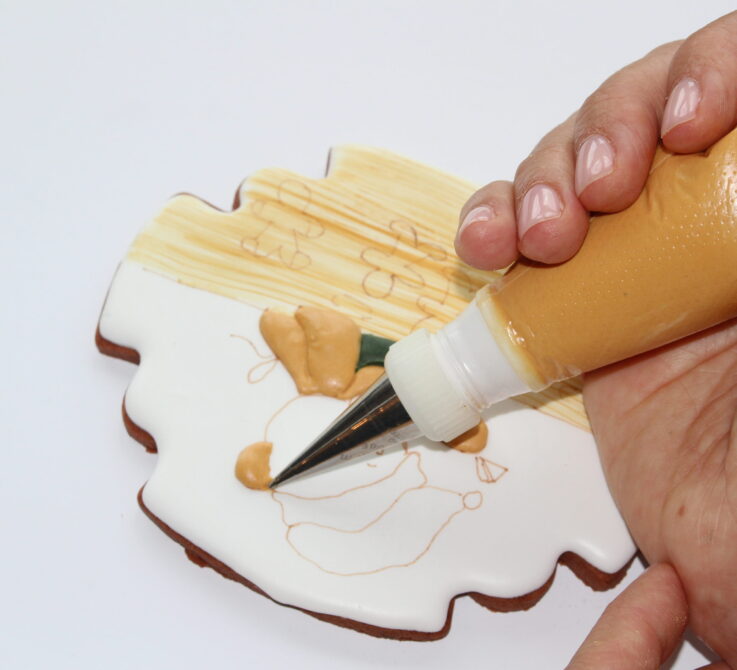
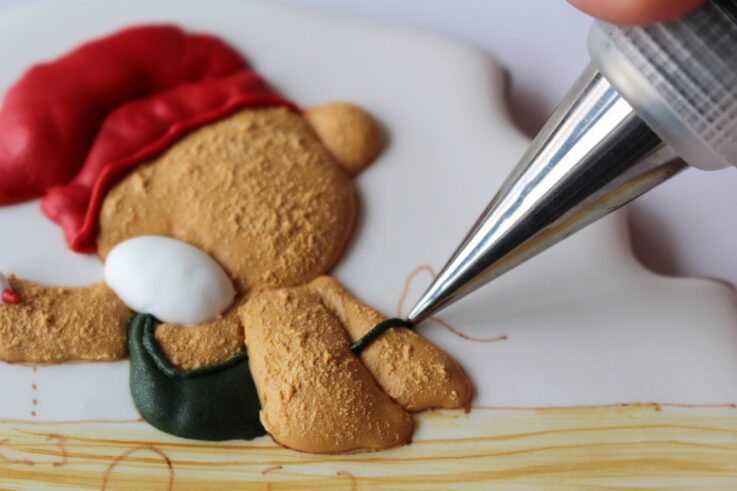
6Fill the second area (stretched arm) and finish as shown
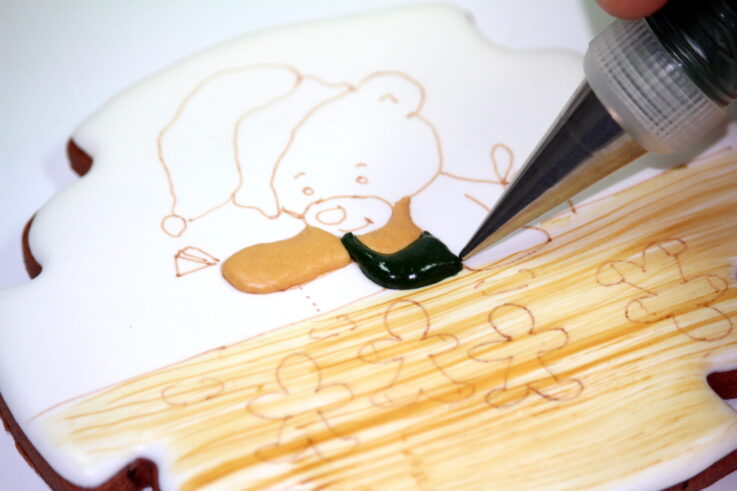
7Using the green royal icing and tip nº 1.5, fill the apron area
8Start filling the back part of the Teddy Bear up to the shoulder
9Come down to the arm finishing at the hand
10Start filling the ear, please make sure you give more volume to the outer part of it
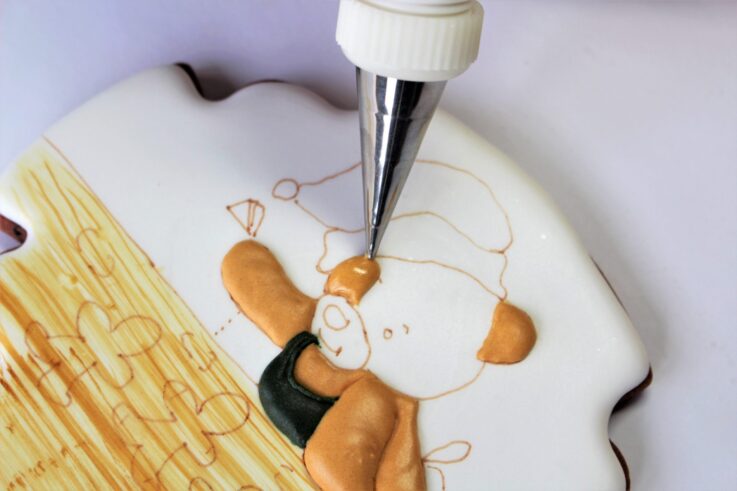
11Start filling the Teddy Bear’s head as shown giving more volume to the cheeks and front
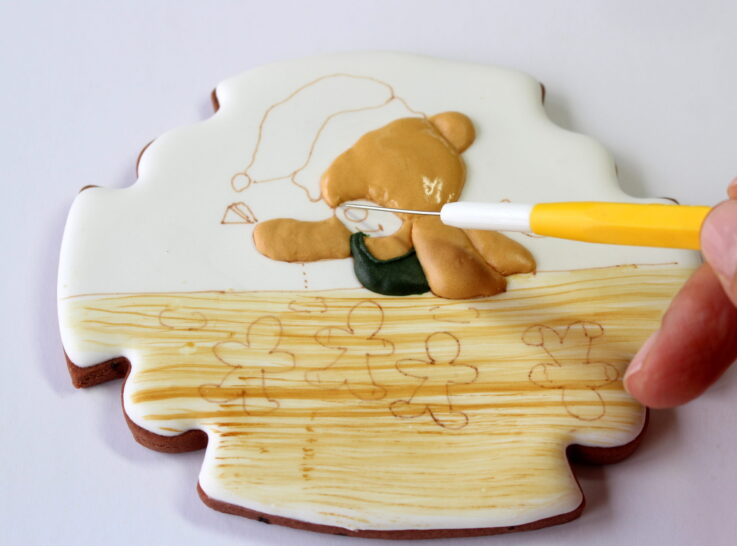
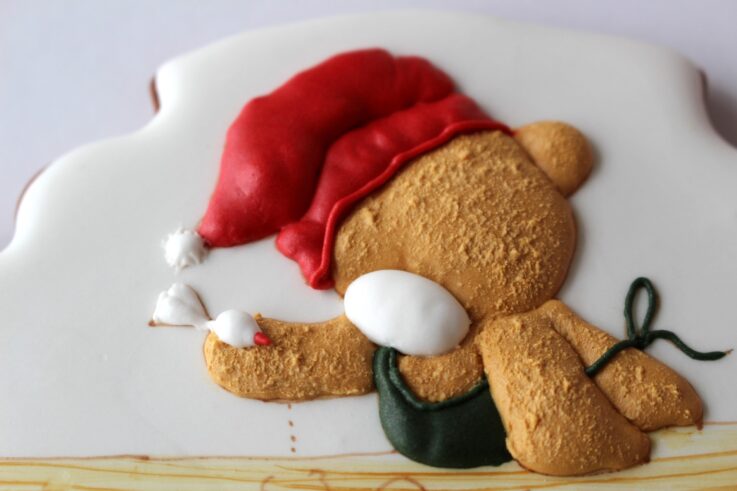
12Finish smoothing it if needed with the scribe tool
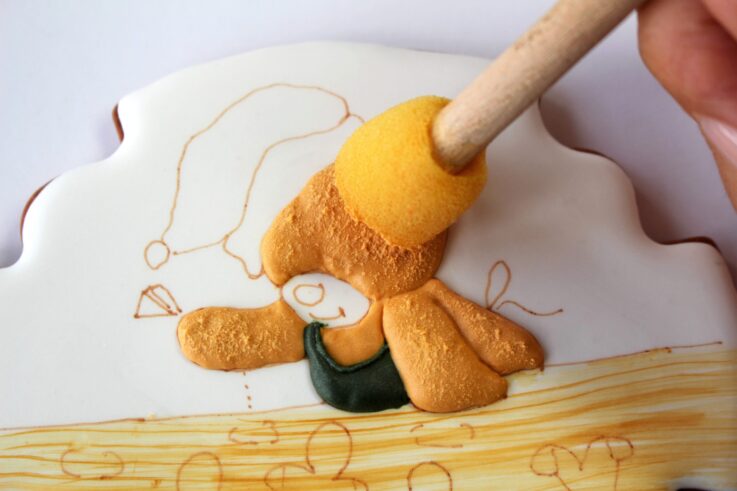
13Once the Teddy Bear’s body and arms are dry, squeeze a little bit of caramel royal icing in a plate, use the small sponge to add texture, tapping gently the bear’s body parts
14The Teddy Bear has now fur!
15Fill the lower part of the cap using red royal icing and a tip nº 2.
16Slightly overlap the Teddy Bear’s head when filling with red.
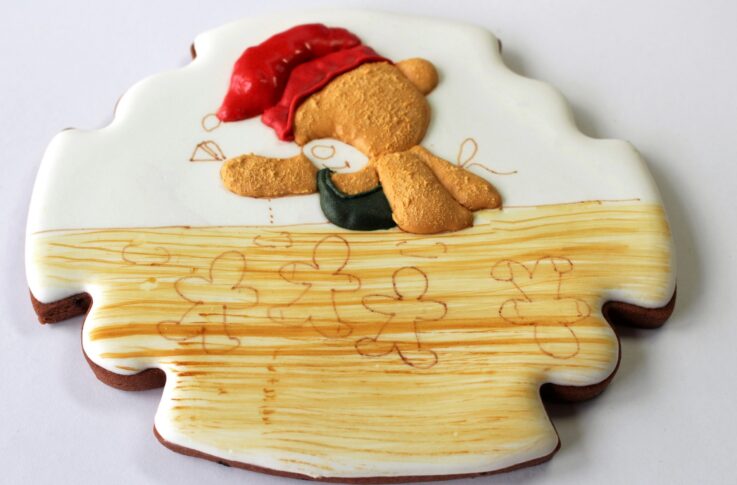
17Fill the upper part of the hat, giving it more volume than the lower part, when filling, leave it uneven and bumpy but with a very smooth surface
18With medium soft white royal icing, and tip nº 1.5, fill in the area of the Teddy Bear’s muzzle, give it extra volume to bring it up at the same level as the head’s area surrounding the muzzle
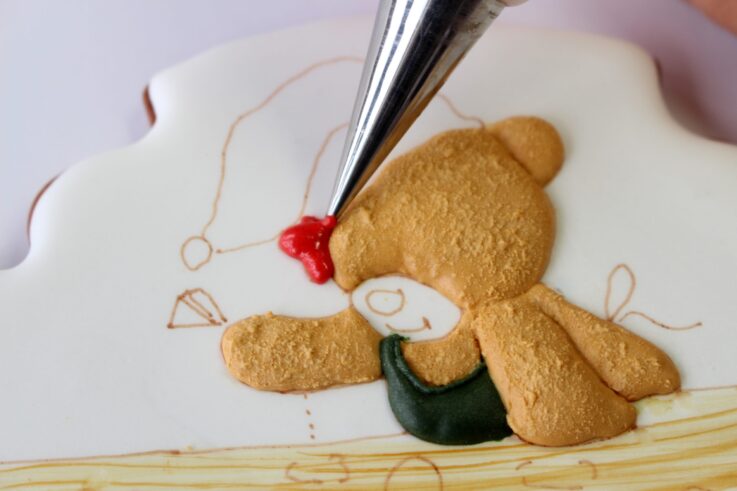
19Using the medium soft white royal icing and tip nº 1.5, make a dot at the end of the Teddy Bear’s hat.
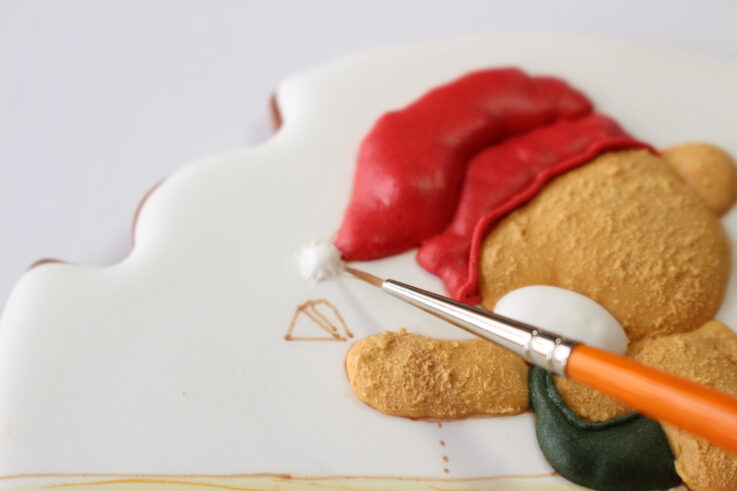
20Immediately, with a fine brush, pull a few strings to give the idea of fur.
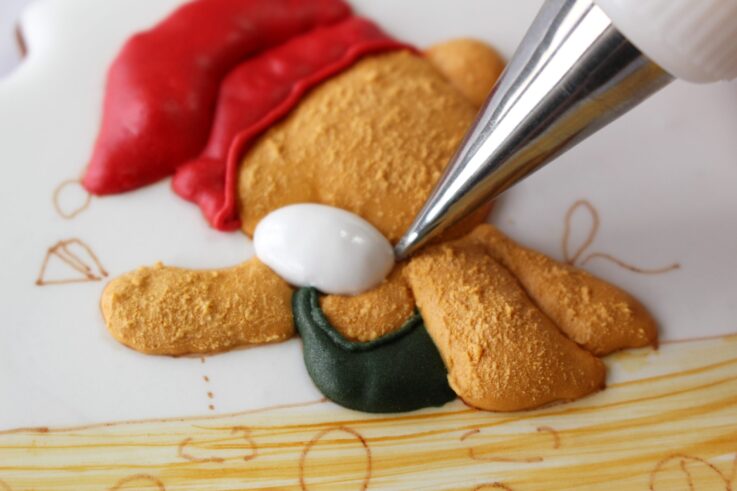
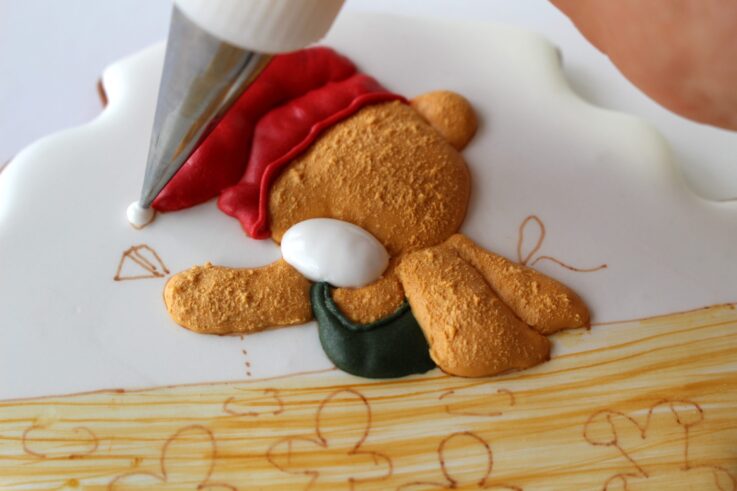
21Make a line with the white medium soft royal icing, and tip nº 1.5, for a pleat at the top of the Teddy Bear’s piping bag. Using the same white, make a generous oval shape on the top of the end of the Teddy Bear’s arm for the piping bag body, use the red royal icing to make the tip at the end
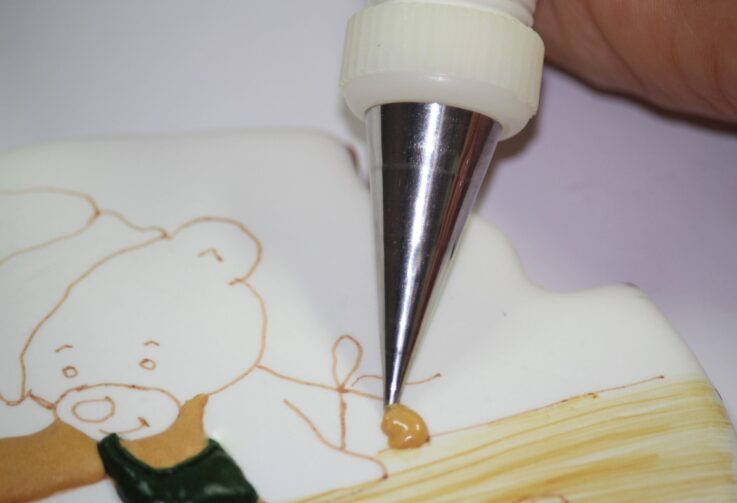
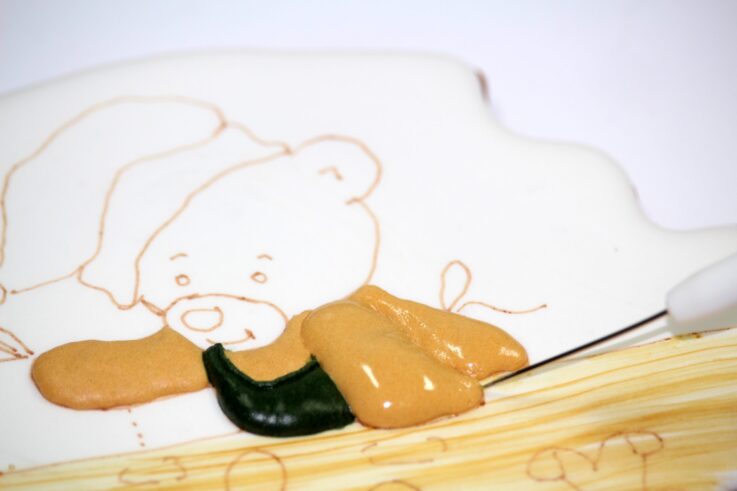
22Using the green royal icing and a tip nº 1, make the line for the apron’s bow, and then finish it as shown
23Finish the upper part of the piping bag
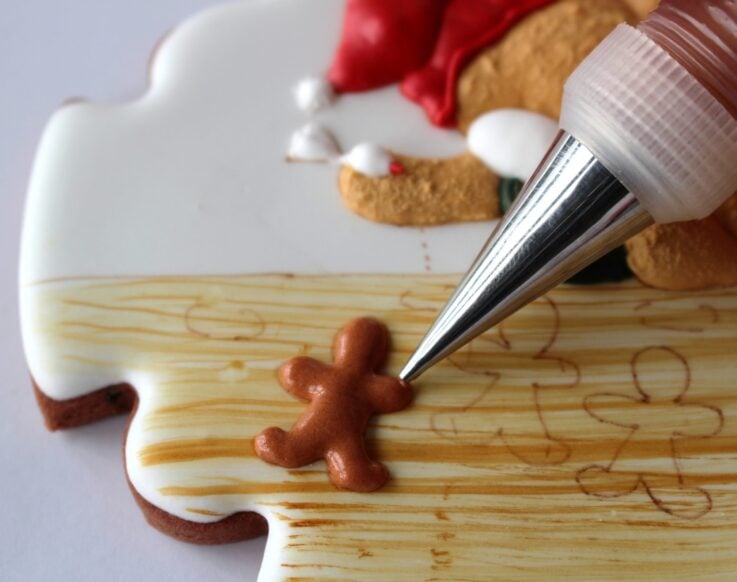
24Using the chocolate medium soft royal icing and tip nº 1.5, fill the gingerbread men one by one
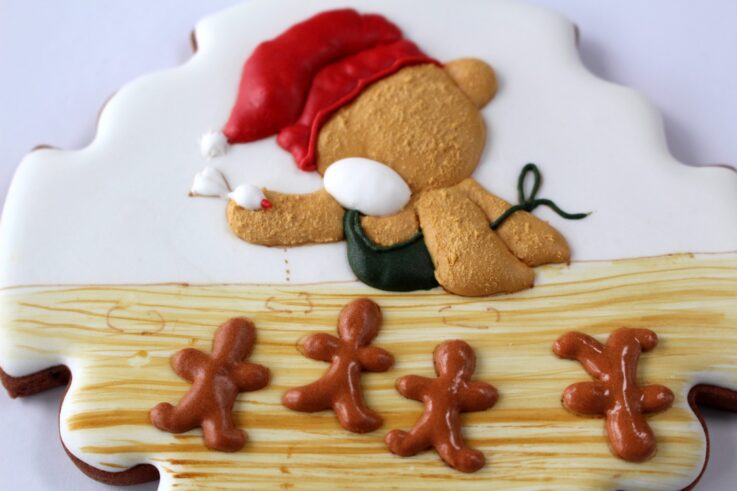
25Finish all of the gingerbread men
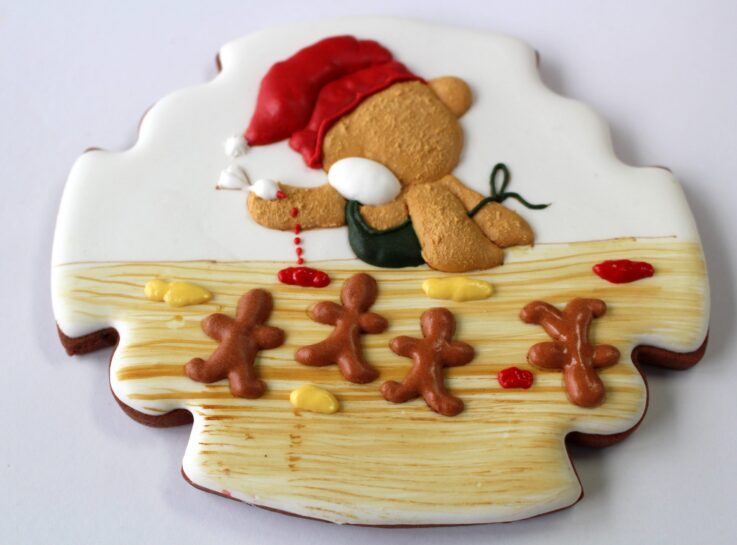
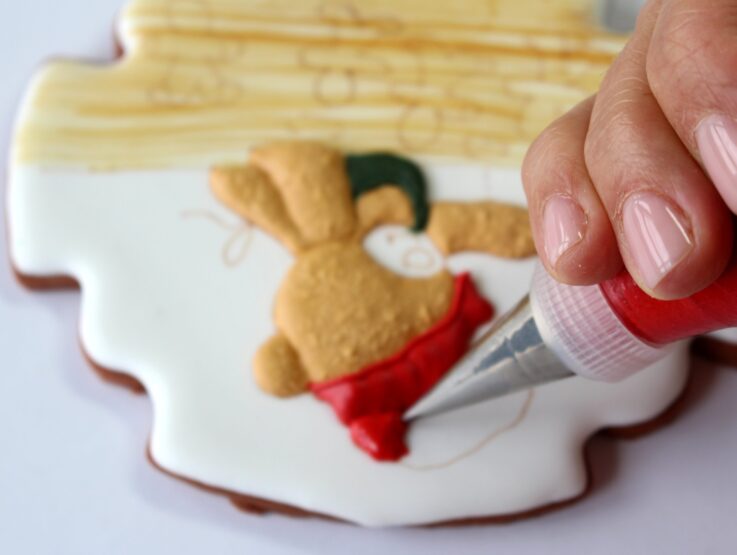
26Using the yellow and red royal icing piping bags fitted with a tip nº 1.5, make the stains on the table and the dripping icing on the piping bag
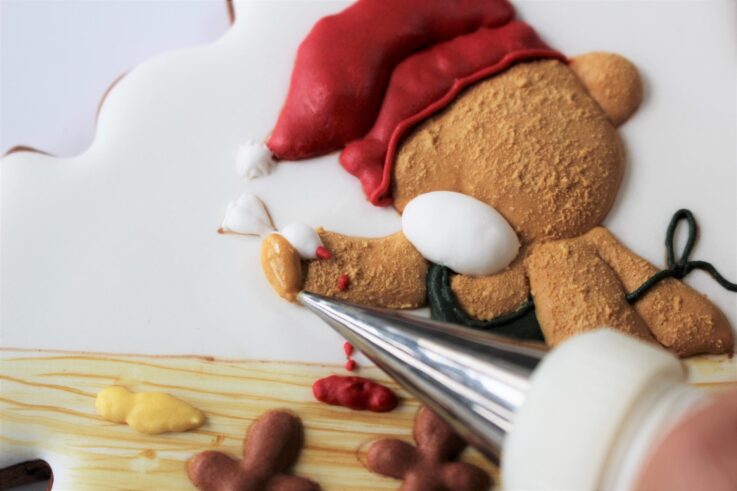
27Using the caramel royal icing piping bag fitted with a tip nº 1.5, make the Teddy Bear’s hand hand slightly covering the Teddy’s piping bag
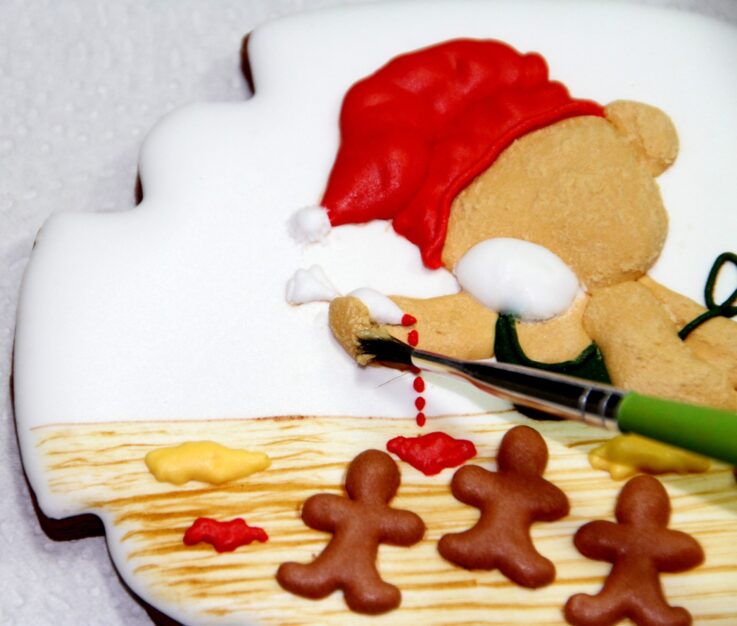
28Once dry, squeeze a lit bit of caramel royal icing in a plate and using a small sponge or a brush, give texture to the hand to resemble fur
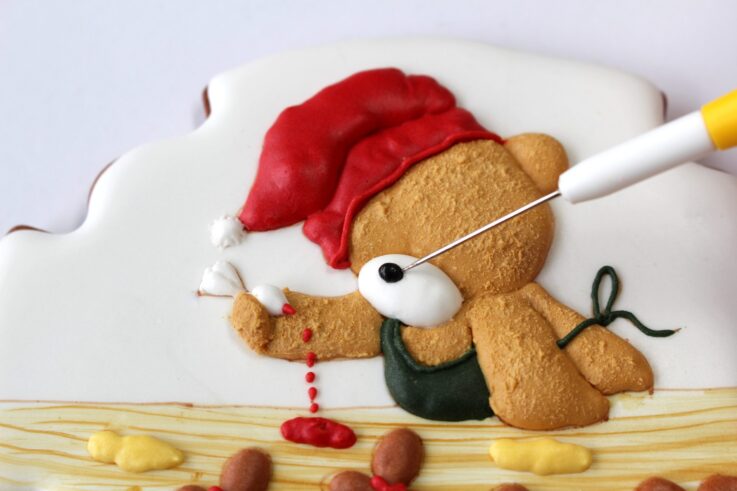
29Using the black royal icing bag with a tip nº 1 make the nose
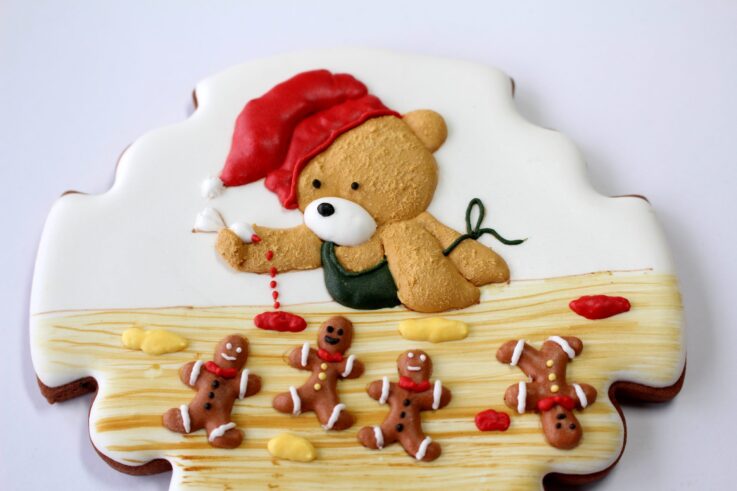
30Followed by the eyes
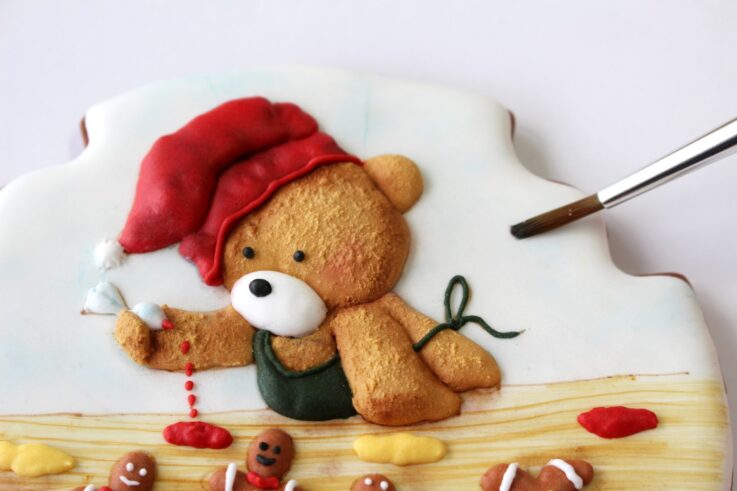
31Once the cookie is completely dry it’s time to use the lustre dust for shading the Teddy Bear, start applying the powder from the lighter colours towards the dark ones.
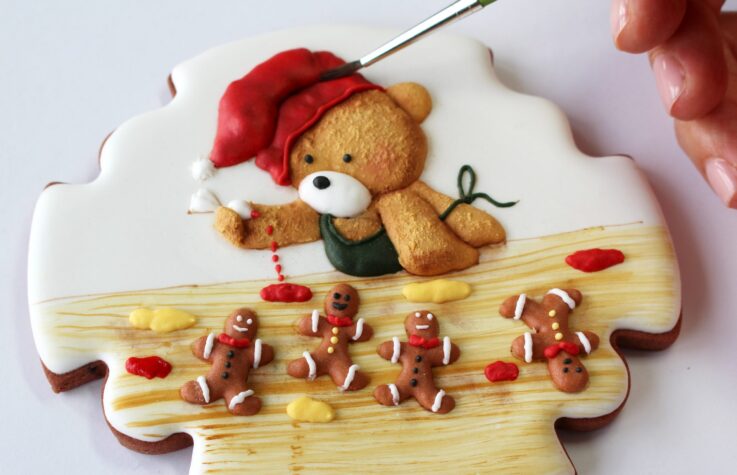
32Pink for the cheeks, blue for the background and Teddy’s piping bag on his hand, brown for the Teddy Bear’s body and around the gingerbread men and black for the hat.
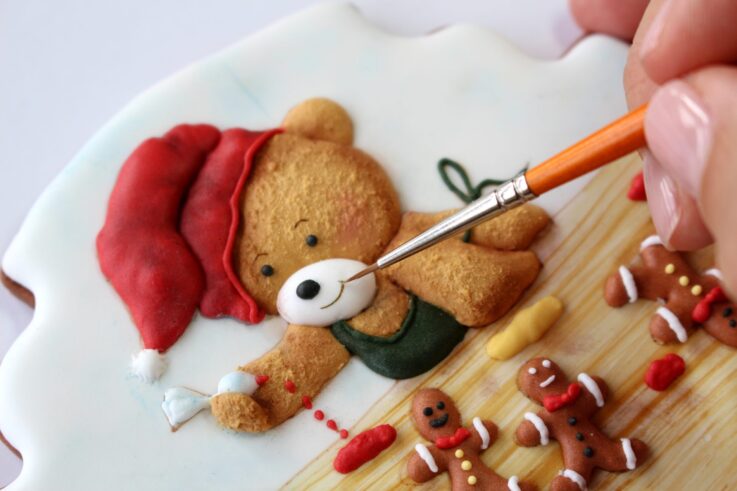
33Using a very thin brush (3×0) and caramel gel colour, trace the mouth line, use grey (white tinted with black) for the hat’s fur. Paint on the royal icing lines made previously.
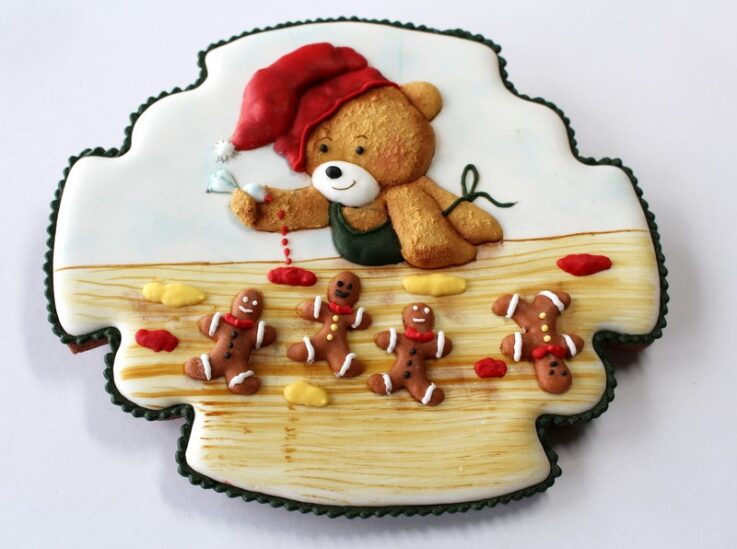
34With the green or red medium stiff royal icing and a tip 1.5, make the border to go around the cookie. The piping bag should go forward touching the cookie rim and coming backwards in the air squeezing the bag to make a dot, but keeping it level (don’t go up or down, don’t make a loop), keep squeezing as you go forward touching the cookie, come back, repeat and make this until your cookie has a complete frame like border
