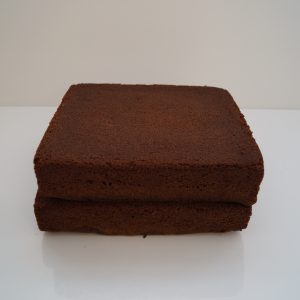
1Melanie starts by baking the cakes, two 8″ squares, each of 1.5″ depth, level these if required
Happy Campers Cake
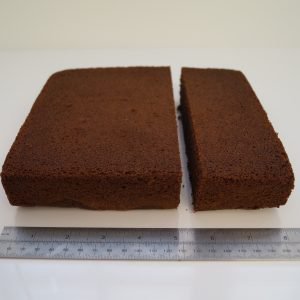
2Then use a carving knife to cut your cake into two so you have 130cm and 70cm
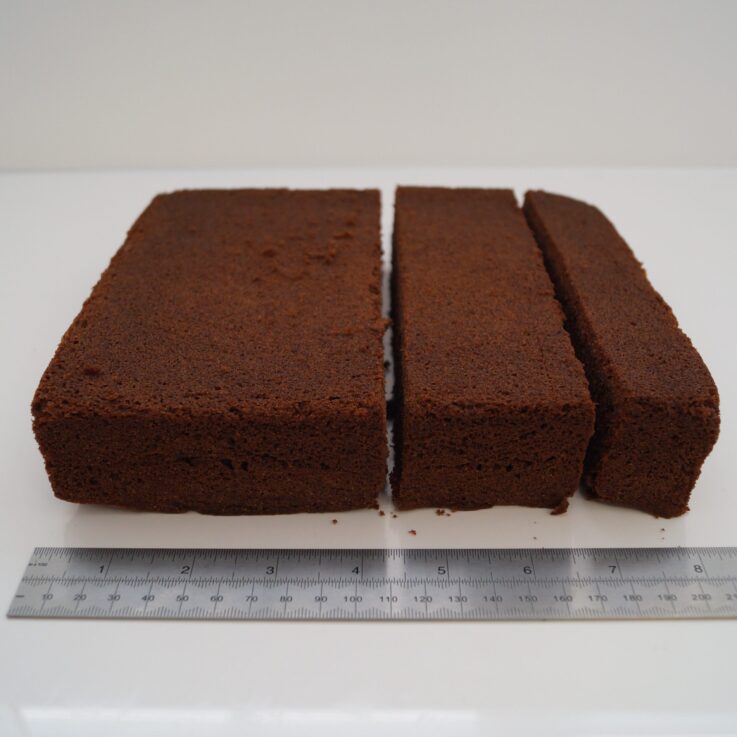
3Cut cake two into three so you have 110cm, 55cm and 35cm (you can discard the smallest piece)
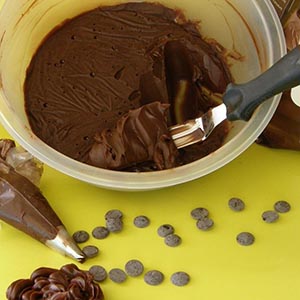
4Now we start the ganache and decorating!
Need to know all about ganache? Paul Bradford shows you how to here.
Please scroll down to see ingredients and equipment needed.
Need to know all about ganache? Paul Bradford shows you how to here.
Please scroll down to see ingredients and equipment needed.
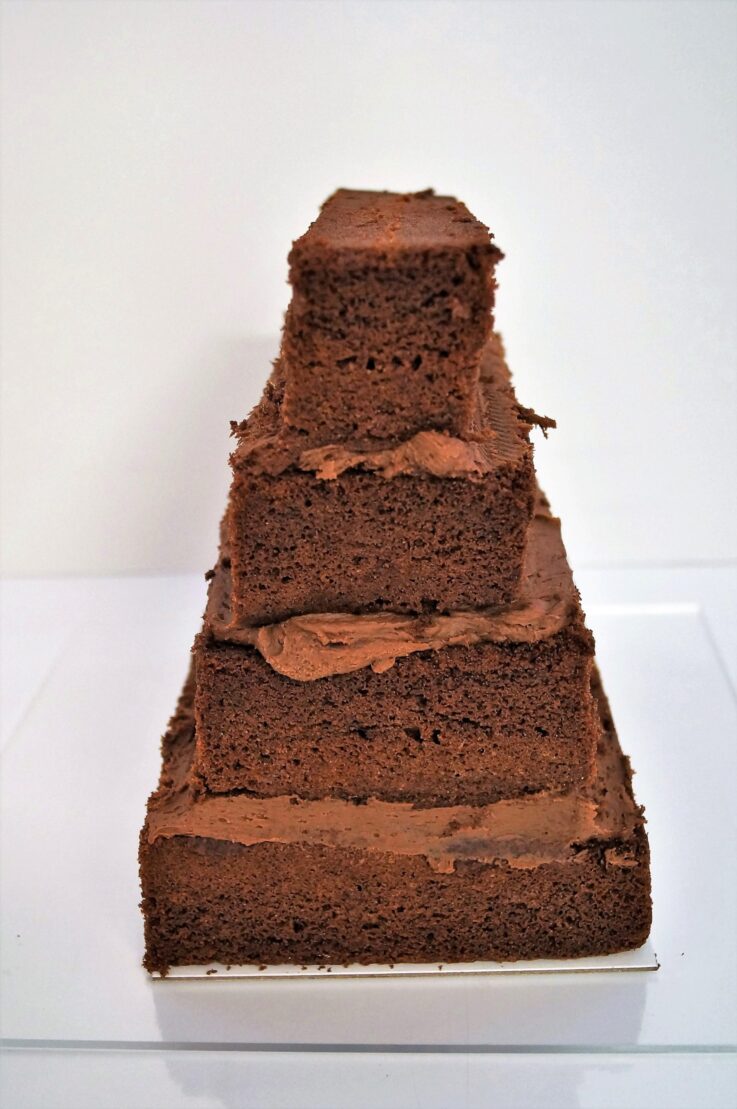
5Stack the cakes in order of size filling with buttercream or ganache of your choice. Place in fridge to chill. Whilst the cake firms up cover your board with green sugar paste (I used Magic Colours Lemon Lime)
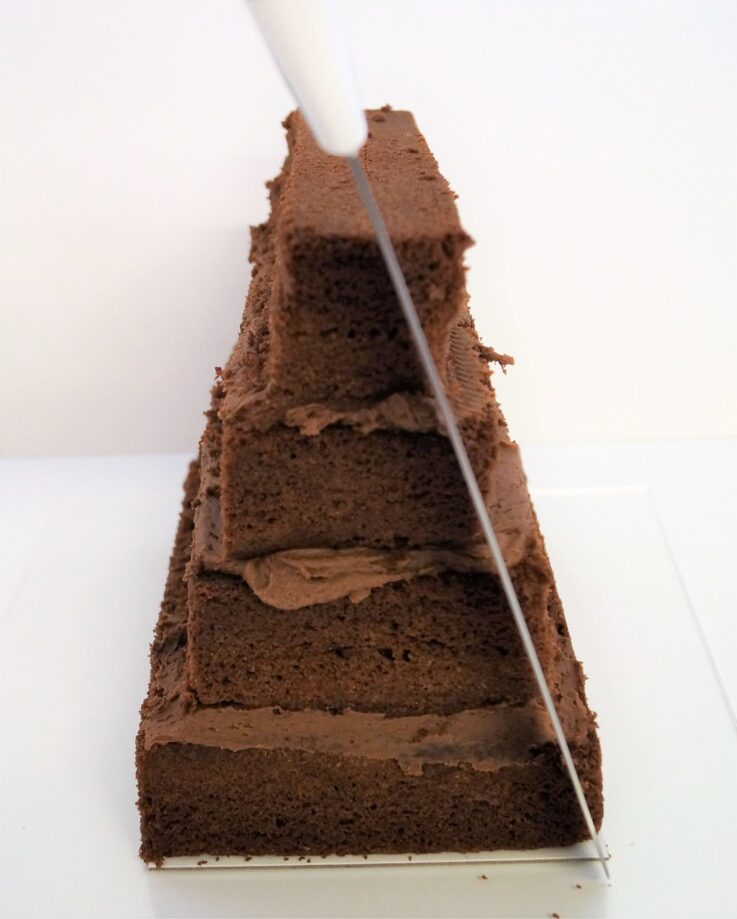
6Mark the centre of the cake with a carving knife and carefully trim the sides using the base board as a guide (if your cake is very well chilled you’ll be able to turn it onto its end to make this easier)
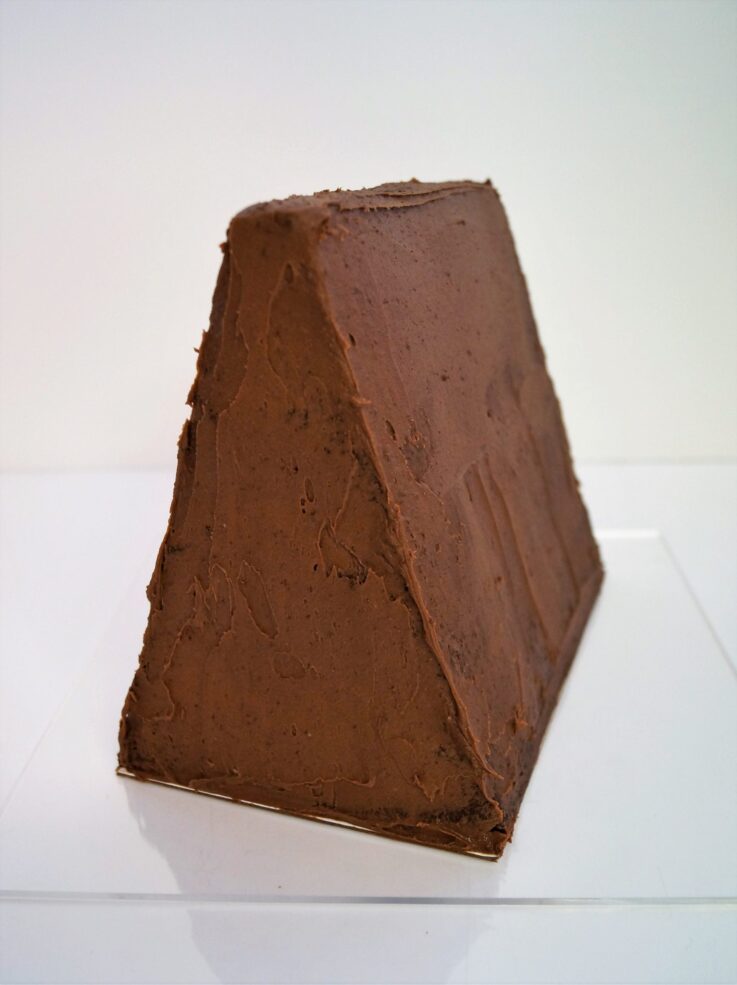
7Crumb coat using your palette knife with buttercream or ganache and chill again before applying a second smoother covering. Chill and then allow to return to room temperature.
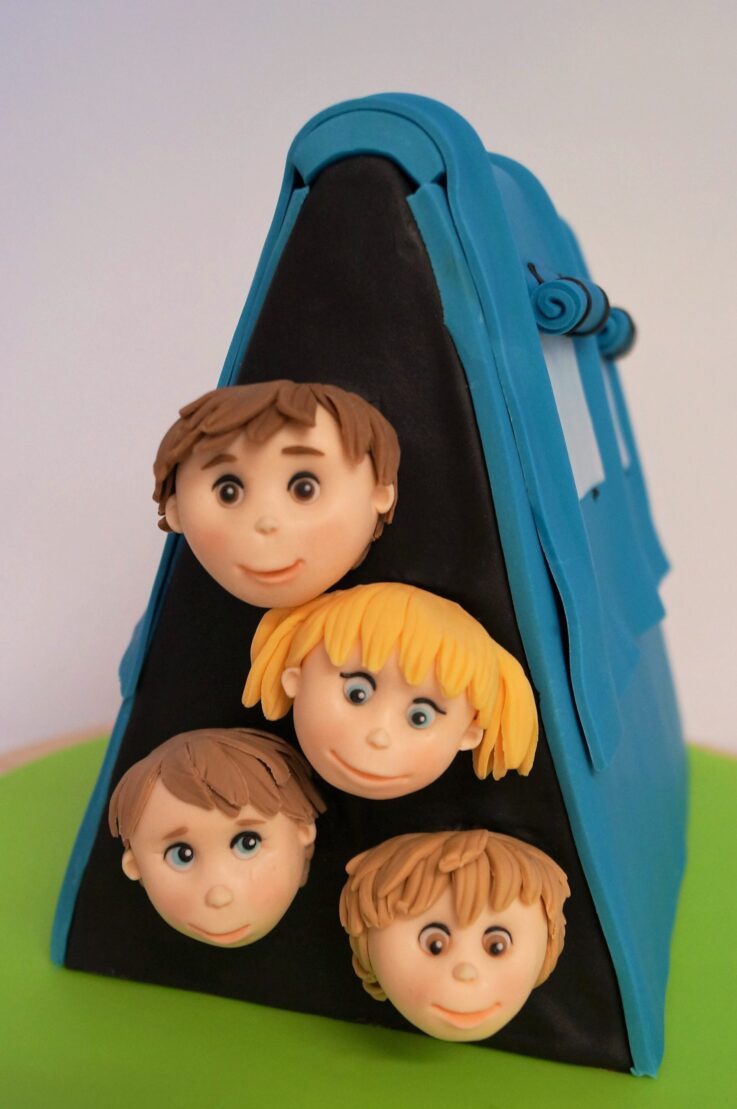
8Start working on models. Take 30g of skin coloured modelling paste and roll into an oval. Use a tool or your finger to indent a line half way across the face for the eye area. Use your thumbs at the bottom of the face to form a chin.
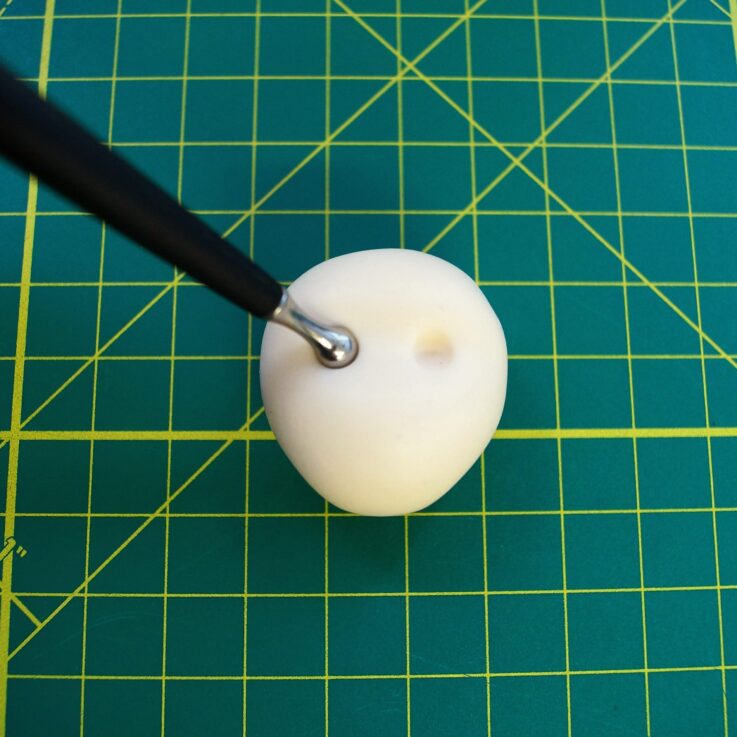
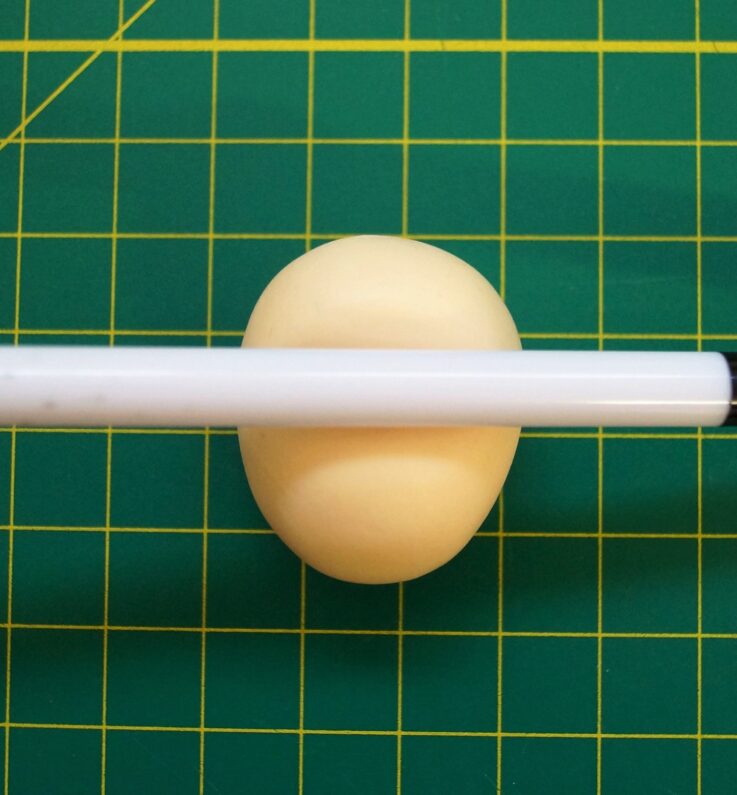
9Use a 10mm ball tool to mark eye sockets and then a 5mm tool to indent a deeper hole for the eyeballs to be added later.
10Use a 10mm ball tool to mark eye sockets and then a 5mm tool to indent a deeper hole for the eyeballs to be added later.
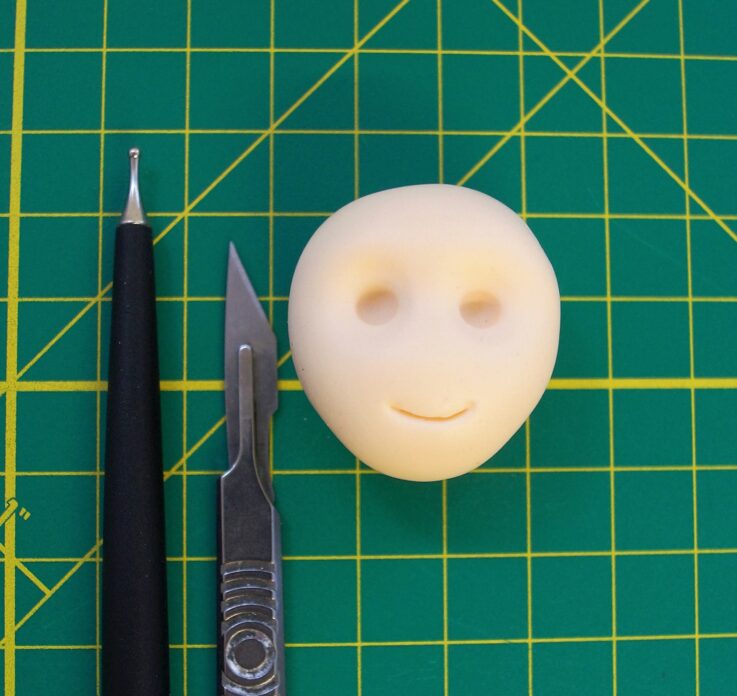
11Mark corners of the mouth with small ball tool then use scalpel craft knife to create the mouth.
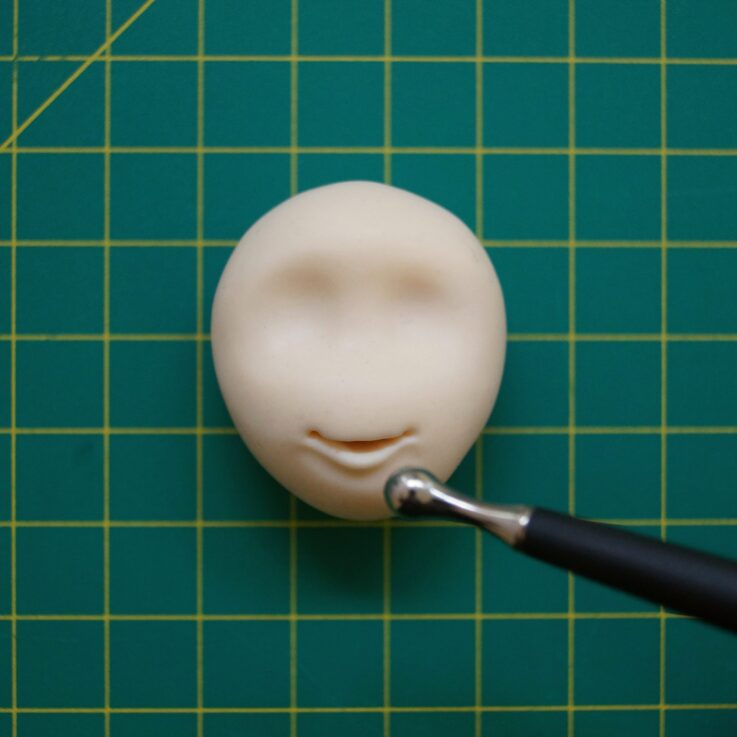
12Place dresden tool, flat side up, inside the mouth and pull up and out to create a top lip and then press down to open mouth slightly
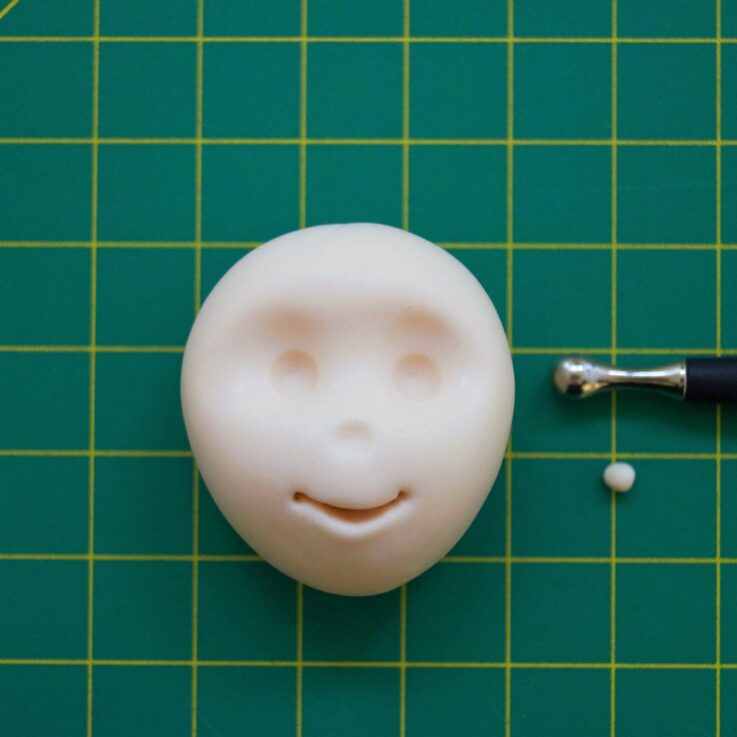
13Use the 5mm ball tool to create bottom lip and chin by pushing gently below the mouth. Adjust and smooth until you’re happy with the shape
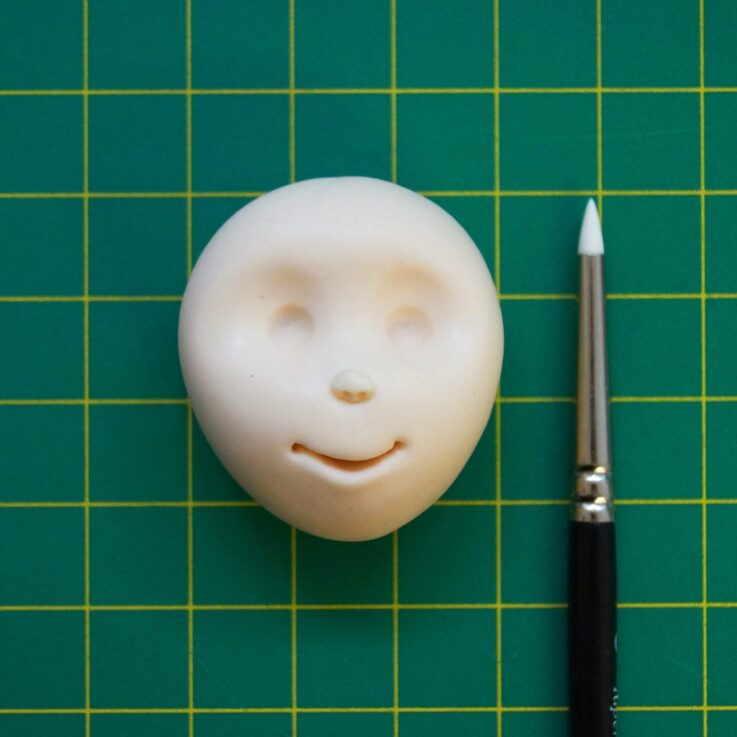
14Use a #0 colour shaper (or other soft modelling tool) to gently create nostrils

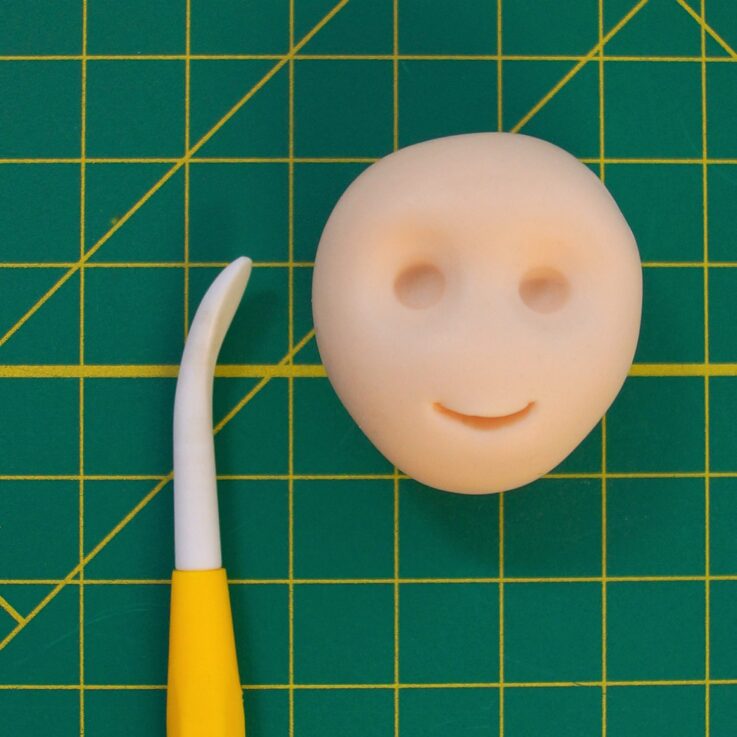
15Roll two small balls of white fondant. Place a little water in each socket and drop a ball in (you can try for size before adding water)
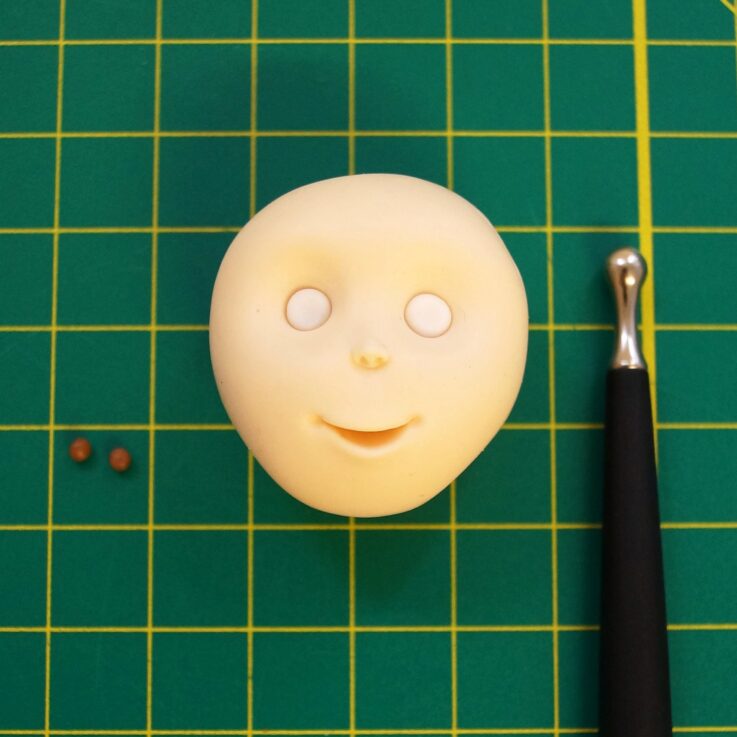
16Indent the eyeball gently with the 5mm ball tool and add a small ball of coloured fondant (whatever colour you want for the iris) Use a small amount of water and place the iris into position and press down gently

17Repeat the same process with a smaller black ball of fondant for the pupil. Then make a tiny hole with a tiny ball tool or if you don’t have one a cocktail stick. Into this hole place a tiny ball of white fondant or a tiny white dragree to create a ‘glint’ in the eye
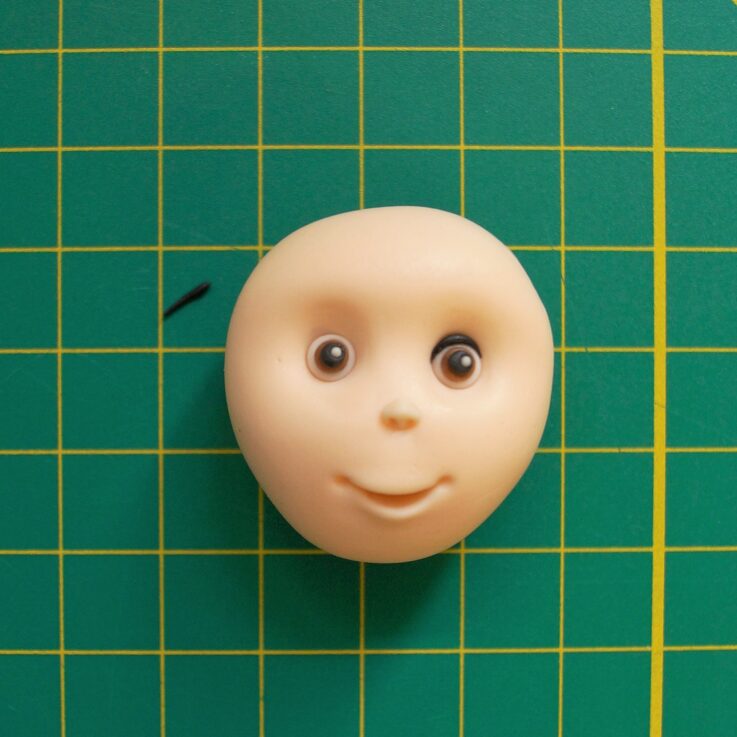
18Roll a tiny piece of black paste to make the eyelashes. Run a little water above each eye and place the fondant carefully into position.

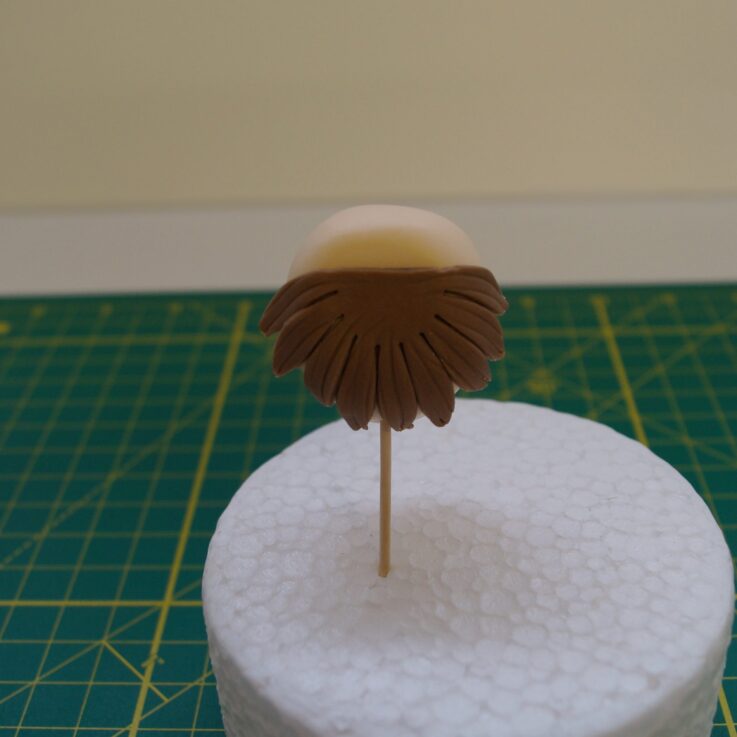
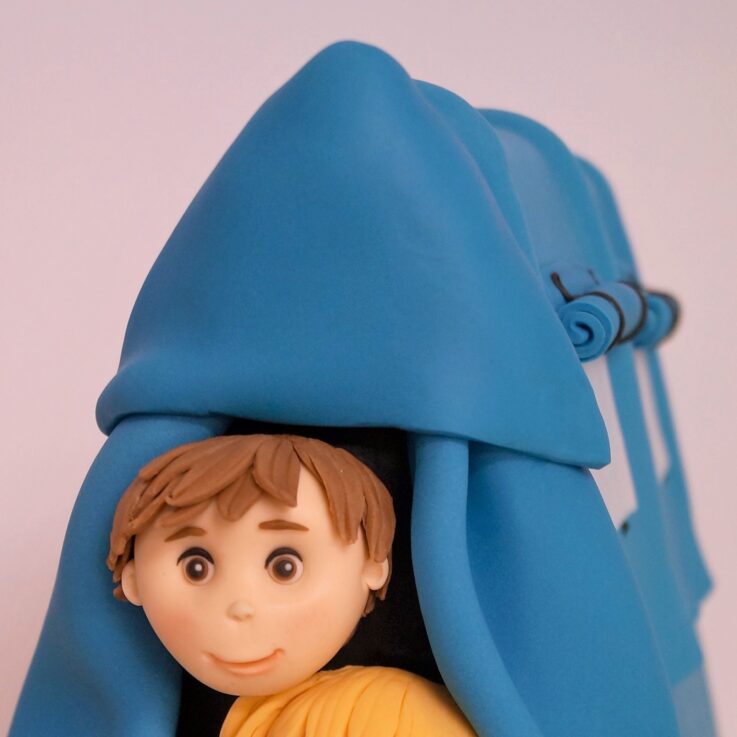
19Place the head carefully into a cocktail stick and place into polystyrene. Thinly roll out paste to the hair colour of your choice. Cut two daisies using a 60mm daisy cutter
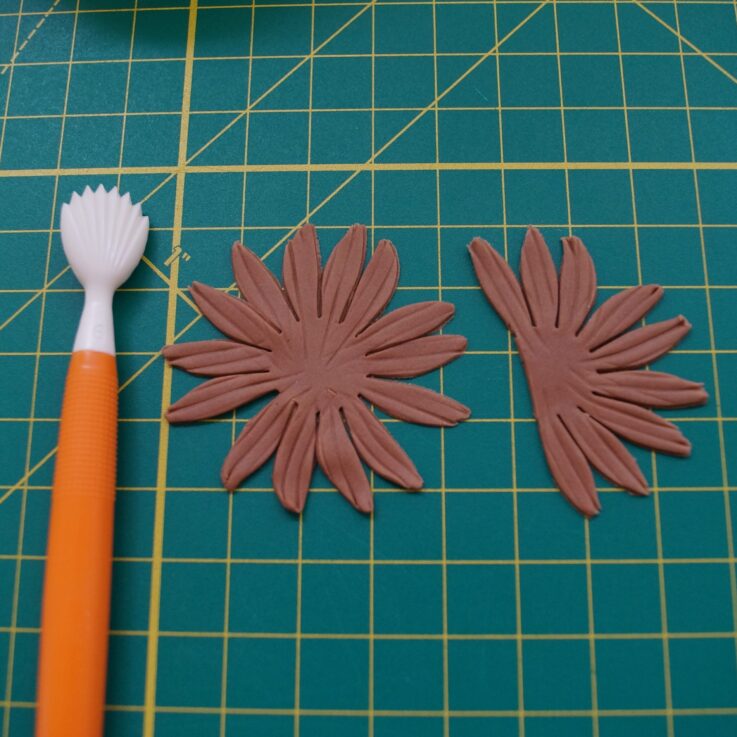
20Mark hair with shell tool and cut one daisy in half
21Place half of one daisy across the back of the head using water to secure
22Use a whole daisy to create the main crown of hair. Style the hair and use additional petals if needed
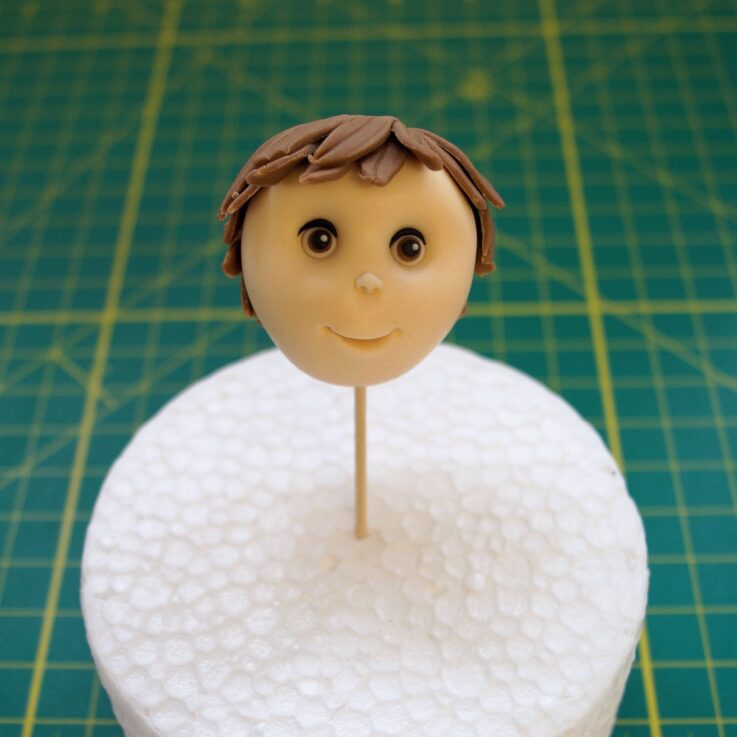
23Roll a ball of skin coloured paste and cut in half. Place a little water either side of the head, place each ear into position. Use a small ball tool to shape each ear
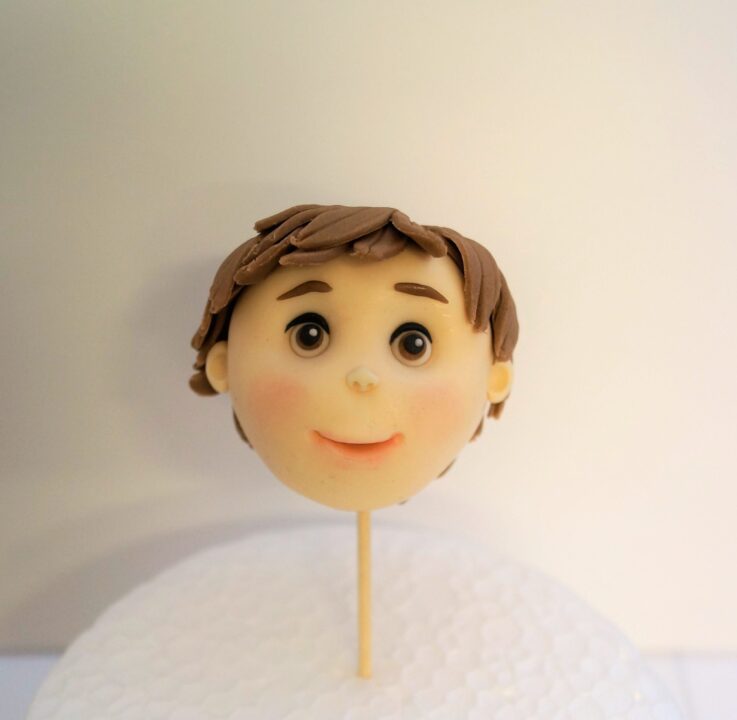
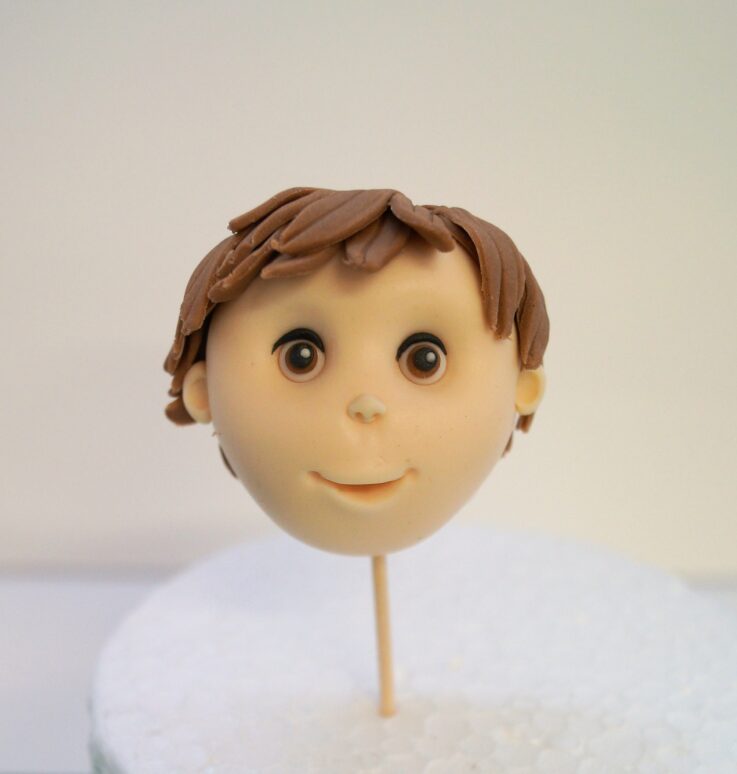
24Roll small pieces of hair coloured fondant for each eyebrow and place above each eye. Use a pink dust to lightly dust cheeks and mouth using soft brushes
- Repeat these steps to make additional faces

25Back to the cake! Use baking paper to make a template of the front triangle . Roll a thin piece of black sugar paste and cut to the template (the template isn’t essential but may help) Place it onto the cake and smooth
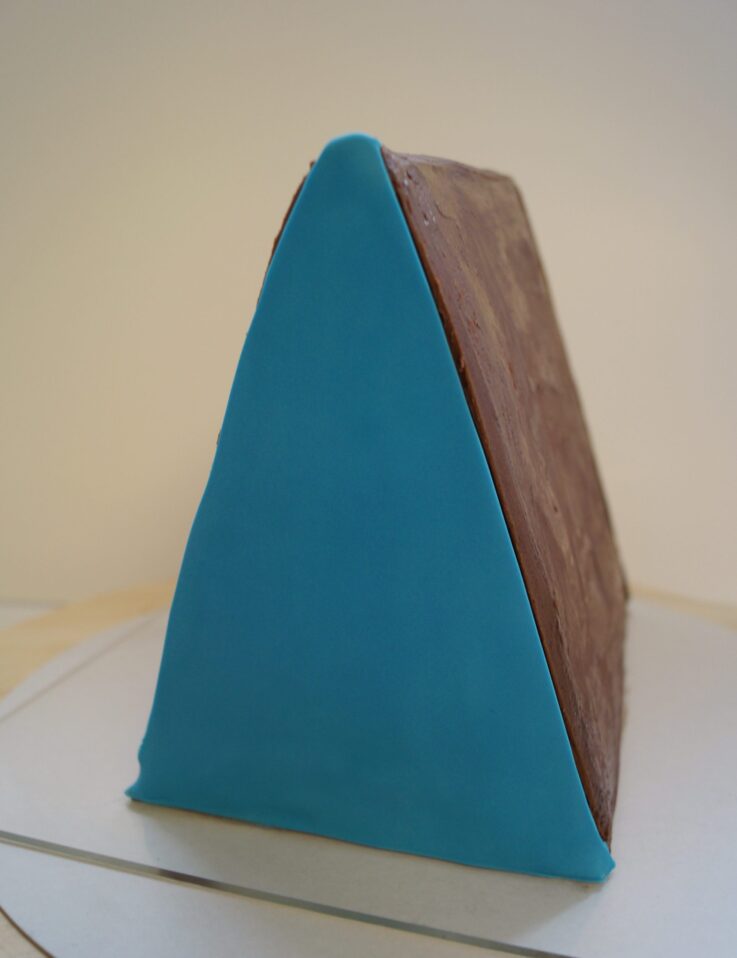
26 Make a second triangle, this time in blue and attach to the back of the cake

27Measure the side of your cake and cut two rectangles to fit each side. Use the baking paper template method if this helps you
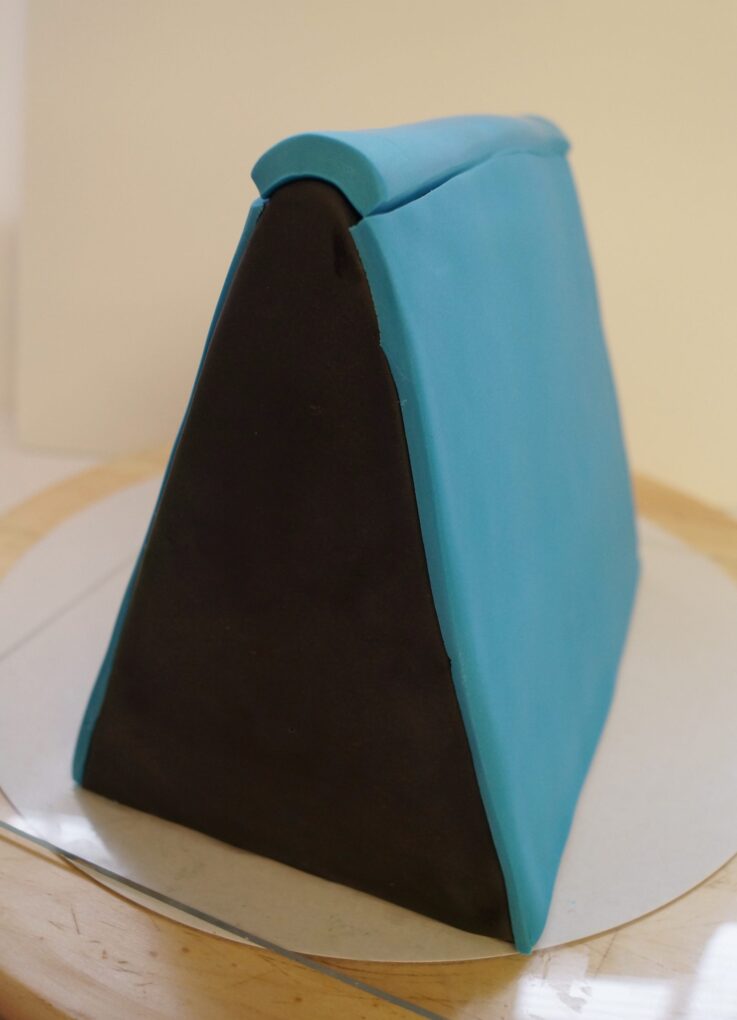
28Cut a piece of sugar paste to run along the length of your cake and join both sides
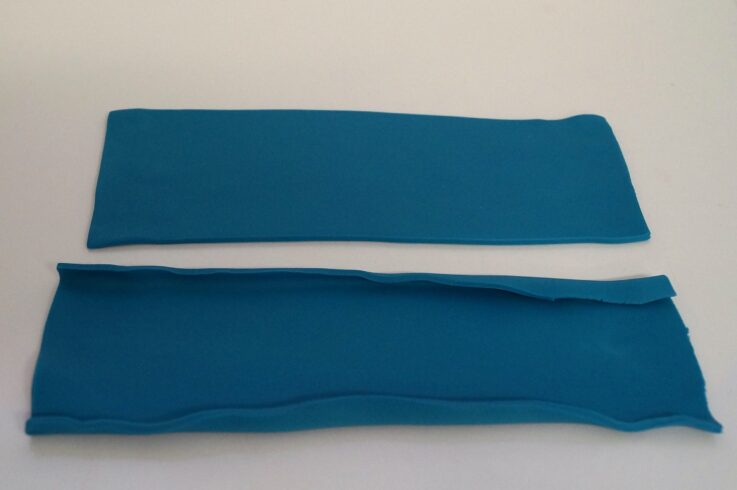
29Use an extruder to make lengths of sugarpaste and place over the tent as shown
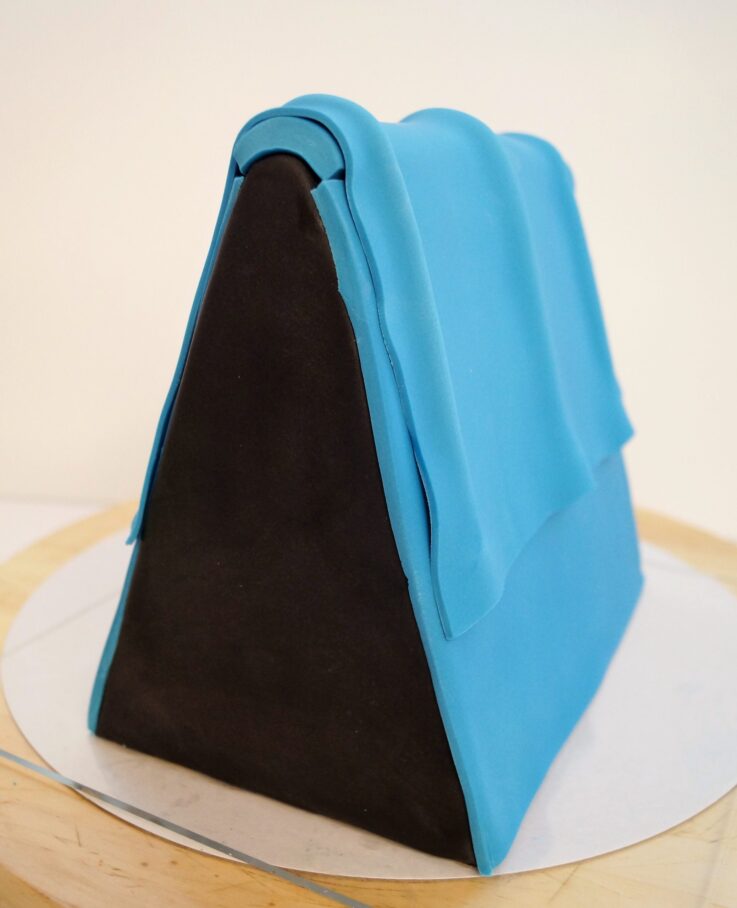
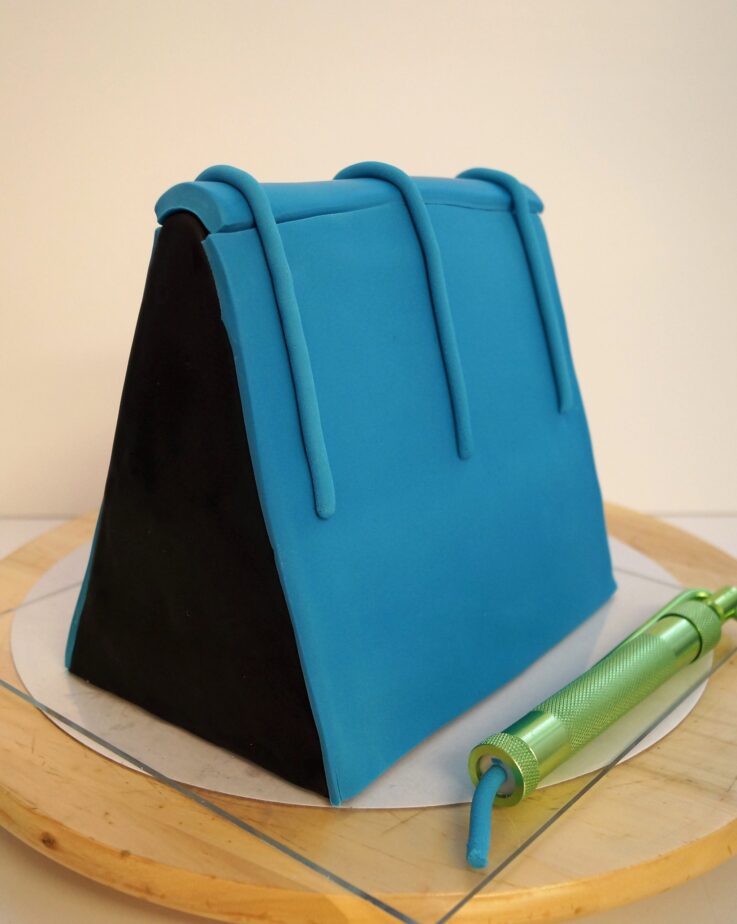
30 Measure your cake and cut a rectangle piece of sugar paste to create a ‘fly sheet’. Put water on the cake and carefully lay the fly sheet over the top of the cake. Leave loose at the bottom to add a little movement

31Cut four squares of white sugarpaste 4cm x 4cm for windows. Place two on each side using water. Dust lightly with blue dust (Mel used Petal Crafts sky blue)
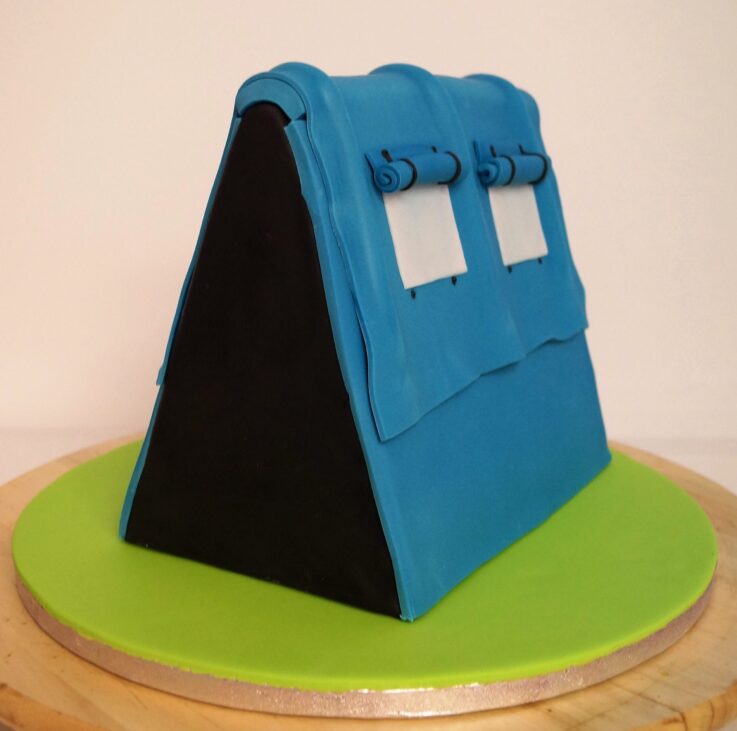
32Cut four blue squares of sugarpaste. Roll them and attach to the windows.
33Carefully transfer the cake onto the cake board, using melted chocolate or royal icing to secure it to the board. Use small pieces of black sugarpaste to add detail to the tent windows.
The heads now need to be glued into position. You can use melted chocolate (not too hot or runny) or thick royal icing. If you want added security you can use a skewer such as a cocktail stick but you must make sure the cake recipient knows there are non edible supports inside the cake.
The heads now need to be glued into position. You can use melted chocolate (not too hot or runny) or thick royal icing. If you want added security you can use a skewer such as a cocktail stick but you must make sure the cake recipient knows there are non edible supports inside the cake.
34Now to make the front door to the tent. Cut two rectangles of sugarpaste approximately 15cm x 5cm. Turn over and gently roll each long side in slightly
35Pinch the rectangle together to form a curtain and glue into position as shown. Repeat with other rectangle.
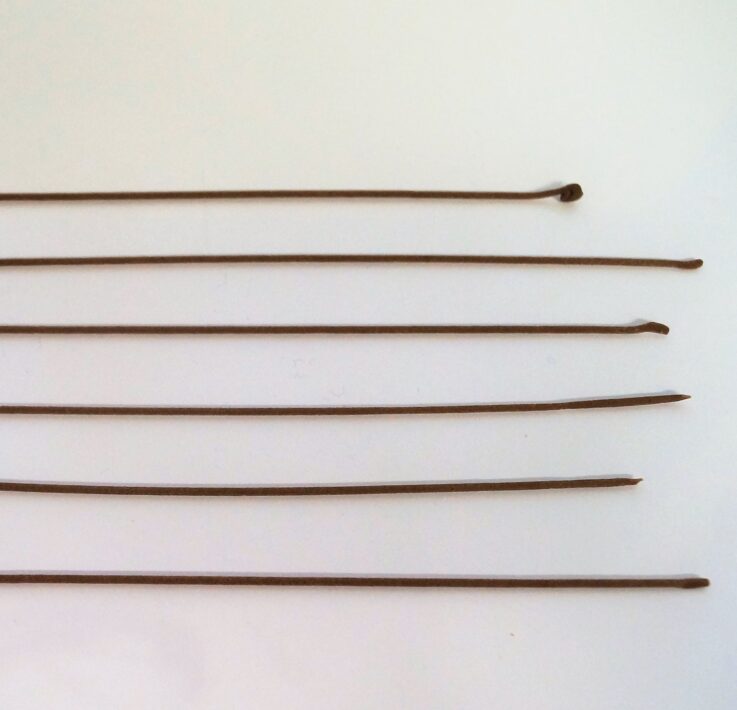
36Use an extruder gun to make six guide ropes for the tent. Roll a ball at one end of each. Attach to the tent gluing the knotted end down to the board and creating a loop at the other end
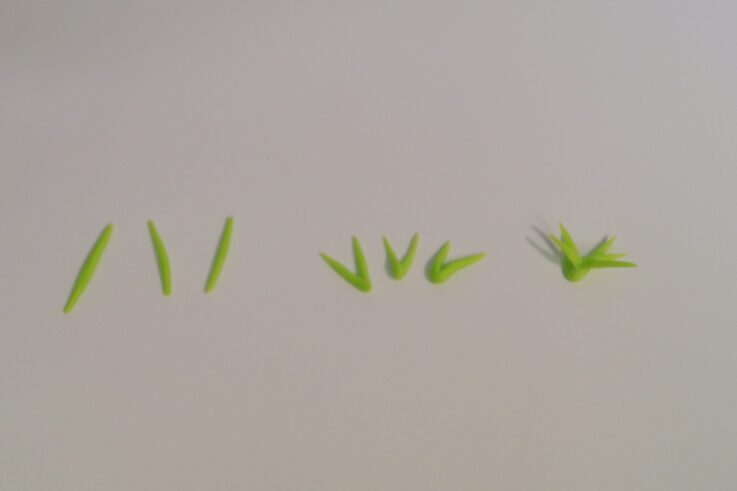
37Use green sugarpaste to make clumps of grass as in the photograph
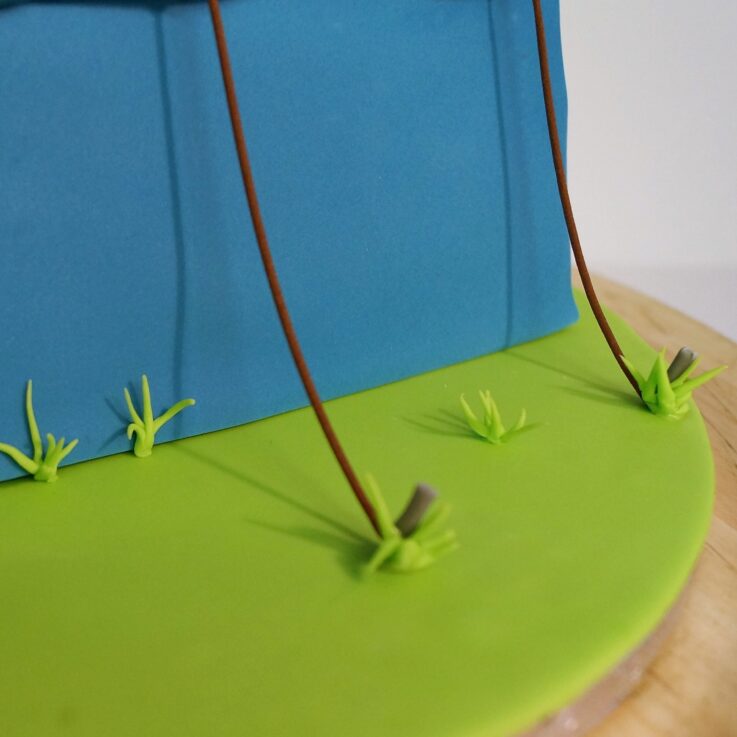
38Make six grey pegs, place one with each cluster of grass and place at the bottom of each guide rope. Add extra clumps of grass on the board.

39Add ribbon to the board and your project is complete!
Equipment list:
Rolling pins, large and small
Carving knife
Small angled palette knife
Ball tools
Scalpel
Large daisy cutter
Dresden tool
Shell tool
Ruler
Cocktail sticks
Edibles:
1kg blue sugarpaste
300g green sugarpaste
120g Skin coloured modelling paste
70g black sugarpaste
100g additional sugarpaste and gel colours for hair, eyes etc
Time taken: 6 hours
Anyone having a go at this? Show Cake Life, we would love to see your pictures – [email protected]
