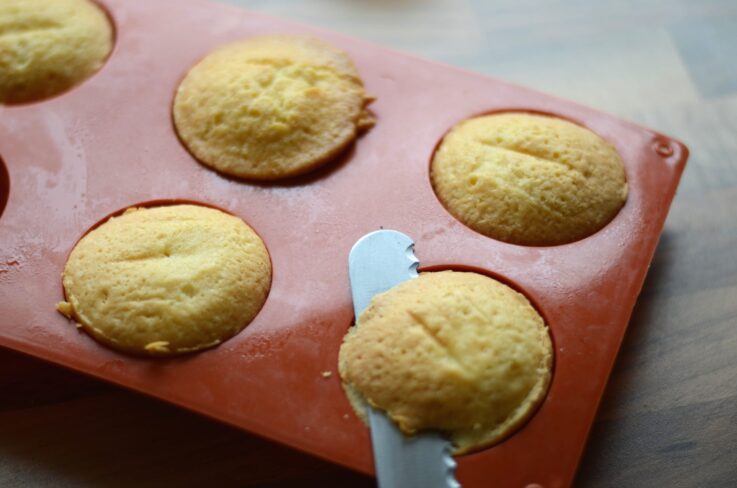
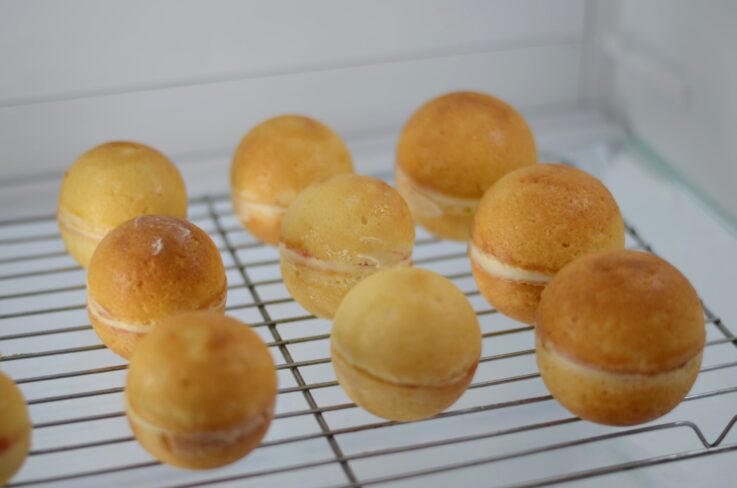
1Bake as many half sphere sponge cakes as you require, cool and trim the tops.
Illusion Cake Tutorial – Mini Fruit Cakes by Ben Fullard
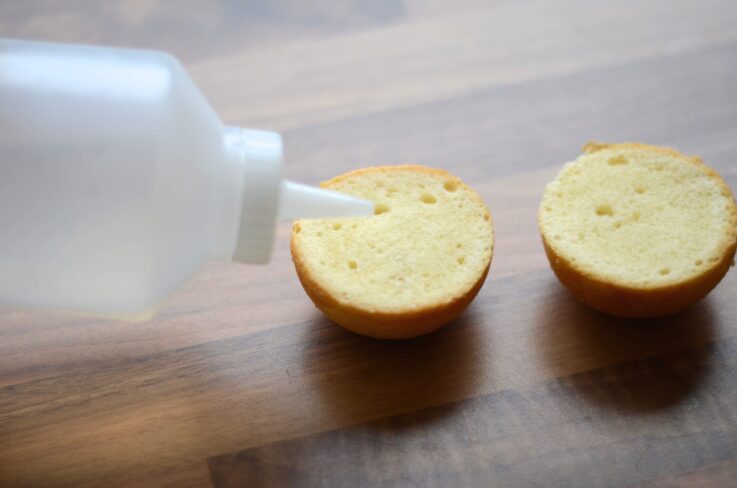
2Drizzle with sugar syrup to keep them moist.
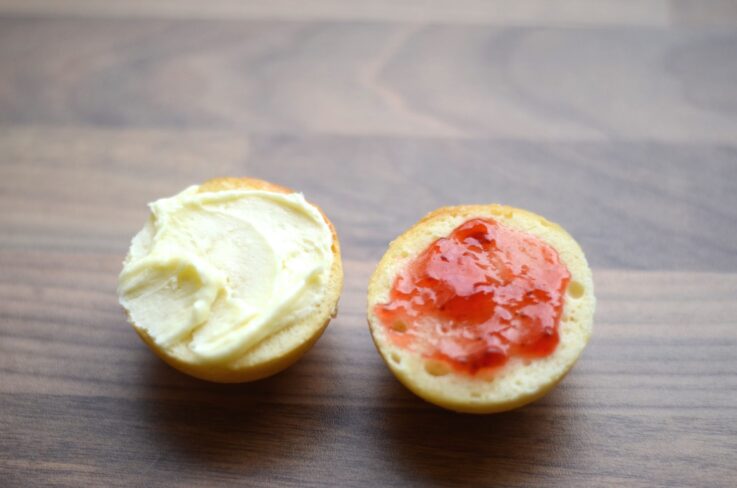
3Take two halves (to create one round cake) and spread one half with jam, one half with buttercream
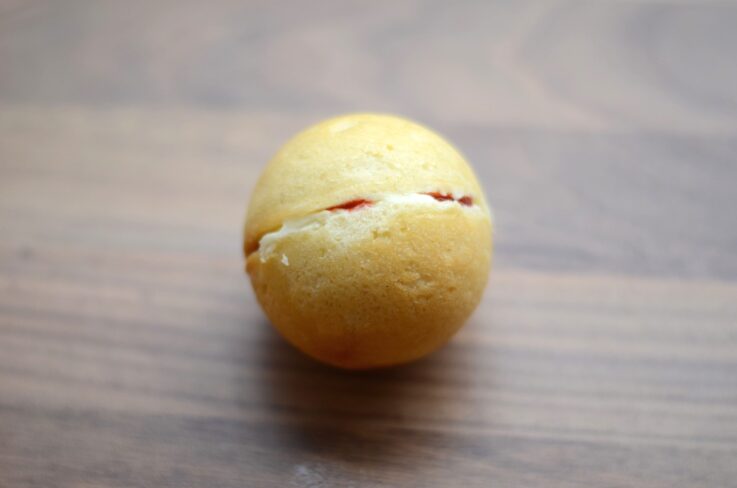
4Sandwich them together and trim any loose edges
5Chill for 30 minutes to set the buttercream (this will make it easier to decorate them)
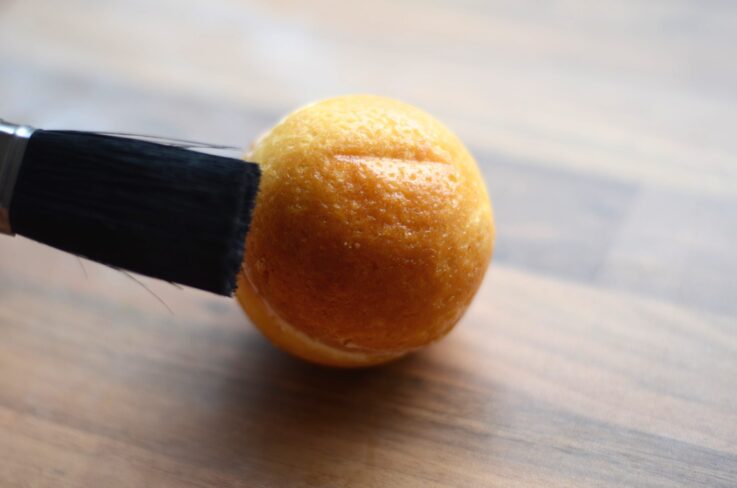
6Brush the outside with sugar syrup to help the sugarpaste stick
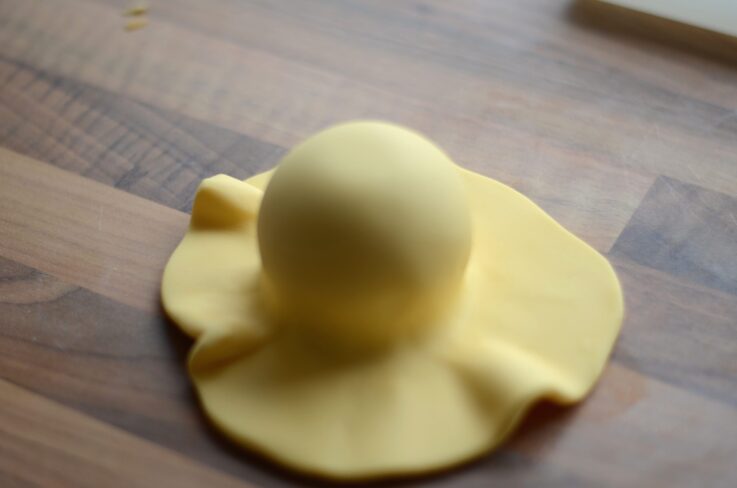
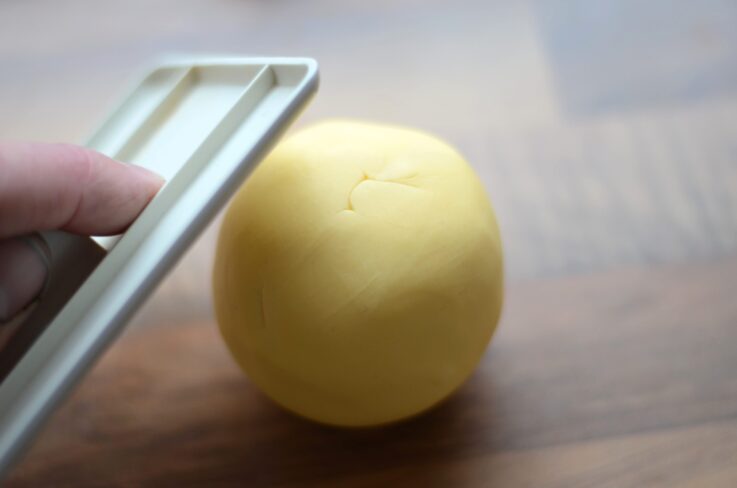
7Roll out a small piece of (egg yellow) coloured sugarpaste and cover your cake.
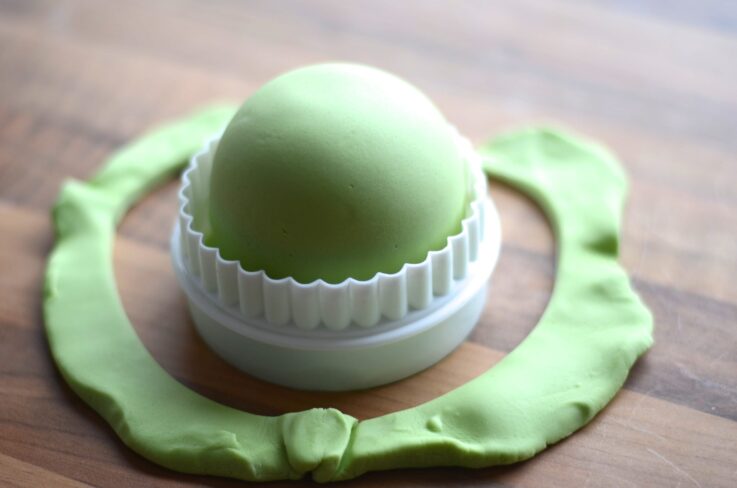
8Using a round cutter slightly larger than the cake, trim off the excess paste.

9Turn over and gradually fold up the loose edges to cover the base of the cake.
10Using a cake smoother, rub the joins until they disappear. Go to step 24 to complete your orange.
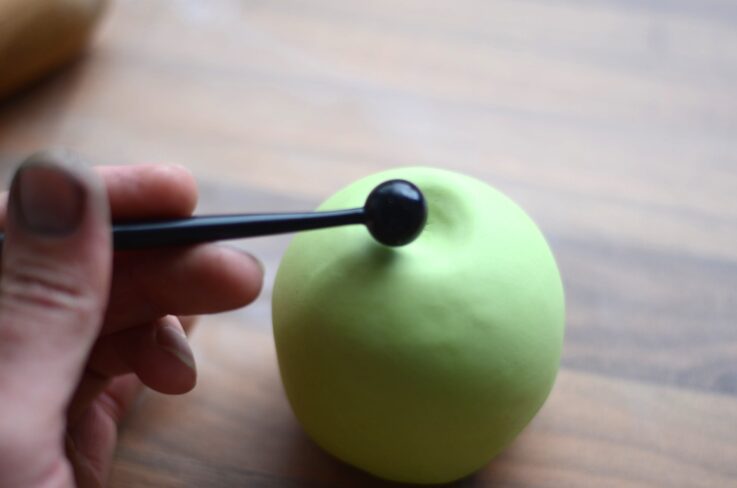
11Create an indent at the top of the cake with a large ball tool (go to step 21 to complete your apple)
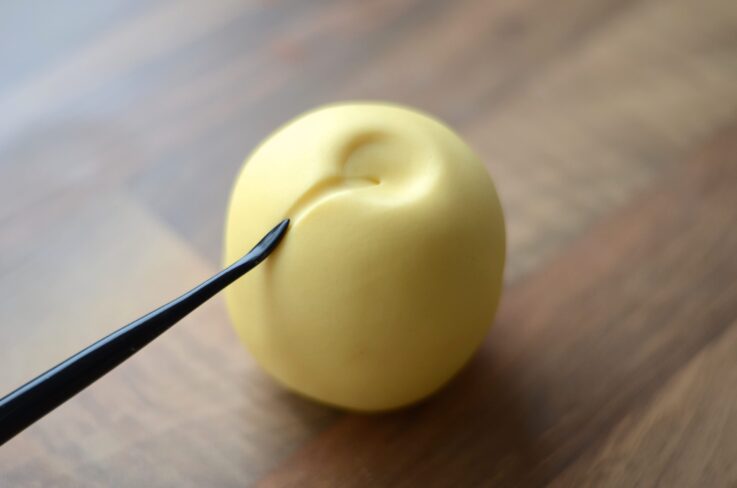
12Use a dresden tool to create an indent from the top of the cake to the bottom
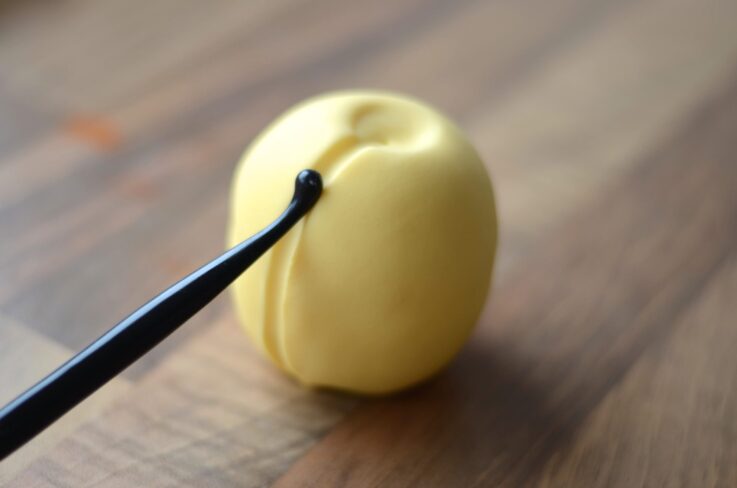
13Repeat step 12 but using a small ball tool to soften the edges of the indent

14Set to one side whilst you work on your other cakes
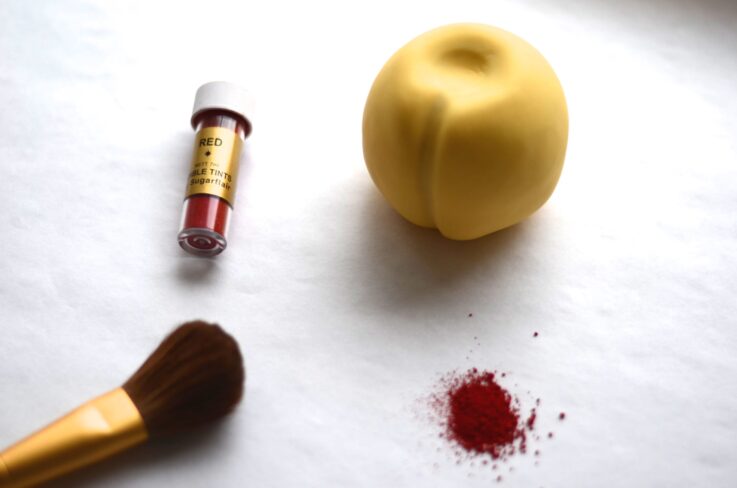
15Using a very soft brush and red blossom tint, start to shade the cake (Google images of the fruit, it’s a massive help!)
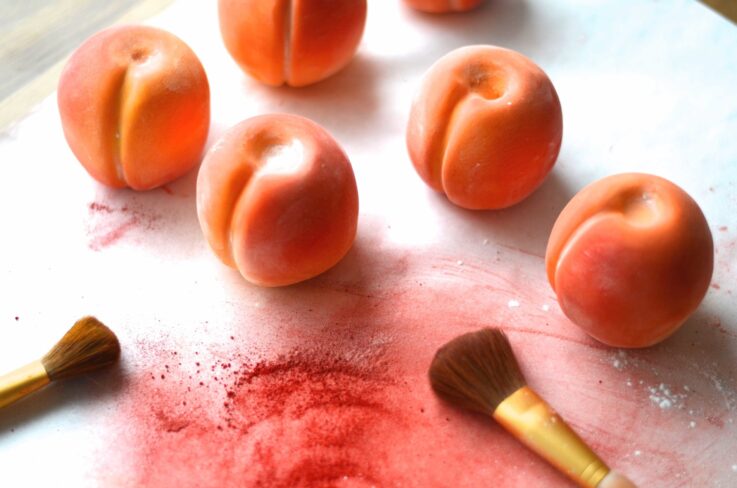
16Use a little tangerine colouring until you are happy with the colour, they should look something like this, depending on the image you are following!

17Finger-rub some icing sugar on the peach cakes to give it a more realistic look.
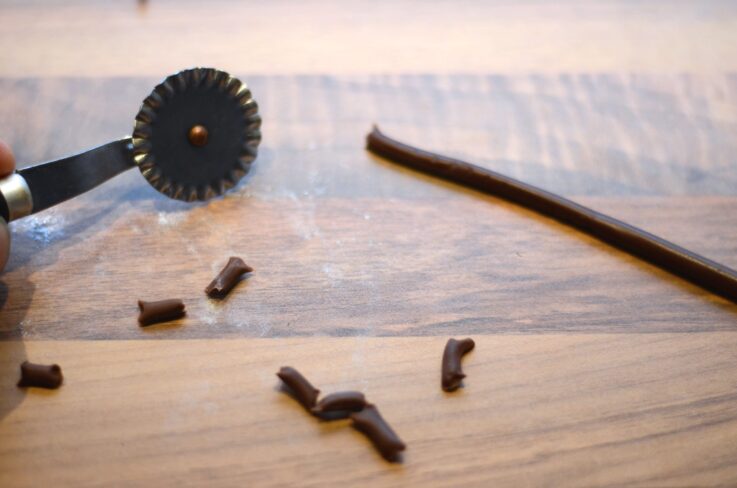
18Roll out some brown coloured or chocolate flavoured sugarpaste into a twig sized diameter and cut into short lengths (1cm), these are your stalks. Let them dry a little, then push them into the top indent of your cake.
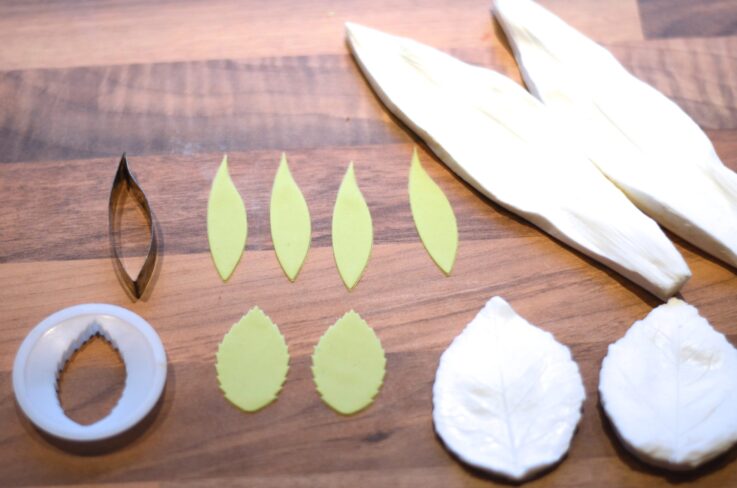
19Now to make some leaves, roll some green coloured flower paste as thin as you can. Cut out a leaf shape vein it and let it dry on a piece of foam so it has some shape.

20Once they are dry, dust them with a little moss green blossom tint.
21Apples – Stop at step 11 then follow these steps to complete your apple.
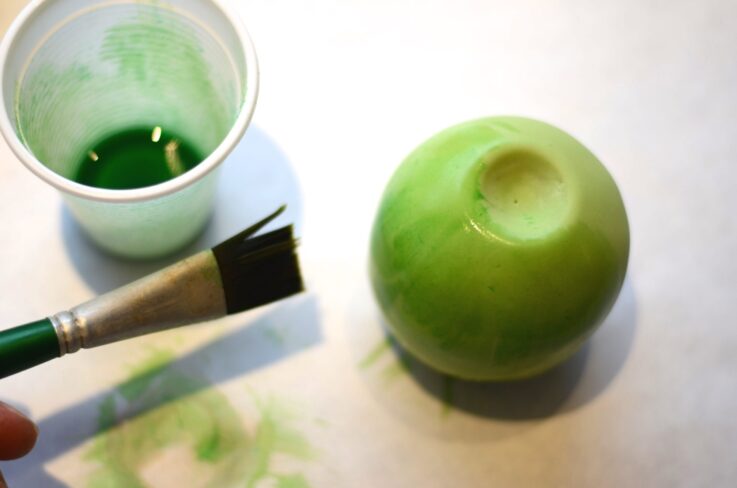
To colour an apple, Ben first mixed party green and spruce green to colour the sugarpaste then brushed it with a mixture of moss green, spring green and lemon extract.
To colour an apple, Ben first mixed party green and spruce green to colour the sugarpaste then brushed it with a mixture of moss green, spring green and lemon extract.
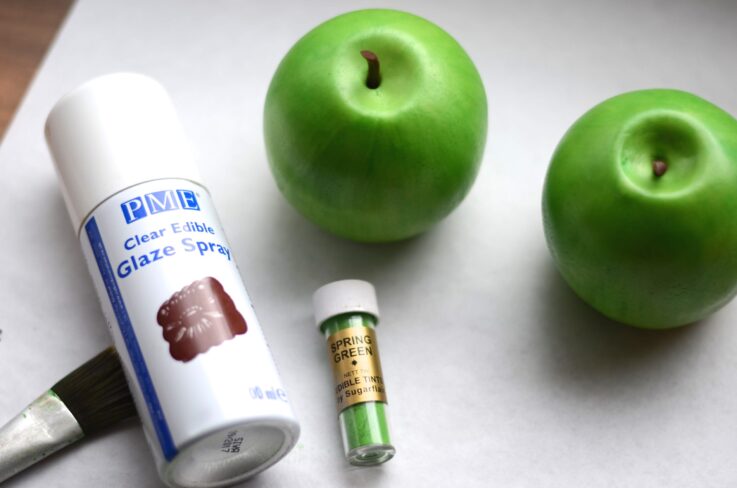
22Once the colour wash has dried, lightly spray the cakes with a clear glaze to create a more realistic effect
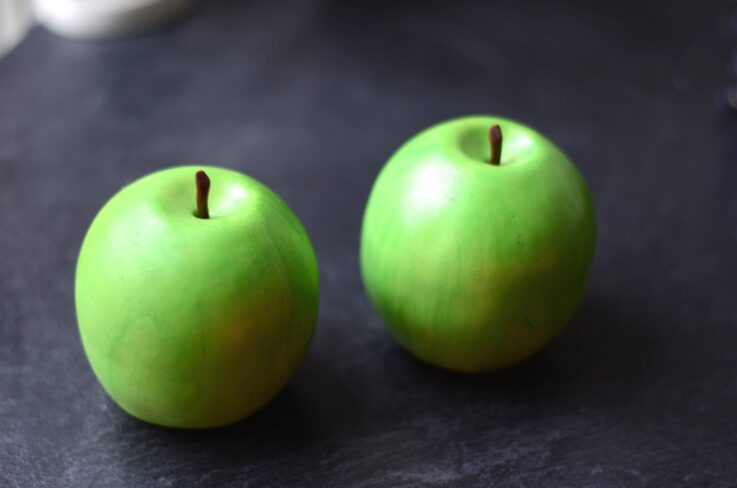
23The apples should now look like this
24To complete your orange, stop at step 10 and follow these steps.
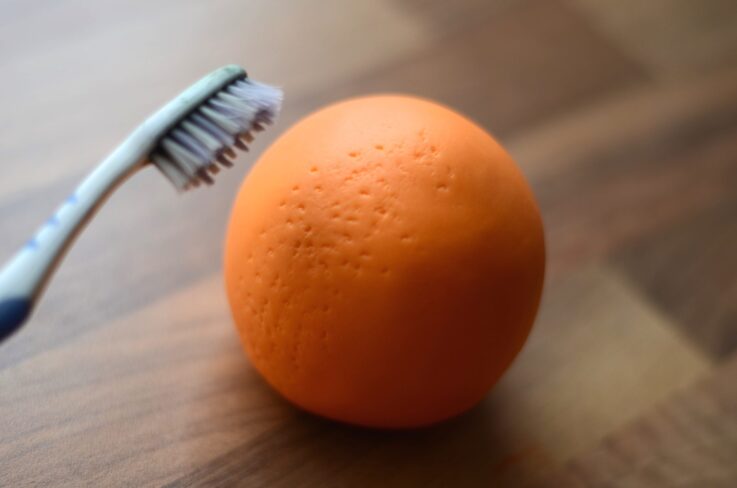
Add texture to the oranges by gently pushing a toothbrush into the soft paste
Add texture to the oranges by gently pushing a toothbrush into the soft paste
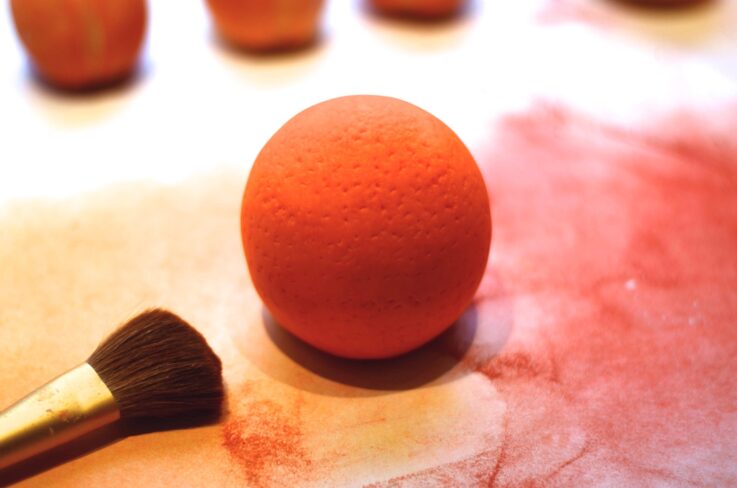
25Dust them with orange blossom tint, then spray with edible glaze to bring them to life
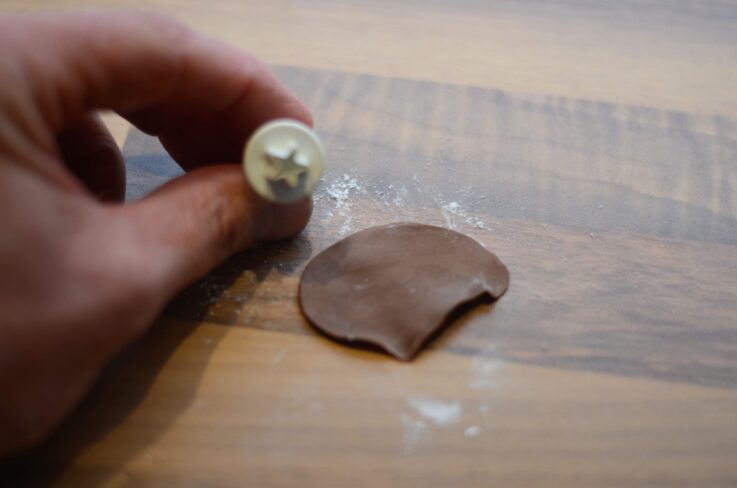
26For the finishing touch, cut out a tiny star from the brown paste and place it on the top of your cake. Attach with edible glue or a little water.
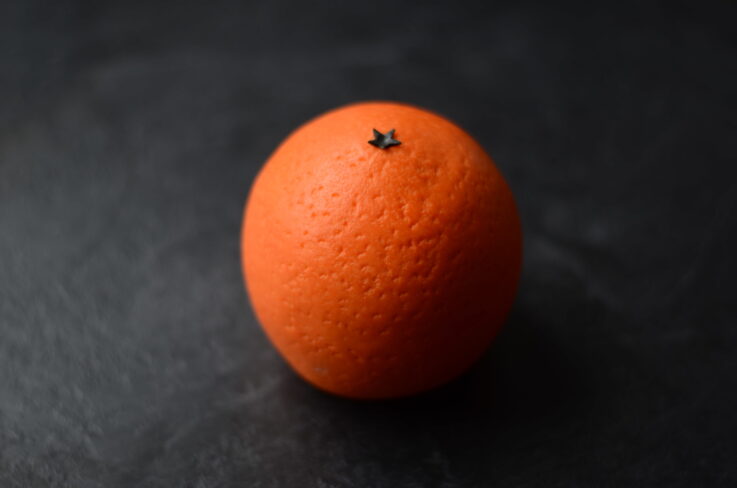
27Your orange cake should now look something like this
Equipment
Equipment
- 7cm silicone half sphere mould
- Pastry brush
- Rolling pin
- Round pastry cutter
- Smoother
- Large ball tool
- Small ball tool
- Dresden tool
- large soft brush (make up brushes are good)
- Leaf cutter
- Leaf veiner
- Toothbrush
- Small star cutter
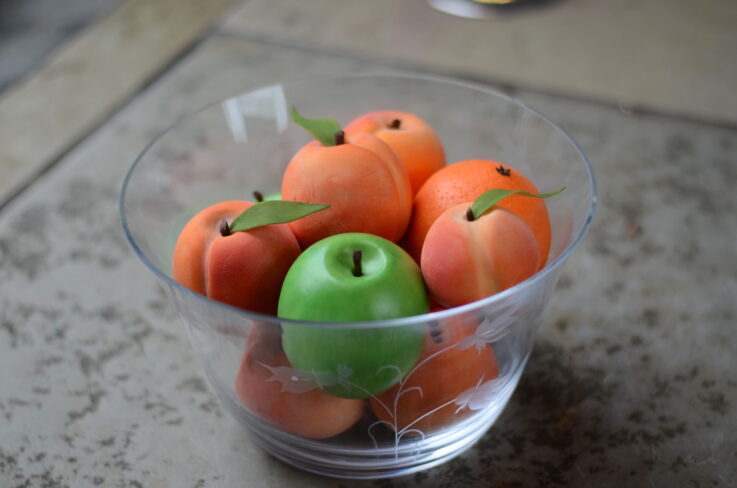
28Finally arrange your fruit cakes in a bowl but don’t expect them to last long! Thanks Ben for this fabulous tutorial!
Ingredients
Ingredients
- 500g sponge mix makes 6 whole cakes
- 150g sugarpaste per mini cake
- 20g brown or chocolate flavoured sugarpaste
- 100ml sugar syrup
- Egg Yellow Sugarflair gel colour
- Party Green Sugarflair gel colour
- Spruce Green Sugarflair gel colour
- Orange Sugarflair gel colour
- Red Blossom tint by Sugarflair
- Tangerine Blossom tint by Sugarflair
- Spring Green Blossom tint by Sugarflair
- Moss Green Blossom tint by Sugarflair
- PME edible clear glaze
- Lemon extract
