Tutorial Preview


Bite Sized
Watch Kelly make her Goblin Village cake in just one minute!
Highlights
Some hand-picked highlights from the full course
1. Structure
How I prepare for a competition, looking at the rules and sketching ideas; also we will get started and look at how to make a really strong, simple structure for our competition piece.
2. Legs and feet
We will be making realistic legs and feet using a mix of modelling chocolate and modelling paste.
3. Attaching the feet
Attaching the feet and making sure they look as realistic as possible.
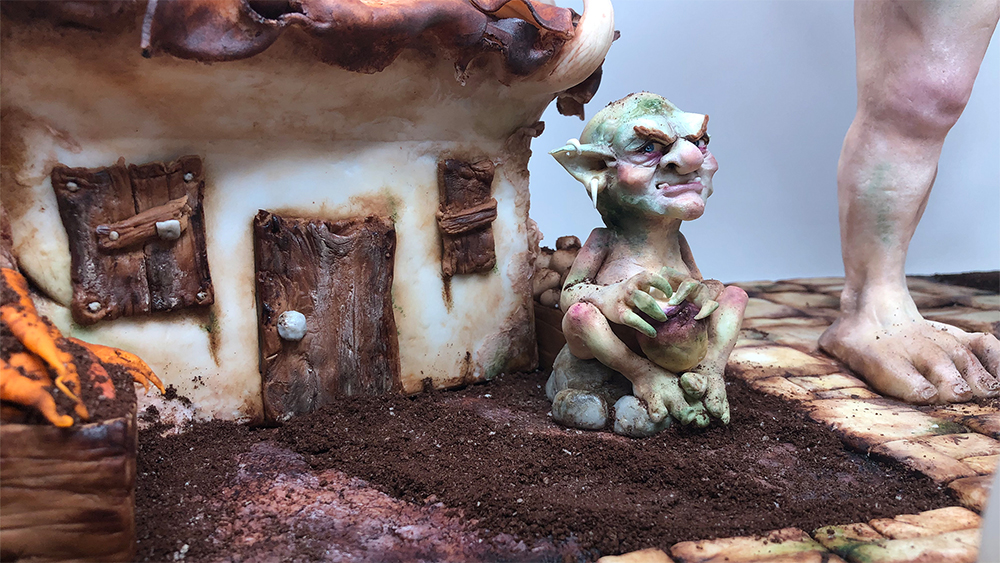
4. Path and roof
Adding a path to our board to give a realistic effect and then turning our attention to covering the roof to look like it is covered in material.
5. Painting the board, path and legs
Lot’s of painting in here, creating shadow and really making everything come to life.
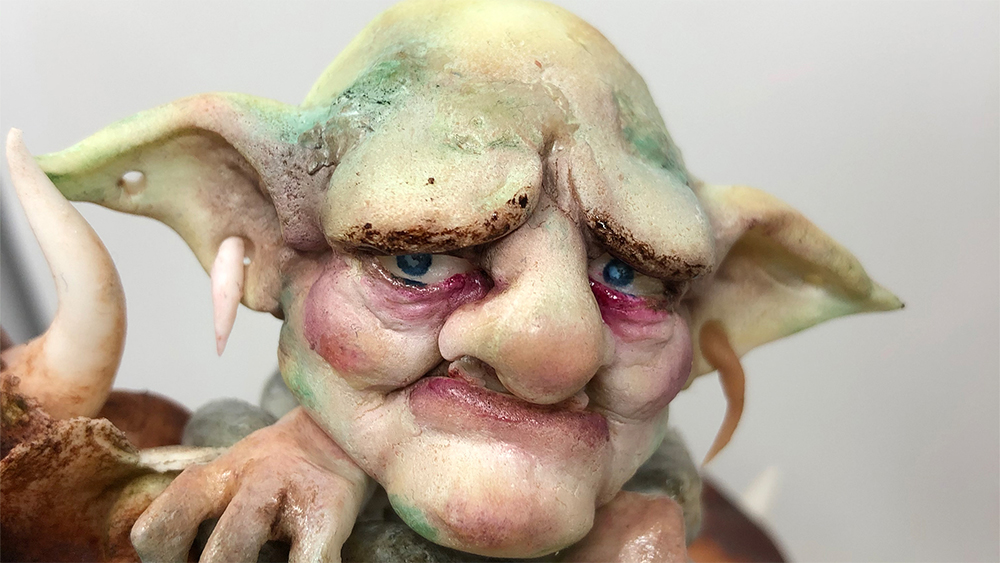
6. Goblin face 1
The FUN! Creating some of our goblins using modelling chocolate and modelling paste to create an army of grumpy goblins.
7. Goblin face 2
Another detailed look at how we get these guys made from start to finish.
8. Painting the heads
Bringing our goblins to life by hand painting and using gel colours.
9. Finishing the goblins
Finishing these wee guys and choosing two and giving them bodies, arms and legs.
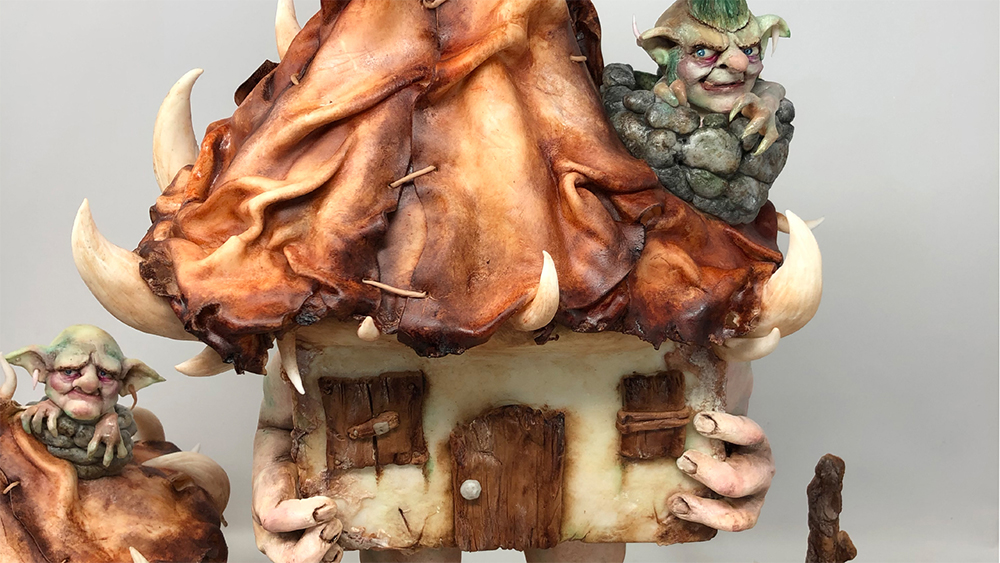
10. Painting the roof
Again using gel colours to give a great realistic look to our roof, all hand painted to create great texture, shadow and awesomeness.
11. Painting the house
Painting the house and really creating a weathered grubby look.
12. Board details
Board details – adding all the details,and the finishing touches.
13. Final thoughts
Giving our hoose (House) some muscle by making some arms and attaching and hand painting them.
14. Final Thoughts
We are done! We will have a look over everything and double check we are happy with it all ready to kick ass at competition!
15. Other Ideas
Kelly shares some other ideas for your own goblin village!
16. PRO Lesson
In this lesson, Kelly shares her top tips on competition pieces.
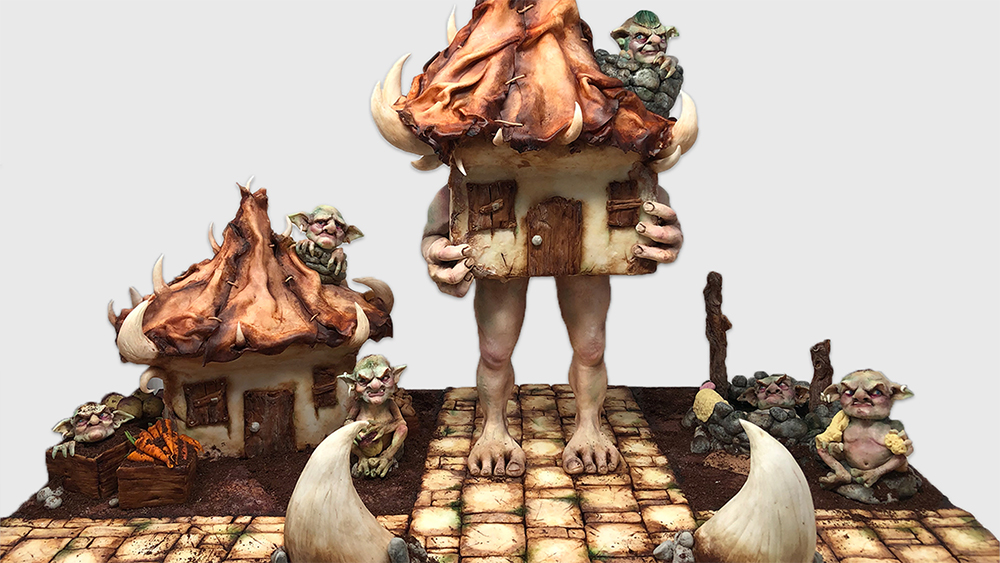
Goblin Village Cake Tutorial
In this tutorial we will be looking at cake competitions!!! We will be looking at the whole process from choosing your category, rules, sketching and planning out your entry. We will be focusing mainly on modelling and creating a piece that has the wow factor, highly detailed and competition ready.
A note from Kelly:
For this cake it took 7-10 days from start to finish. But for a real competition I always take at least 2-3 months minimum for an entry this large and detailed. For competitions a huge amount of work will need to go into your entry. Remember you are getting marked on things like, is this original, does it have the WOW factor, attention to detail, difficulty, techniques used, quality of the work. So really take your time and make sure the end result is made to the absolute best of your ability.
In the following tutorial, you will learn how to…
- Use modelling paste/modelling chocolate
- Make realistic arms, legs and feet
- Focus on hand painting, not an airbrush in sight!
- Create awesomeness of the highest order!
- and much, much more!
Don’t forget to share your interpretations of this wonderful cake with Paul and the rest of the CakeFlix community on our Facebook group.
View hundreds of more world-class tutorials only at www.cakeflix.com.