Tutorial Preview
Highlights
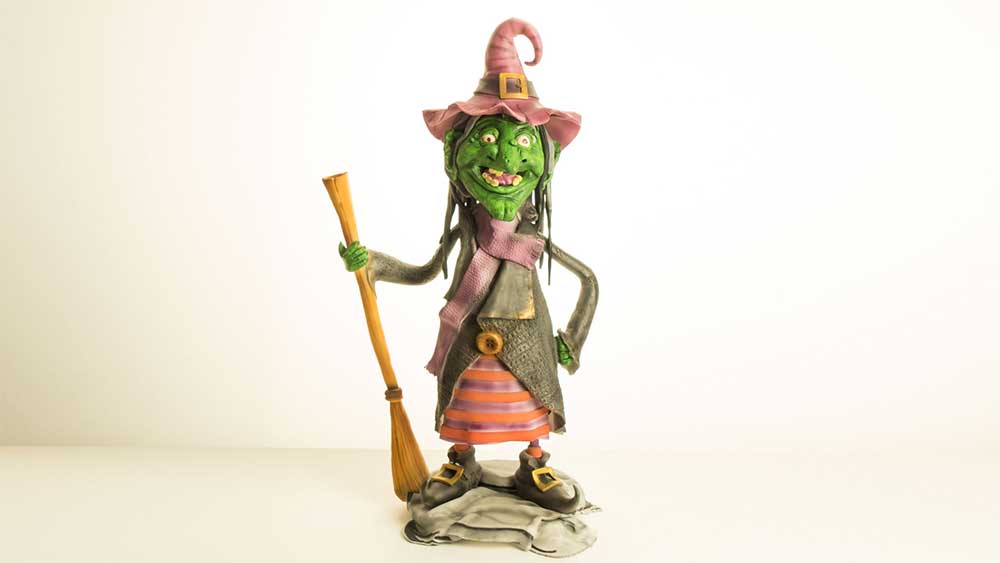
Some highlights of our spooky witch cake tutorial
1. Making the stand
As you can imagine, a cake like this requires a structured stand. In this lesson, Paul explains all the components and shows how to put the stand together for our Halloween Witch.
2. Carving the cake
Paul makes some adjustments to the stand then starts to stack and carve the cake. Although he’s using dummy cake, it’s exactly the same principles. As Paul says in the lesson, don’t be scared as ganache fixes everything!
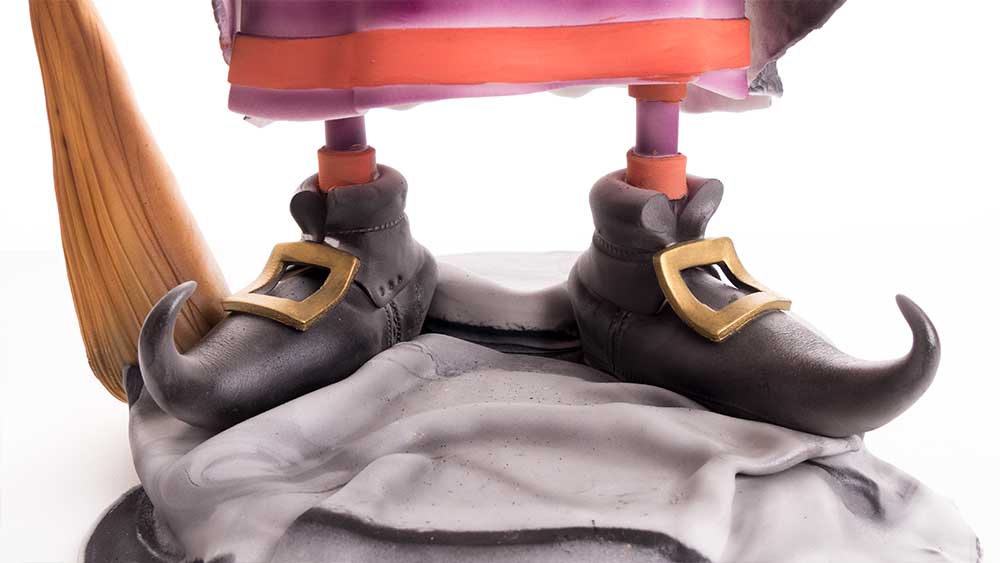
3. Covering the legs and making the shoes
Decorating the stand structure is key to getting that ‘How did they do that?’ question. In this lesson Paul gives our witch her stockings and distinctive witchy shoes.
4. Adding the boot tops and buckle
Paul finishes the witch’s boots and adds a buckle just for extra effect.
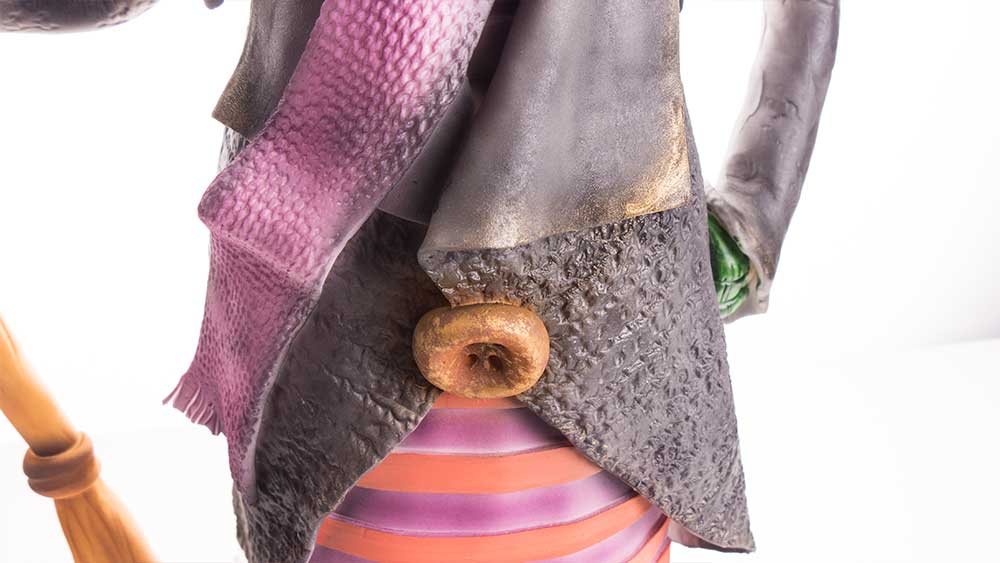
5. Adding the jacket
The jacket is added in three stages starting with a striped pattern on the undercoat which can be seen from the front. Paul then adds the jacket in two pieces which have been texturised.
6. Adding the arms and broomstick
The distinctive features are all coming together now when Paul adds the arms and broomstick. He uses armature wire for the arms and a threaded rod for the stick, then decorates with texturised sugarpaste.
7. Adding the neck and scarf
Using some simple techniques which he adds his own twist too, Paul adds the neck, scarf and collar before moving on to finish off the broomstick.
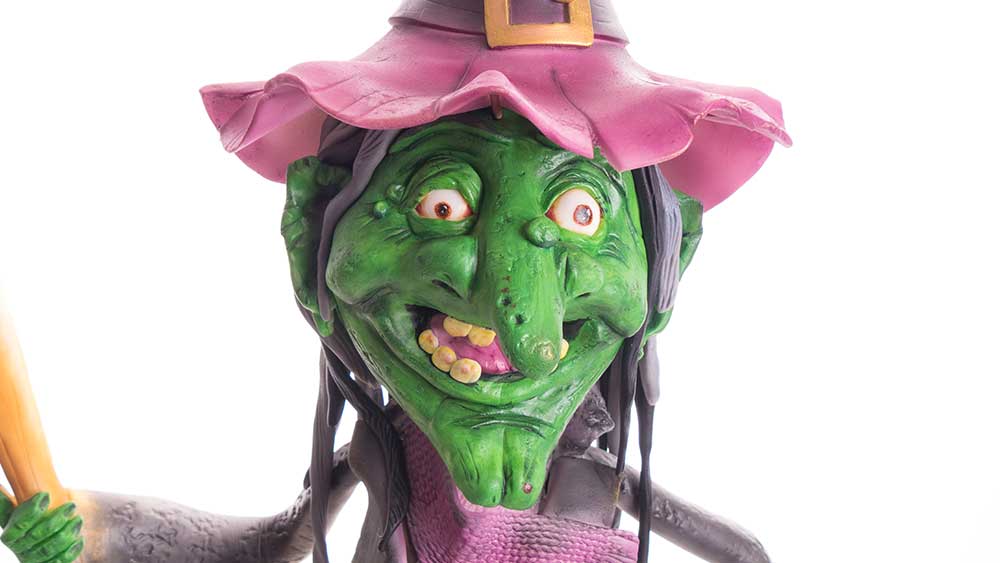
8. Creating the facial features
Up to this point Paul had left his options open whether he was going for a friendly witch or a scary witch. A Facebook poll decided that it should be a scary witch, so Paul creates the all important scary facial features from modelling chocolate.
9. Covering the head and adding the ears
This can be a little tricky, but watch how Paul covers the head making sure to bring out the key features, before adding the ears to really bring the face to life.
10. Airbrushing the body
Time to get the airbrush out! The colours are of course your choice, but Paul starts with the purple to decorate the stripes and some shading before moving over to the black for the jacket and shoes.
11. Colouring the stripes
Those with a steady hand can airbrush the stripes on, but Paul chooses to paint them by creating a rusty red colour, in keeping with our scary witch.
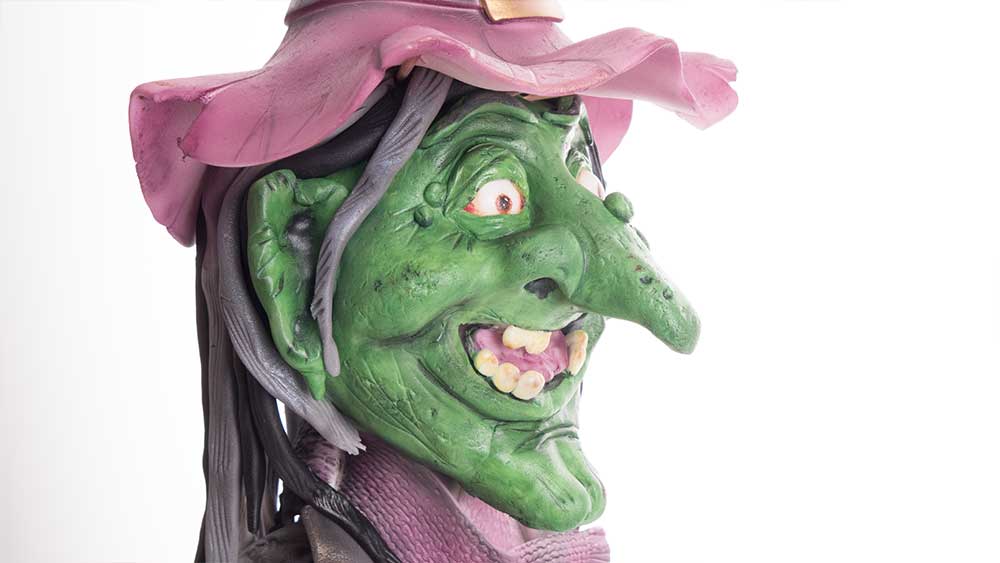
12. Painting the face
Time to get to work giving this witch her scary look. The face is always the main character point so watch how Paul colours the face adding all those extra details to great effect.
13. Adding the hair
Paul uses shades of grey and black textured sugarpaste sausages to make the hair. Remember that there’s a hat to go on so it doesn’t need to be perfect at the joins!
14. Adding the hat
No witch is complete without a pointed hat. Paul works with some shapes before deciding on the final design, which he then places on the head carefully making sure that the face can be clearly seen.
15. Painting the hat and finishing touches
Paul gets the airbrush out again to paint the hat then adds the belt and buckle, before painting them gold. He then finishes the eyes to give us one scary witch!
16. Other ideas
Paul shares with you some other ideas for this spooky witch design!
17. Pro lesson
Paul teaches you everything you need to know about selling a cake design like this.
🎃 Learn How to Make a Bewitching Halloween Witch Cake! 🧙♀️
Get ready to cast a little cake magic this Halloween with Paul Bradford’s spooktacular witch cake tutorial! This enchanting design is perfect for Hallows’ Eve — creepy, creative, and completely irresistible.
You’ll conjure up your own wickedly wonderful witch using professional techniques that are as fun as they are effective. By the end, your guests will be spellbound!
✨ In this tutorial, you’ll discover how to:
-
Build a sturdy internal structure that brings your witch to life
-
Master cake carving for a dynamic, sculpted design
-
Use airbrushing for eerie, otherworldly effects
-
Create detailed facial features full of character
-
Add depth and drama with hand painting
… and a cauldron full of extra tricks and tips along the way!
Grab your broomstick (and your spatula) — it’s time to whip up some wickedly good fun! 🧹🕸️
Don’t forget to share your interpretations of this wonderful cake with Paul and the rest of the CakeFlix community on our Facebook group.
View hundreds of more world-class tutorials only at www.cakeflix.com.