Tutorial Preview


Bite sized
Watch Sarah make her Moth Orchid Flowerpot Cake in just one minute!
Highlights
Some hand-picked highlights from the full tutorial.
1. Tools & Ingredients
Get to know the tools, ingredients and materials required to make these elegant flowers.
2. Making the Column
Sarah begins by making the column part of the Moth Orchid first.
3. Making the Throat
Here, Sarah makes the central area of the flower called the throat, including shaping the lips that gives the Moth Orchid its distinctive look.
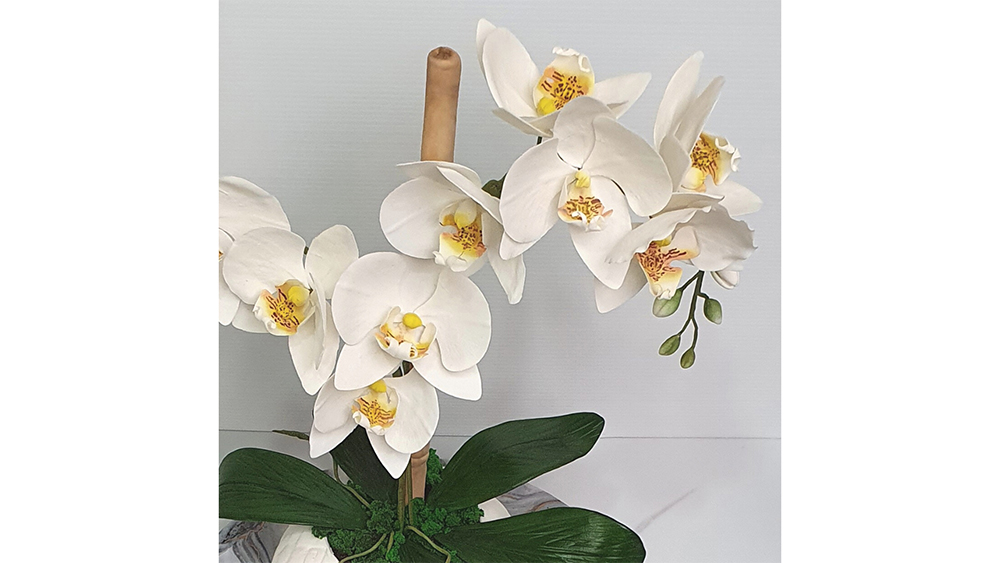
4. Making the Sepals and Petals
In this lesson, we learn to make the sepals and petals. Sarah shows that you can use a rose mould petal veiner as an alternative, if you do not have a Moth Orchid petal veiner.
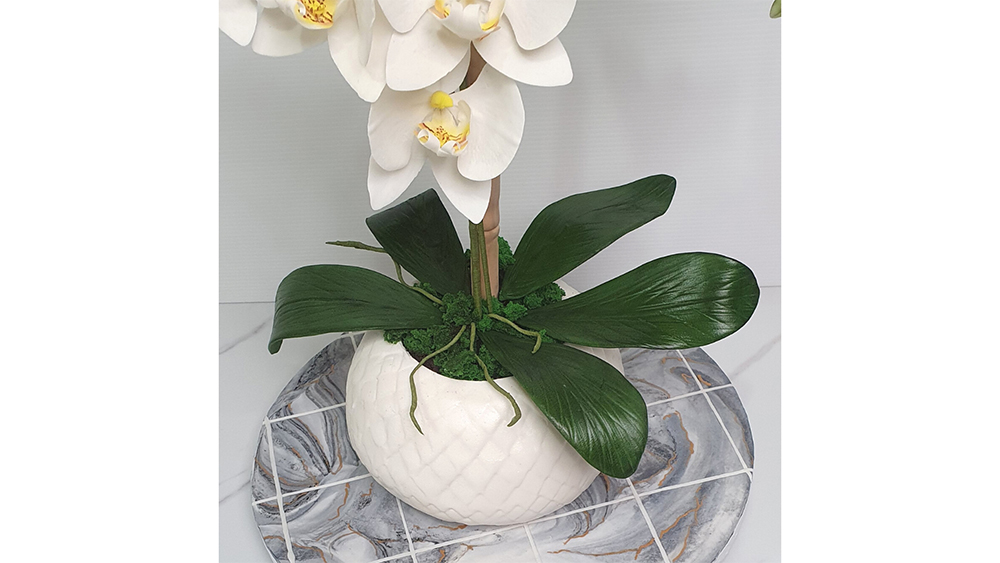
5. Making the Leaves
If like Sarah, you don’t have a Moth Orchid leaf cutter, no problem. She shares how you can easily use the leaf template that has been provided.
6. Making the Buds
Sarah shows you how to make natural looking buds in various sizes.
7. Dusting and Painting the Throat, Column, Sepals and Petals
Sarah starts by dusting the throat, then painting the delicate characteristics inside the throat and finishing by giving the column, sepals and petals a light dust as well.
8. Dusting and Steaming the Leaves and Buds
Sarah gives the leaves and buds a quick dust. Then uses a steamer to set the dust on them. If you do not have a steamer, you could use a saucepan with boiling water or over a kettle. Be super careful not to burn your hand when steaming these.
9. Assemble the Moth Orchid and Preparing the Buds
Make sure to follow Sarah as you assemble this delicate flower to get all the parts in the right place. Ensure you hold each part carefully, as you bring your gorgeous Moth Orchid together.
10. Assembling the Moth Orchids and Buds to the Stems
With all of your 9 Moth Orchid flowers made, and the buds ready. Sarah shows you how to bring together the buds and the flowers along the stem, helping you to create a beautiful double-stem of flowers, ready for the flowerpot cake.
11. Decorating the Cake Board
Sarah gets going by mixing some white, grey shades and black fondant together to create a marble effect. It is easy to do, but don’t get carried away over twisting and folding those colours. She also takes it one step further by showing you how to do marble tiles with a grout effect.
12. Bamboo Detail
The double-stem Moth Orchids are supported, but rather than adding a plain doweling. Sarah shows you how to re-create the look of a bamboo stick around the doweling for a hyper realistic effect.
13. Filling Cake with Ganache and Carving the Cake
Sarah fills and stacks two cakes together in preparation for carving. She explains how to use a cookie cutter as a guide and some cake flipping action, to help you get an even oval shape as you carve.
14. Crumb Coat
It is important to trap in those pesky but delicious cake crumbs. Sarah does a layer of ganache, ensuring that every part is covered with ganache to keep the crumbs at bay.
15. Final Layer of Ganache
Sarah covers the cake with a final layer of chocolate ganache. Use flexible acetate or similar to help you smooth over the curves of your cake.
16. Covering the Cake, Adding Texture and Cutting the Opening
In this lesson, Sarah shows you how to cover a curved cake and while the fondant is still soft, uses an interesting kitchen gadget to get a modern textured effect on the surface of the fondant. She also cuts away an opening ready for the chocolate soil.
17. Making the Edible Moss
Sarah shares her edible moss recipe with you and shows you how quick it is to make, with no oven in sight!
18. Adding Edible Soil & Dust Bamboo
Good old Oreos are crushed, which are perfect for creating the chocolate soil, Sarah adds it to the opening. We use some petal dusts, brushing colour into the bamboo groves to help make it look real.
19. Assembling Moth Orchids and Leaves to the Cake
With all your components now complete the fun can begin! After all your hard work, along with Sarah, you can carefully add your double-stem Moth Orchids and bamboo into your cake. The leaves are positioned into place, along with the edible moss, bringing your flowerpot cake to life.
20. Painting Gold-Flecks on the Marble Tiles
Nearly there just the finishing touches! Sarah gets you to use some gold lustre dust and a really fine paint brush, to paint in some organic gold-flecks to highlight some of the marble tiles.
21. Air Roots
Oops! Sarah, in all her excitement thinking she had finished this great cake, forgot to add the air roots. Make sure you add these into the existing straws in your cake.
22. Other Ideas
Sarah shares some other ideas of how you can play around with this cake design to create your own cakes.
23. PRO Lesson
In this lesson, Sarah gives you some extra info about the flowers, pricing and selling an elegant cake like this.
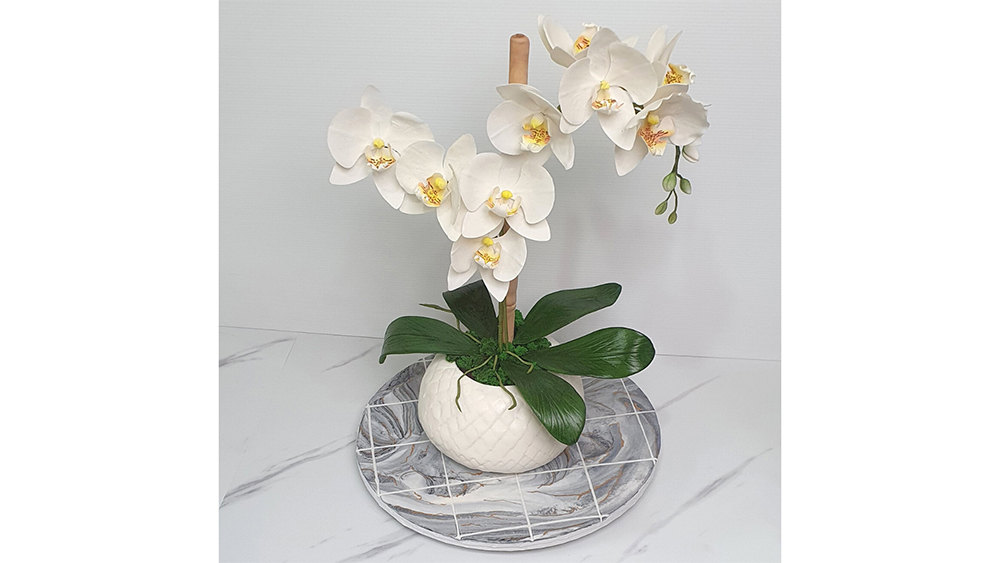
Moth Orchid flowers & leaves tutorial
In this tutorial, Sarah shares a range of techniques, that will enable you to make this elegant Moth Orchid flowerpot cake. Included is a quick recipe for edible moss, which is super simple to make, but gives this cake a realistic touch.
In the following tutorial, you will learn how to…
- Dust and paint the throat to achieve a beautiful natural look
- Make the leaves using the template provided
- Assemble all the Moth Orchids and buds, to create a gorgeous double-stem of flowers
- Make the edible moss for a realistic finish
- and much, much more!
Don’t forget to share your interpretations of this wonderful cake with Paul and the rest of the CakeFlix community on our Facebook group.
View hundreds of more world-class tutorials only at www.cakeflix.com.