Tutorial Preview
Highlights
1. Carving and Ganaching the Cake
Strapped for time? Why not skip to the Highlights lesson.
Paul starts off this tutorial by explaining the design and gets straight to carving the shape. You will be pleased to know that the carving is very minimal and easy to do. You are going to love making this cake! After around one minute of carving, it’s onto ganaching the cake in preparation to be covered in sugarpaste. After the front and back have been ganached, place the cake in the fridge for a few minutes and then we can move onto the next lesson.
2. Ganaching the Cake
3. Finishing the Ganaching of the Cake
4. Icing the Top of the Cake
5. Making a Template and Adding the Frills
6. Icing the Board and the Front of the Cake
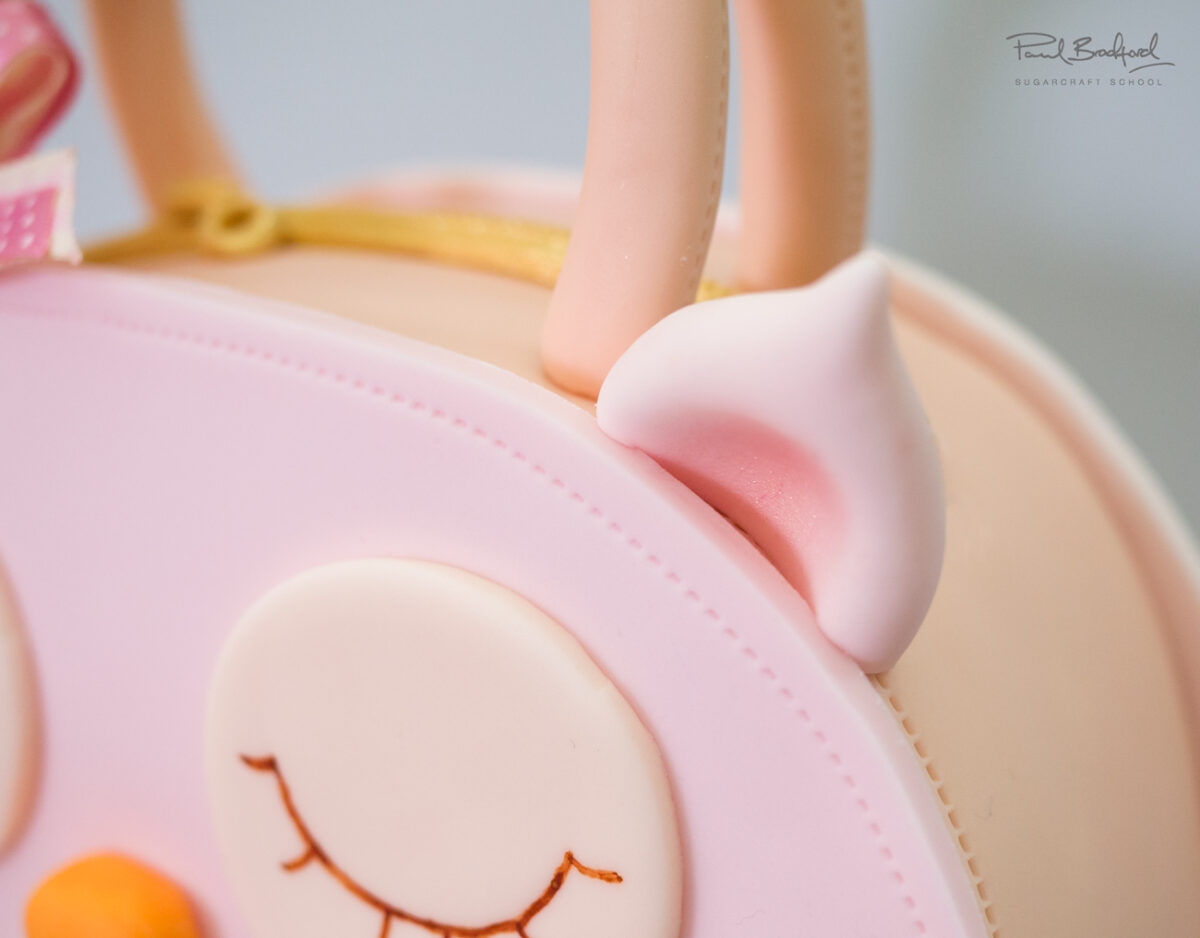
7. Adding the Nose and Eyes
8. Painting the Eyes and Adding Blusher to the Cake
9. Adding the Feet and the Zip
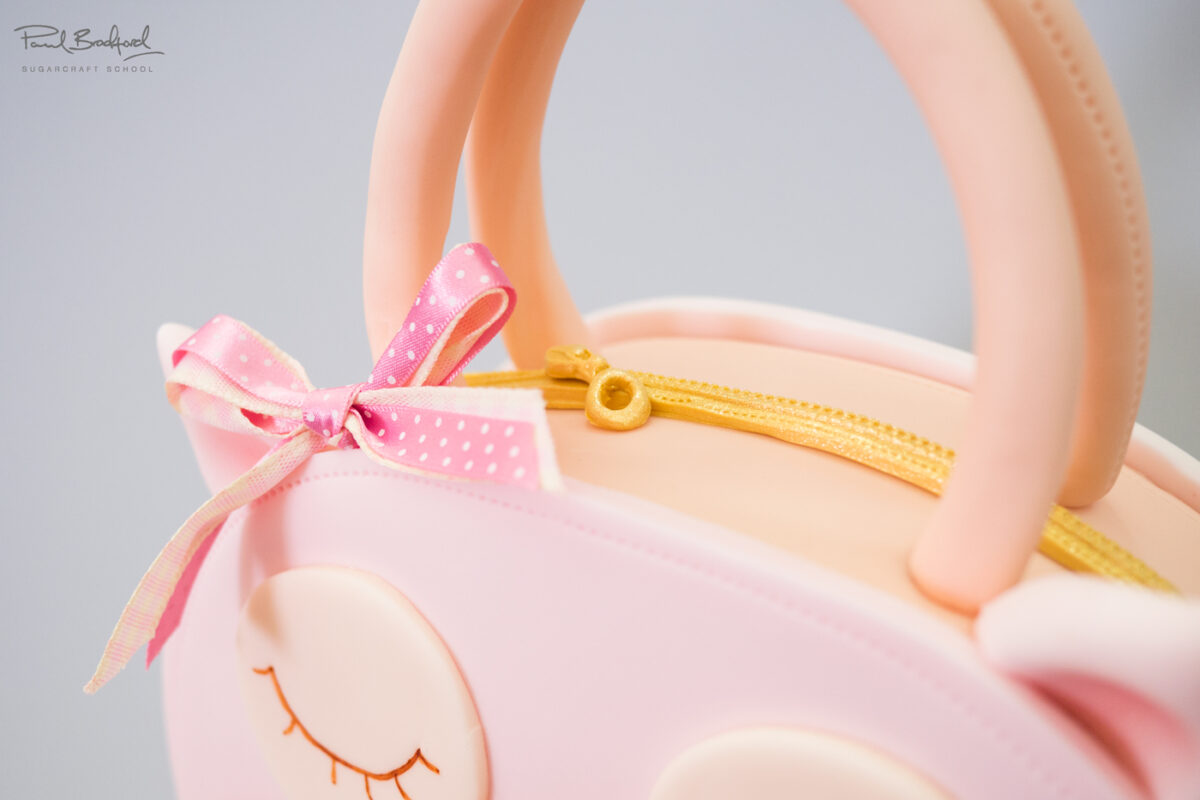
10. Adding the Handles, Ears and Bow
Gather some 20 gauge wires, sugarpaste and florist tape and you’re ready to make the handles. Simply roll out two long, thick sausage shapes using your hands or some cake smoothers and then insert the wire. Put your posy picks in the cake ready to hold the handles to make it food safe. Paul doesn’t need to worry about this step as his cakes don’t get eaten…unfortunately. The rest is just as easy. Paul shows us a quick way to make owl ears and a cute little bow. And now we’re all finished!
11. Other Ideas
12. Pro Lesson
Paul introduces us to this adorable Owl Handbag Cake Tutorial on CakeFlix Tutorials. This design is suitable for beginners and is a great cake to make for those who want to learn a variety of beginners skills or have a special celebration cake to make for a little girl – the colours can easily be adapted to your preference to create the perfect cake. The Owl Handbag Cake Tutorial teaches a range of skills and techniques that are adaptable for other designs.
More about Owls
Owls, magnificent nocturnal predators, grace the night skies with their silent flight and captivating eyes. These enigmatic birds possess remarkable adaptations that allow them to excel in their hunting prowess. Their large, forward-facing eyes grant them exceptional depth perception, making them adept at spotting prey in the darkness. Specialized ear tufts, or “ear-like” feathers, enhance their hearing, enabling them to pinpoint even the faintest sounds made by their prey.
Owls’ wings are uniquely designed for stealth and silent flight. Their feathers have soft, velvety edges, which minimize the sound produced during wingbeats. This adaptation allows them to approach their prey undetected, making them formidable hunters. Owls’ talons are sharp and powerful, enabling them to seize and carry prey with ease. Some species, such as the eagle owl, have talons that can exert a force comparable to a human hand.
Owls exhibit remarkable hunting techniques. They often perch on high vantage points, scanning the ground below for potential prey. Once they spot a target, they launch into a swift, silent attack, using their sharp talons to capture their quarry. Owls are opportunistic feeders and consume a wide range of prey, including small mammals, birds, insects, and even fish.
These nocturnal predators play a crucial role in maintaining the ecological balance by controlling rodent populations. Their presence in an ecosystem helps prevent the spread of diseases carried by rodents, such as hantavirus and Lyme disease. Owls are also cultural symbols revered in many societies throughout history. In some cultures, they are seen as symbols of wisdom and knoledge, while in others, they are associated with mystery and the supernatural.
Owls, with their beauty, adaptations, and ecological significance, are a fascinating and essential part of our world. Their silent flight, piercing eyes, and captivating presence continue to inspire awe and wonder in people of all ages.
Don’t forget to share your interpretations of this wonderful cake with Paul and the rest of the CakeFlix Family on our Facebook group.
View hundreds of more world-class tutorials only at www.cakeflix.com.