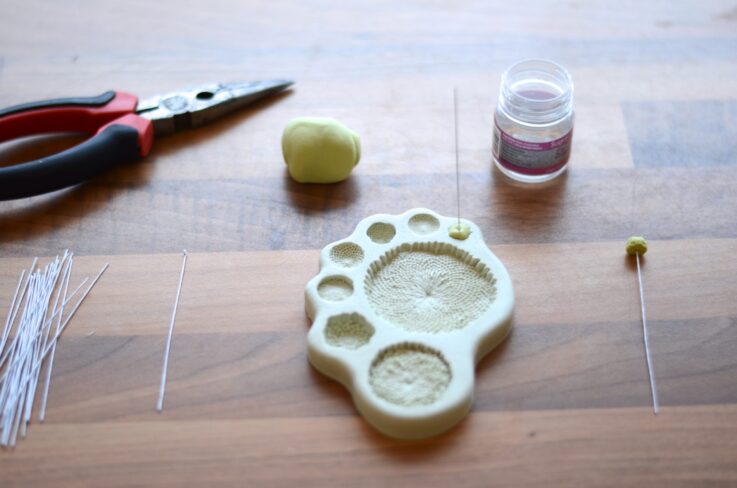
1Push a tiny ball of green paste into your veiner, dip your hooked 24g wire into the glue, shake off any excess and push into the ball of paste. pinch to make sure it is securely sealed then eject from the mould and leave over night to dry.
Spread The Love – A Valentine’s Day Cake Tutorial by Ben Fullard

2Roll out some white flower paste (no 6 on a pasta machine) and using a clematis or (Hydrangea) cutter as Ben has done, cut out your flowers and keep them in a sealed bag to stop them drying out. Vein them and gently rub around the edge of each petal with a Dresden tool to lightly frill the petal.

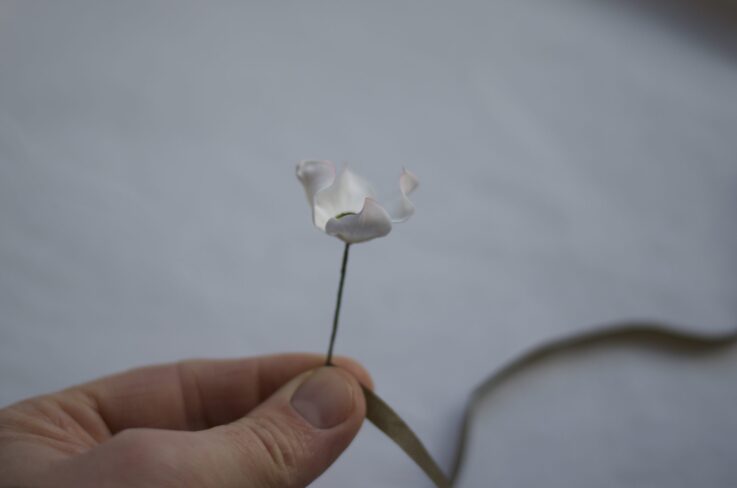
3Paint the back of your dry entry with a little edible glue and attach the flower
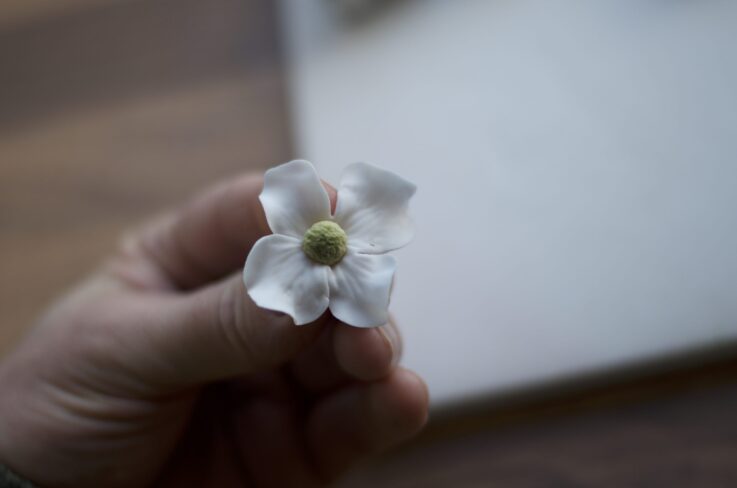
4Squeeze with your finger tips to make sure they are properly attached and at this stage you should pinch and curl the petals to give them some life.
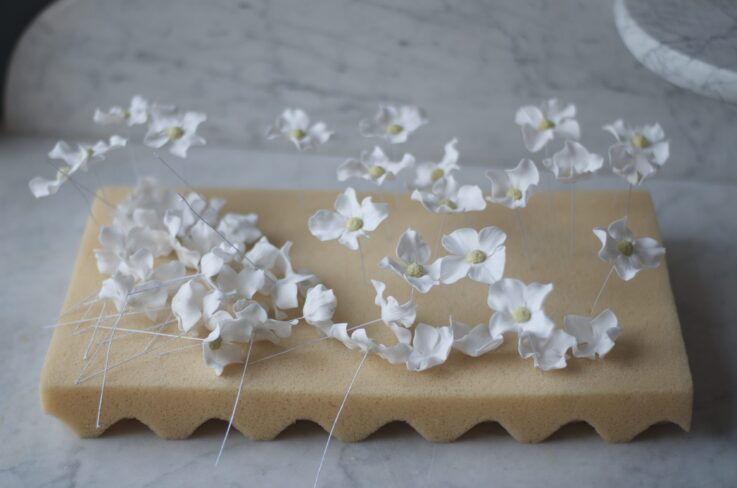
5Push into foam to dry. (Overnight).
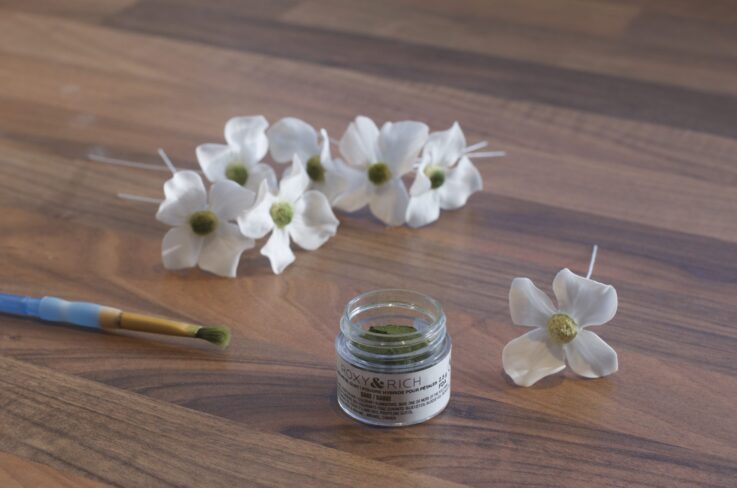
6Colour the centres with a little green dust.
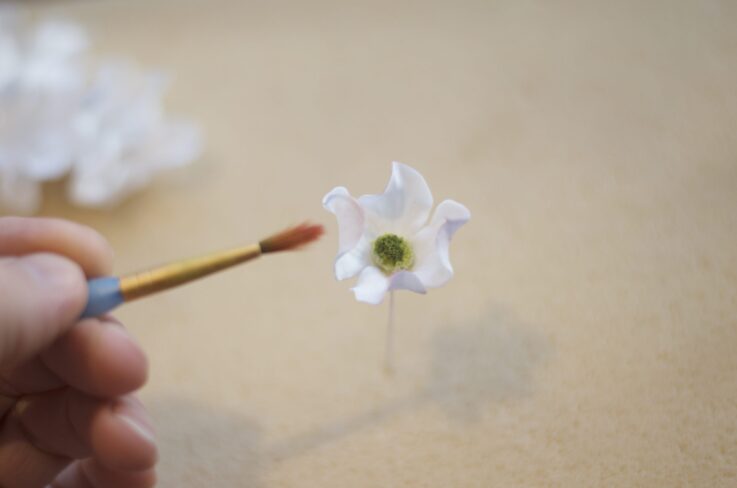
7Tint the edges of the petals with a little fuchsia pink dust.
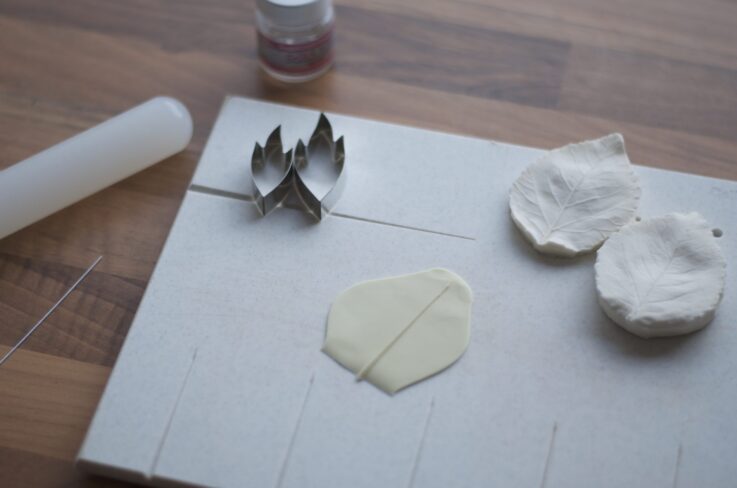
8Roll out some green paste on a grooved board.
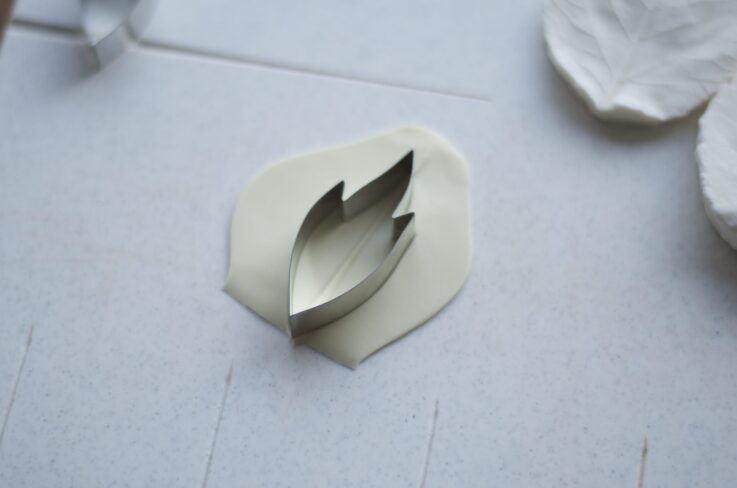
9Turn over the paste and cut out your leaf shape.

10Dip your 26g wire in to the edible glue, remove any excess, then holding the leaf between your finger and thumb gently push the wire into and along the deep vein created by the board.
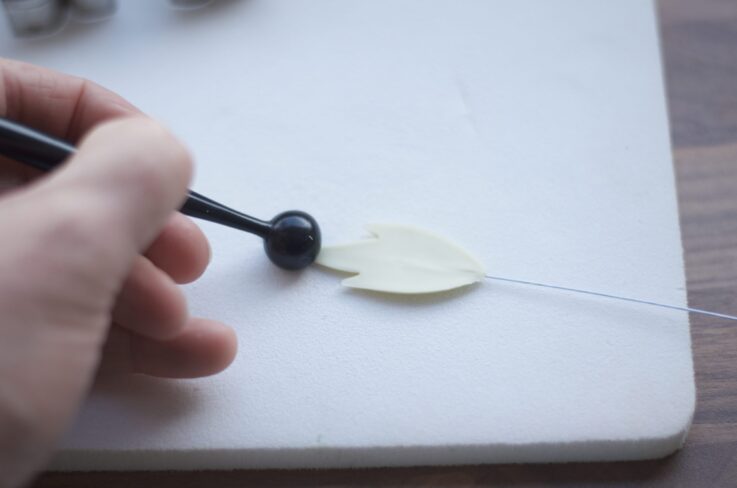
11Soften the edges with a ball tool.
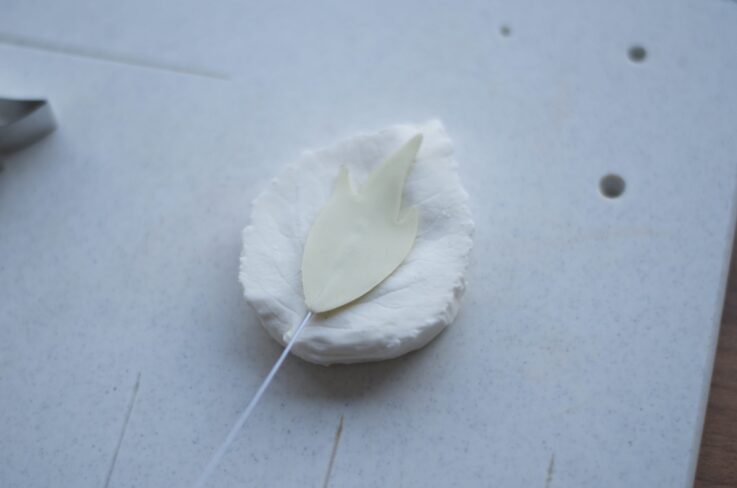
12Place onto your veiner, (Ben used a rose leaf veiner) with the thick vein facing down in the mould.
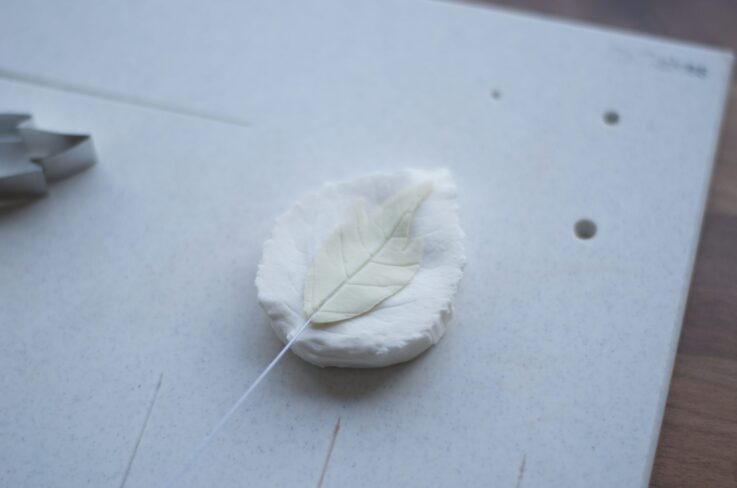
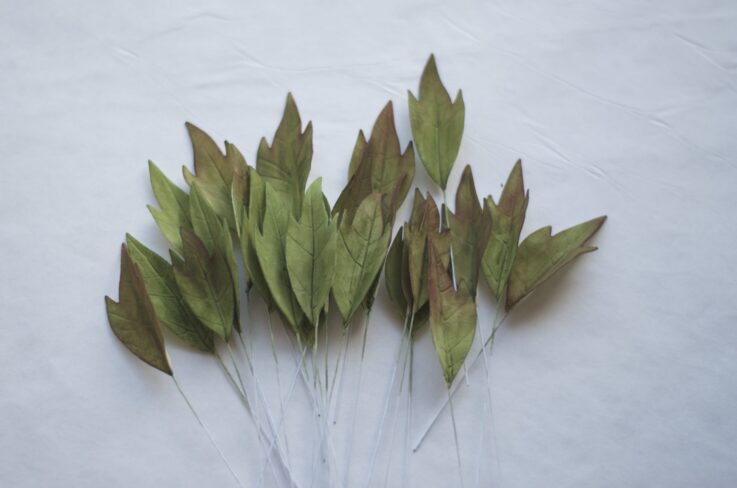
13Your leaf should now look like this.
14Gently pinch the base to give the leaf some shape.
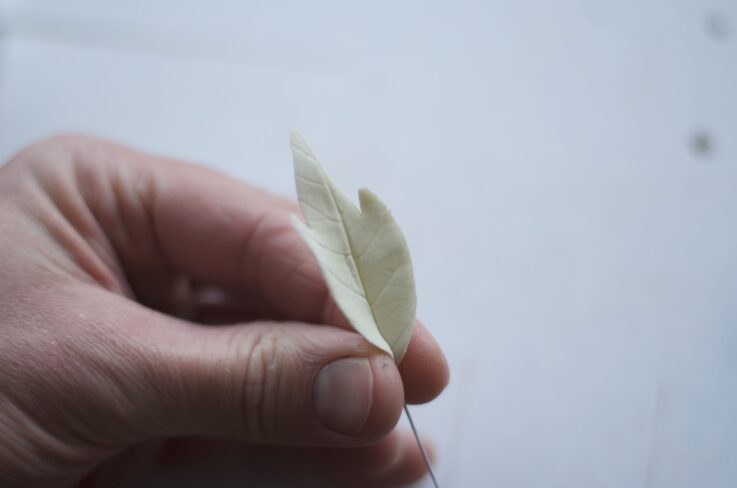
15Set aside to dry, usually overnight.

16Mixing some of your green dust with some lemon extract to create a paint, gently paint the leaves. TIP Two thin layers works better than one thick one.
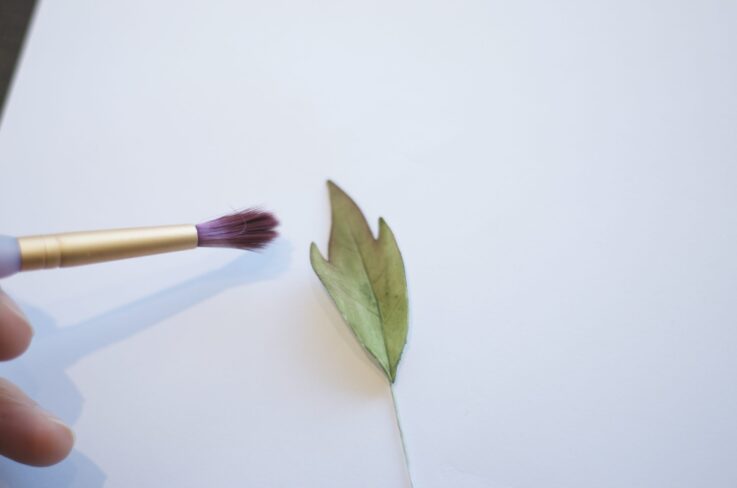
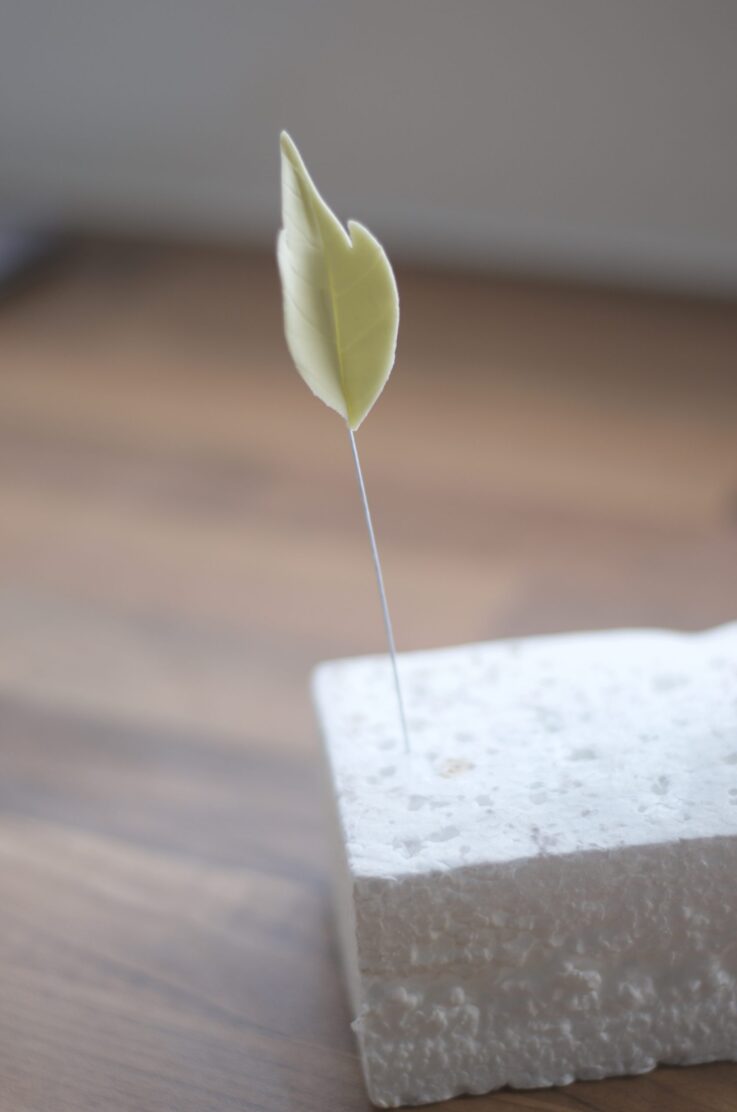
17Once dry, usually 5 after minutes lightly dust the end of the leaves with your Bordeaux coloured dust.
18Don’t paint all of the leaves exactly the same as this never happens in nature.
19Using your brown floristry tape, first, stretch it to make it sticky then gently wrap around the wire from underneath the petals to the base of the wire.
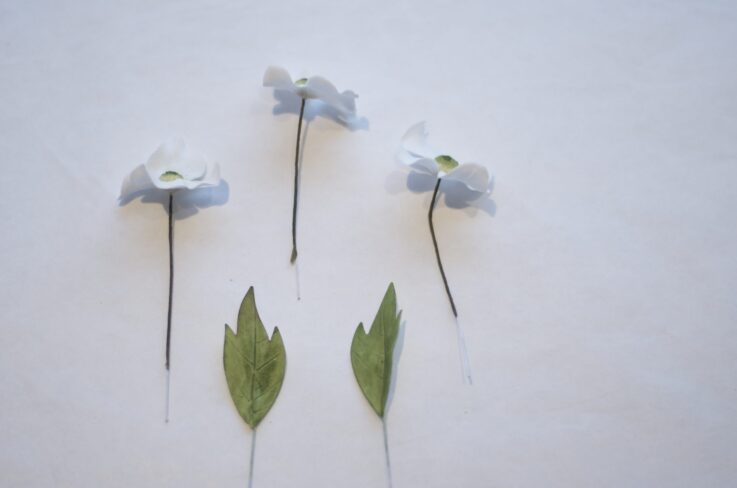
20Tape all of your flowers but not the leaves, as the wires will not be showing.
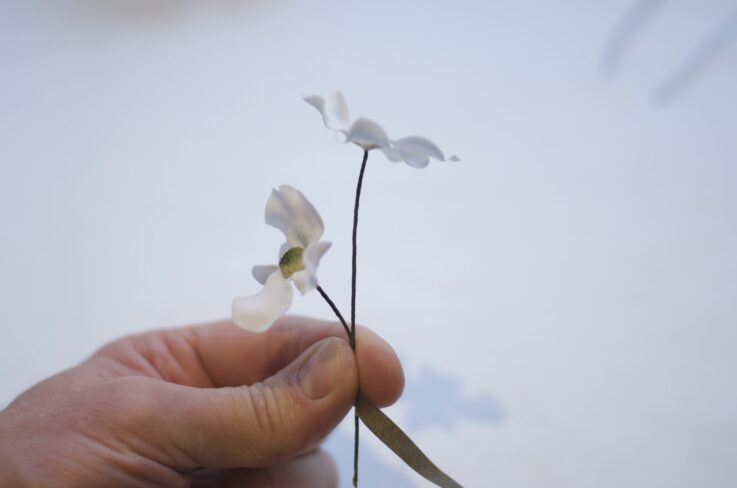
21Now, using the same method, tape one flower to an other.
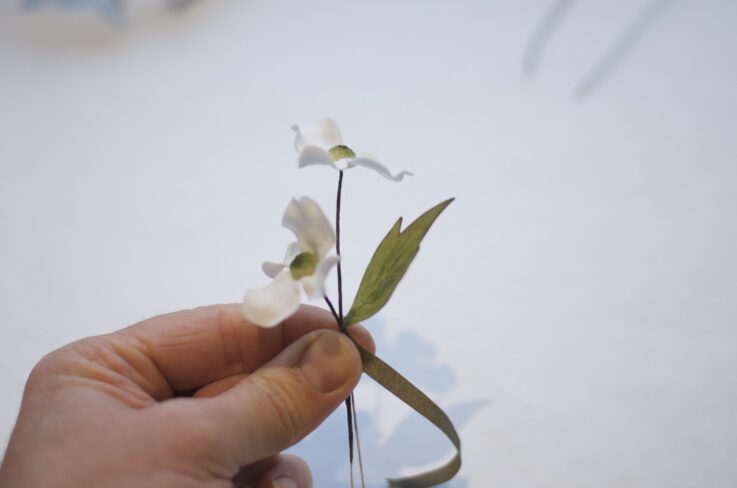
22Now start adding the leaves.

23It should now look like this.
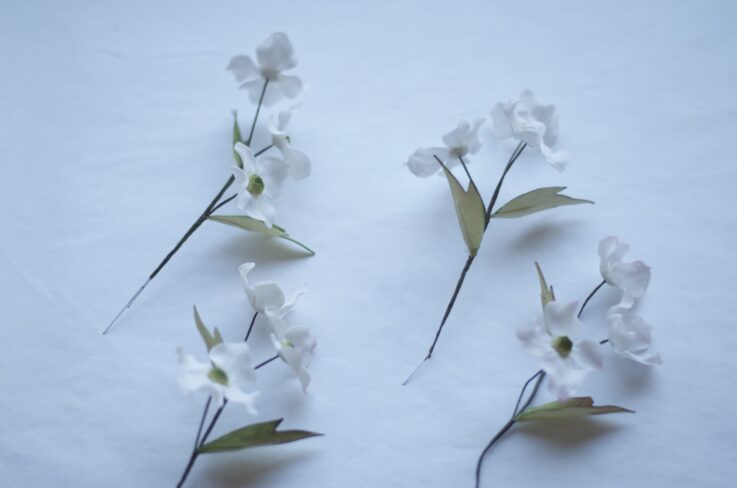
24Tape all of the flowers into small ‘clumps’
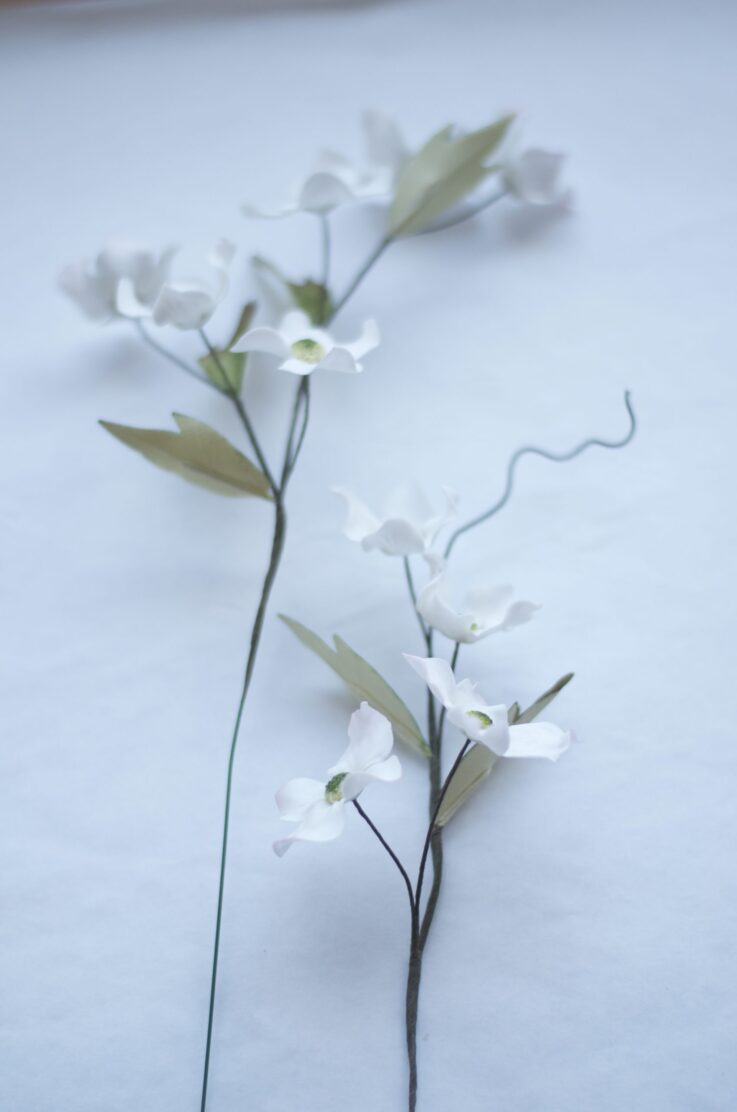
25Now tape the clumps together to make small branches. You can tape the small branches together to make larger branches, and so on.
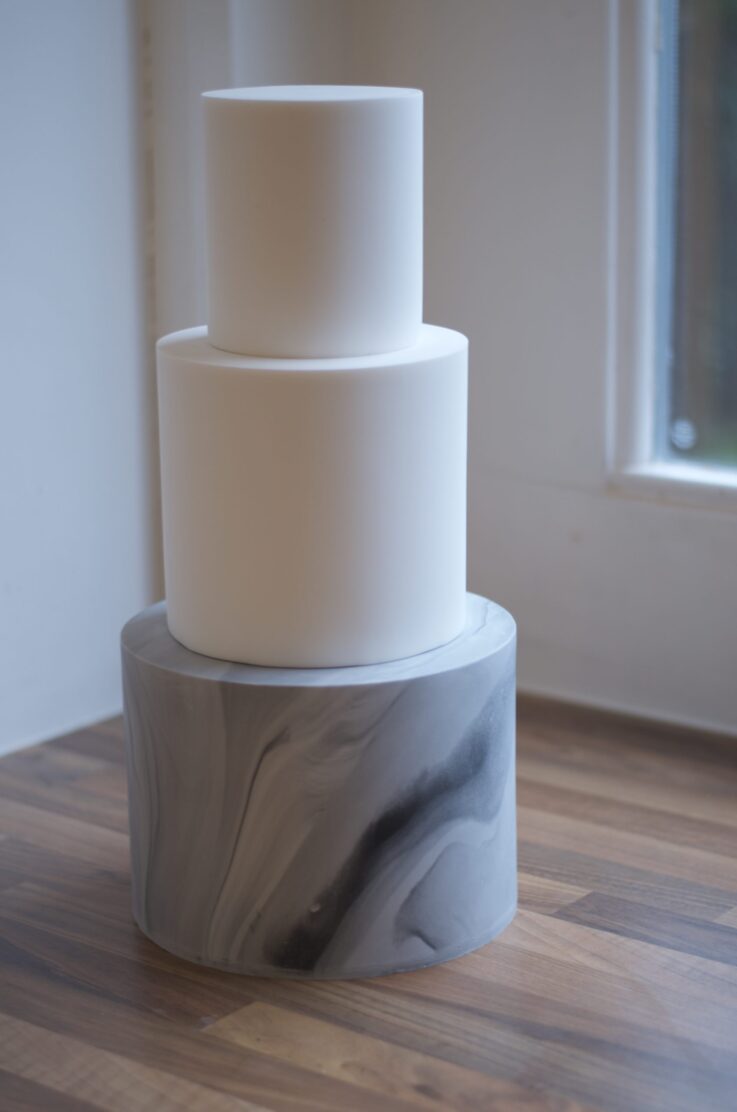
26You will need to have a 4” 6” and 8” cake covered.
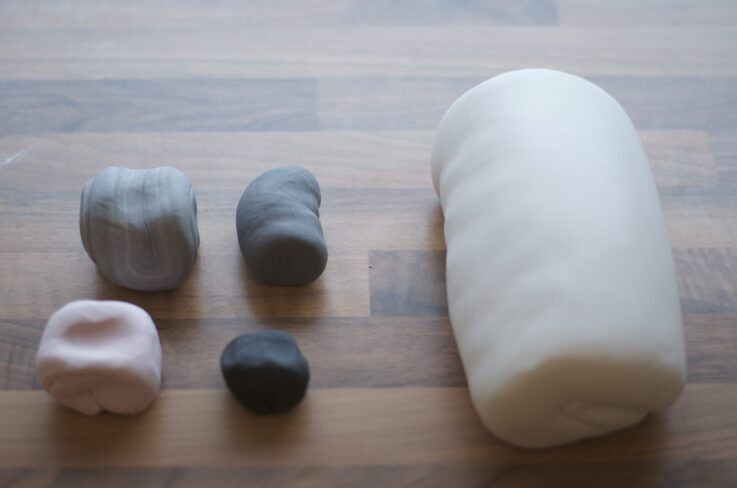
27To create the marble effect for the bottom tier mix 90% of your sugar paste in a pale grey, (it does not matter if it is not fully mixed) 3% each of Darker grey, deep grey and Pale pink (or any colour to compliment your flowers) and finally 1% in black.

28Roll these out and set them up something like in this picture. Carry on kneading these together as you would normally. When the surface area has the desired marbled effect stop kneading and roll it out.
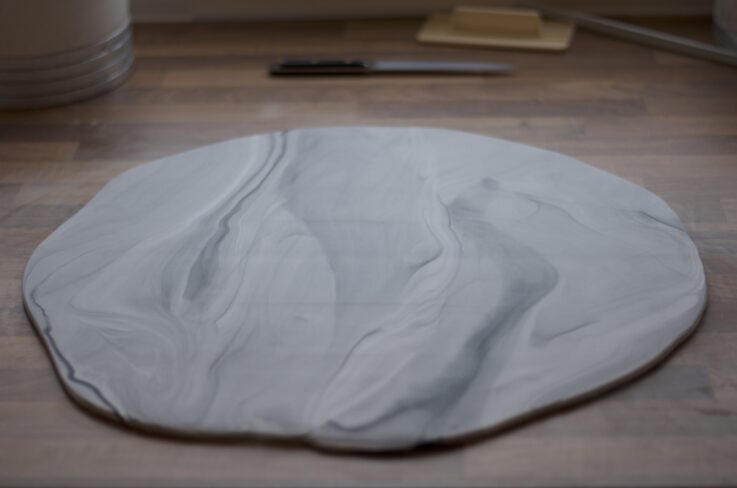
29It should look something like this.
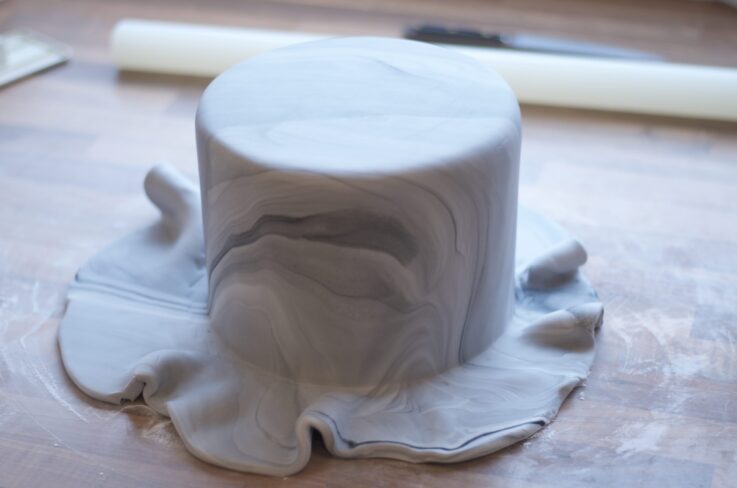
30Cover your bottom tier.
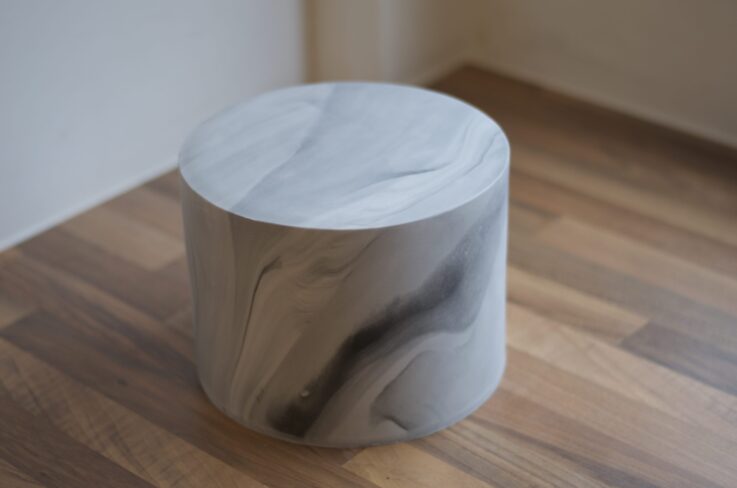
31Ben thinks sharp edges work best and make the marble look more realistic.
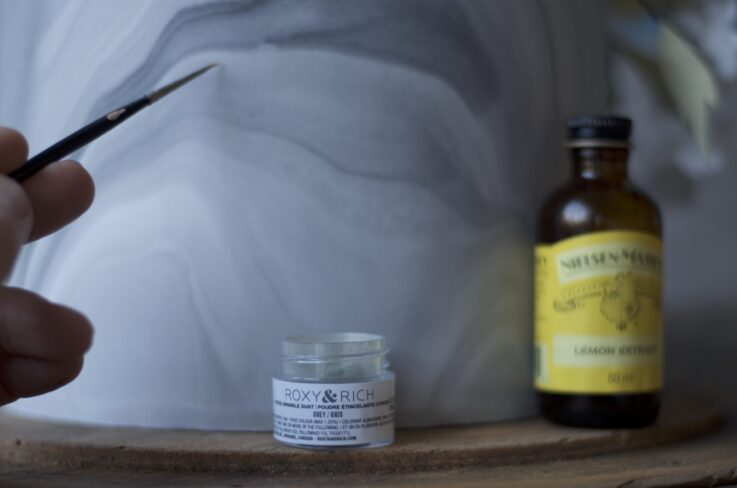
32Using your silver dust mixed with lemon extract, make a paint and add fine line details to your marble.
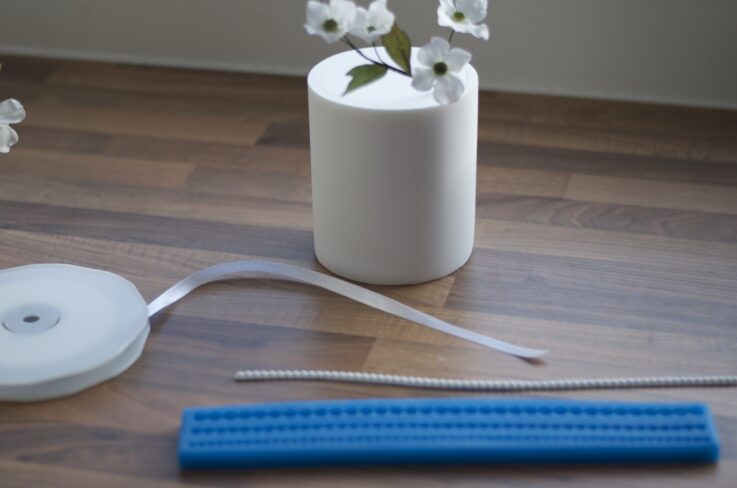
33Trim the edges of your other two tiers with either ribbon or a sugar moulding
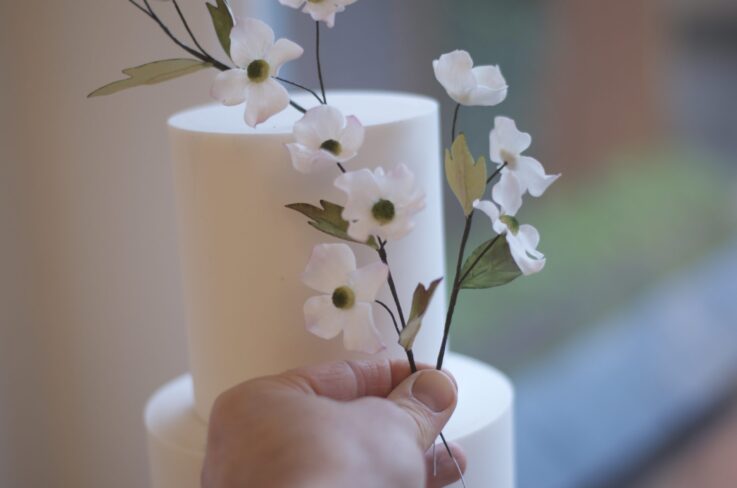
34Hold the flowers in place first to see how many and exactly where you want them.
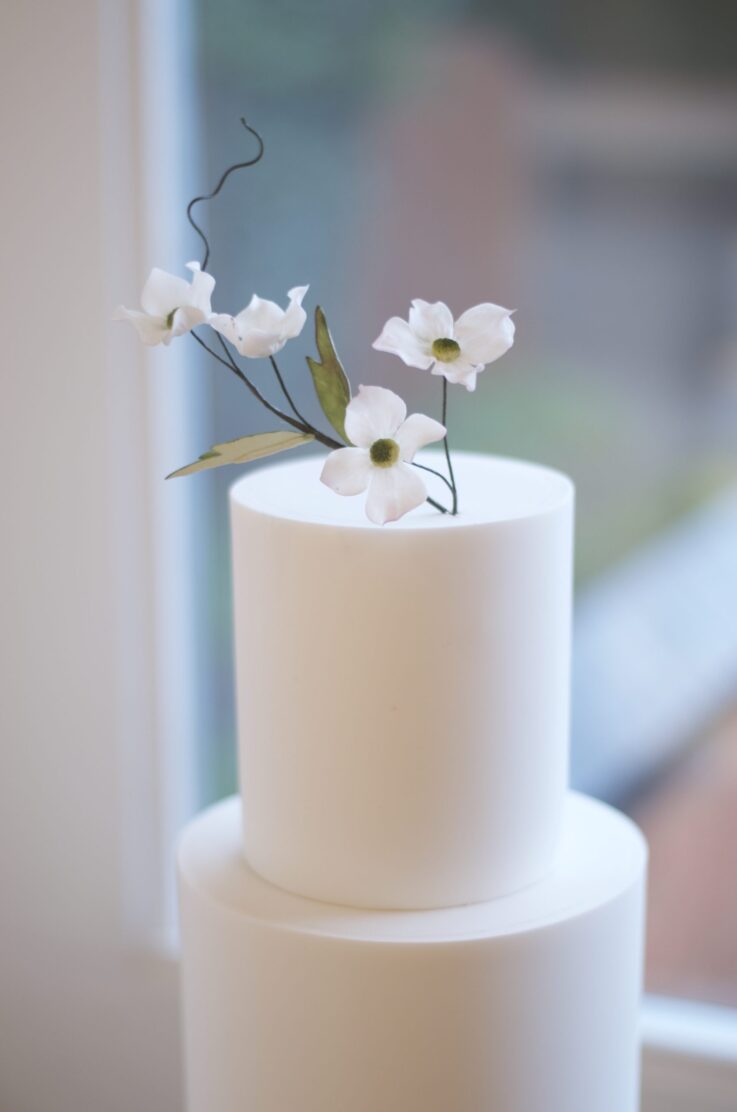
35Now push the wires into your cake using a posy pic or a suitable barrier and start arranging the flowers.
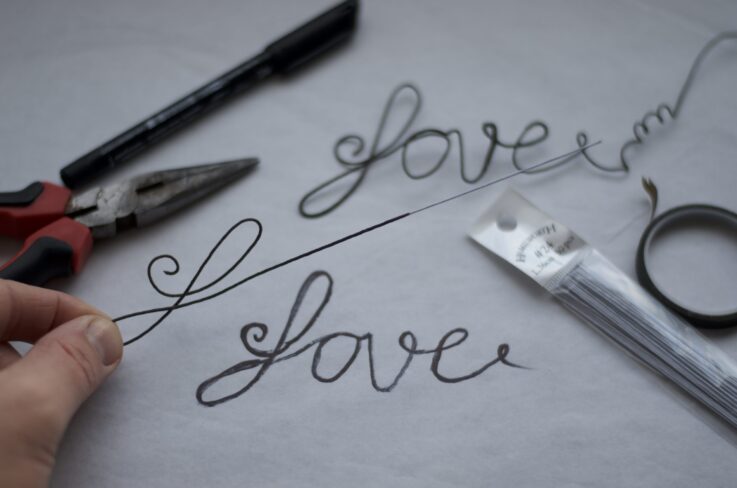
36Using a marker pen write the word LOVE or trace it onto a piece of paper. Using a piece of brown taped wire start to bend the wire into shape. (It’s easier than it looks)
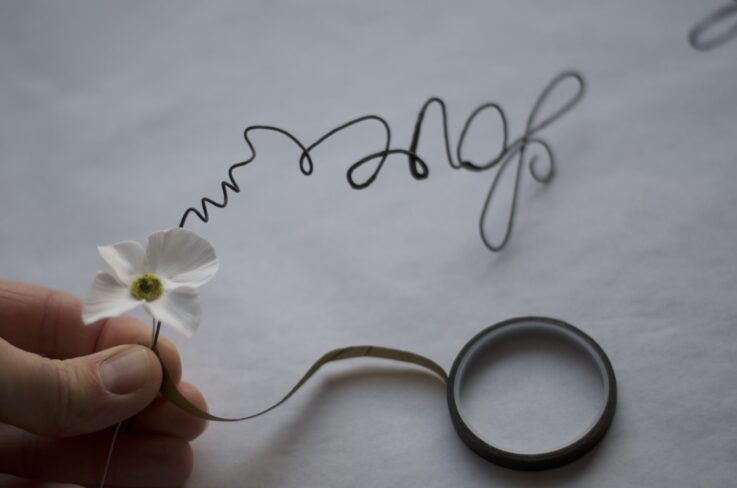
37Now tape some flowers and leaves in exactly the same way as before to your curley wire word. Again using a posy pic or a suitable barrier, insert into your cake.
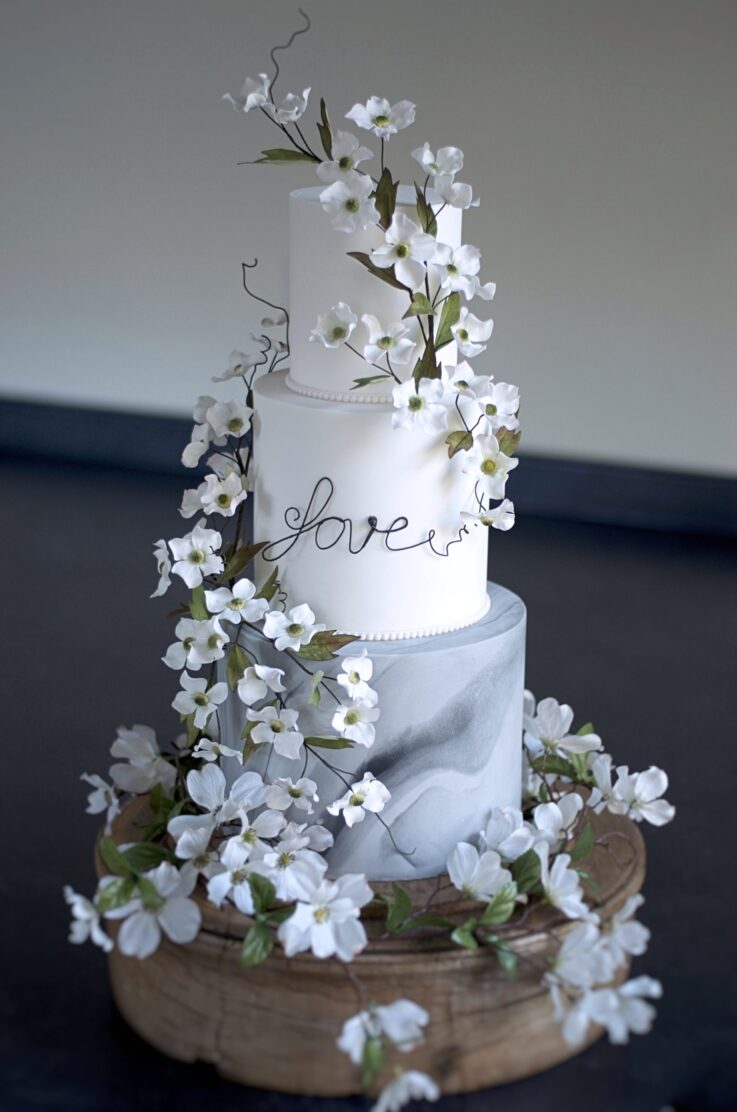
38Here is the beautiful cake by Ben! We would love to see your creations!
You will Need:
Equipment.
Flower centre mould – by Diamond City
Edible glue
26g wire
24g wire
Pliers
Gooseberry green flower paste
Hydrangea cutter
Hydrangea veiner
Squires rose leaf veiner for the leaves
Standard hydrangea veiner for the blossoms
Foam pad
Dresden tool
Brown floristry tape
Clematis leaf cutter
Grooved board
Rolling pin
Rose veiner
Ball tool
Polystyrene foam (to dry flowers and leaves on.
Ribbon or sugar moulding
Safety Seal
Wire cutters
Piece of paper
Marker pen
Ingredients & Colours
4” x 5” round covered cake
6” x 6” round covered cake Ben used THE SUGAR PASTE
8” x 6.5” marbled round cake
White flower paste
Green dust (Roxy and Rich)
Bordeaux dust (Roxy and Rich)
Fuchsia pink dust (Roxy and Rich)
Silver Lustre dust (Roxy and Rich)
Lemon extract or Vodka
Black sugarflair colouring
Pink sugarflair colouring
