Tutorial Preview
Highlights
Here we have carefully selected all the key parts that will be more than enough to get you started if you are struggling for time.
1. Creating the Templates
In this lesson Paul shows us the thought process behind making the templates for this project. No need to reach for your camera and a ruler because Paul has done all the work for you and templates are available for download. This is a good lesson to watch however as it shows you how you can prepare your own.
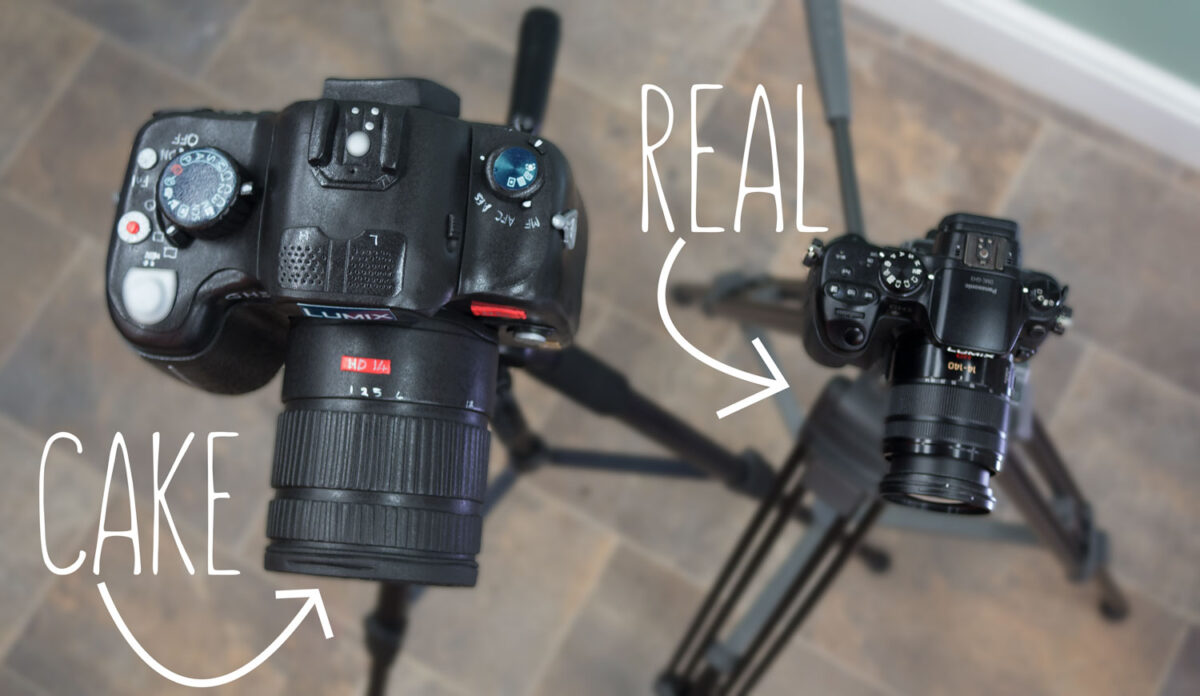
2. Making the Release Camera Shoe
Paul has a brain wave that will allow us to put the cake onto an actual camera stand! Not only will this look “seriously cool” but it will save us a lot of time not having to make a stand from scratch. You will obviously need to purchase a camera stand but they are actually pretty cheap. Click here.
3. Carving the Cake
Now it’s time to use the templates to cut out the cake in a cool camera shape. Paul runs into a little bother as the cake is slightly too small but fear not…Paul quickly figures out what to do which means less waste! Make sure you don’t use a freshly baked cake and leave it in the fridge for a good while before carving.
4. Ganching the Cake
It’s time to cover it in delicious dark chocolate ganache and work on the shape a bit more. There’s only so much cake carving you can but when it really starts to take shape is when you layer up the ganache and begin rounding off corners and creating sharp edges. Be generous with the ganache and once you’re done give it time to chill and then smooth it all off with a clean palette knife and a pastry brush and warm water.
5. Covering the Cake
In this lesson Paul covers this cake in black sugarpaste and gets using his hand to make sure if fits nicely around all the shapes without creases. Paul uses his hand most of all and then finishes off with acetate smoothers. Just remember not to cut too much sugarpaste away at the bottom so you are able to tuck it in under the cake.
6. Covering the Lens
Paul has decided to use cake dummy for the lens as the weight of cake would be too much and would most likely collapse without there being extra support underneath. Paul decides to reinforce the cake dummy by inserting a large wooden skewer as well as toothpicks through it to help support it inside the cake. Paul coats the dummy with edible glue before attaching the sugarpaste but feel free to use vegetable fat and then begins to work on smoothing it and getting rid of the join.
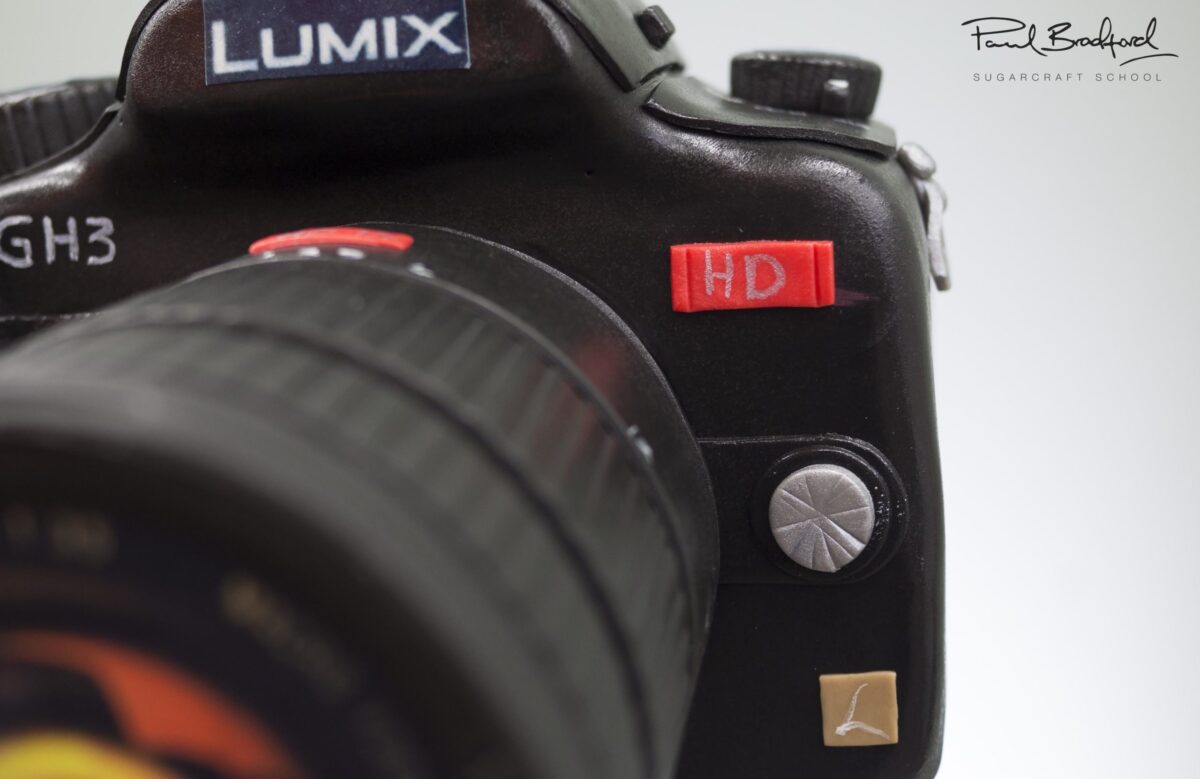
7. Adding Detail to Lens
Here Paul begins to take a closer look at the lens to see what kind of detail he needs to start adding to it. He starts by concentrating on the focus ring and the zoom ring. He creates then but cutting out long, thin pieces of sugarpaste and indenting them with a small piece of cardboard to create grooves.
8. Adding Detail to Lens pt 2
Paul continues to study the outer part of the lens by adding more ribbed grip layers and attaching with with edible glue.
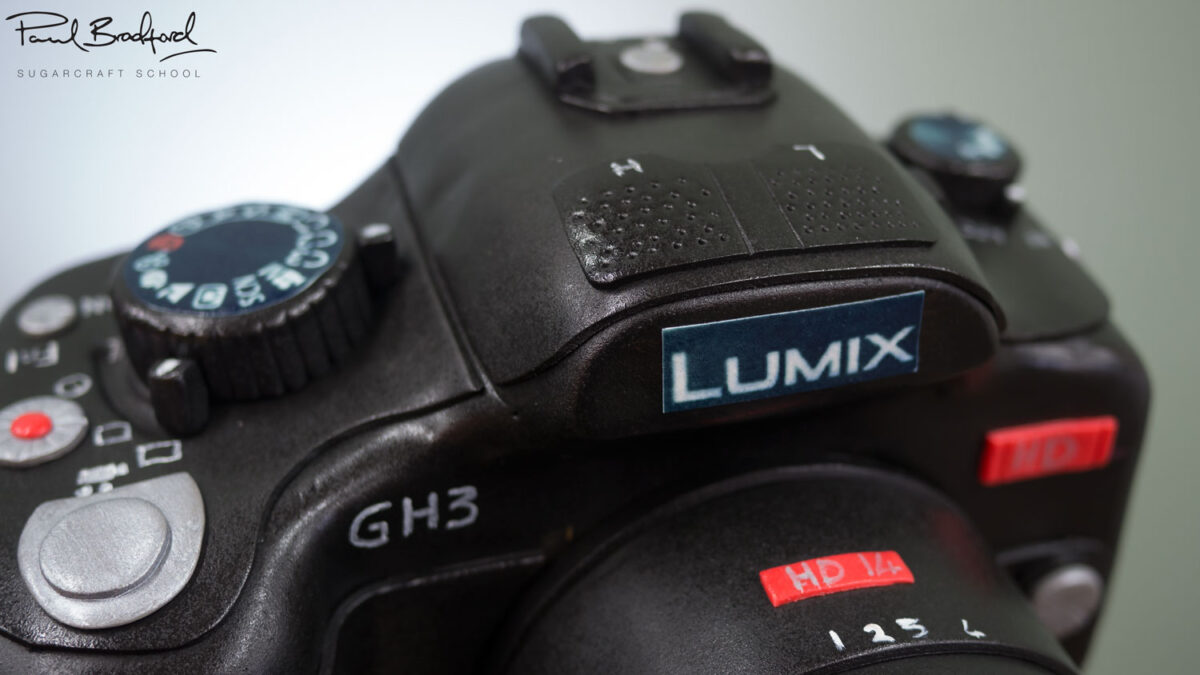
9. Adding Detail to the Body Part 1
Paul now moves onto the camera body after leaving it to dry for a little while. In an ideal situation Paul recommends leaving the camera overnight before moving onto this stage. It’s time to start adding layers and textures so lot’s of rolling out, studying and cutting to size.
10. Adding Detail to the Body Part 2
Paul continues to add more and more detail using his hand PME modelling tools as well as ribbon cutters and so on.
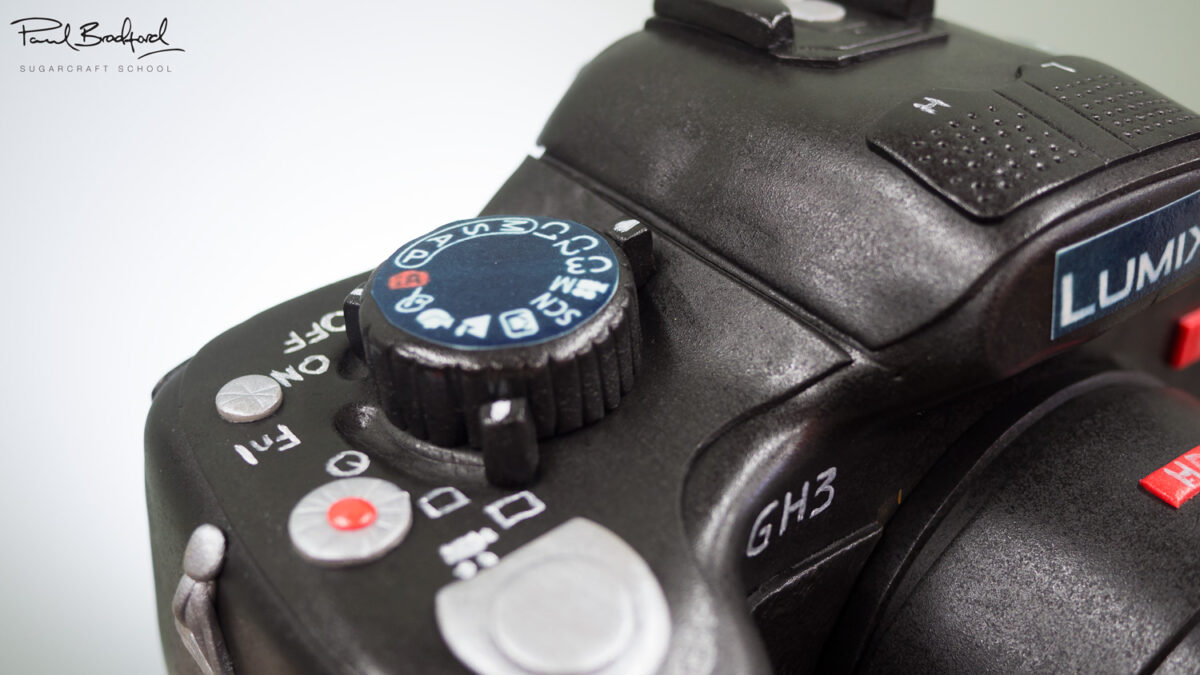
11. Adding Detail to the Body Part 3
Again this is basically an exercise of creating what you see and Paul studies the camera closely re-creating all the little parts using square, circle and triangle cutters. Paul gets rolling out little sausages and balls of sugarpaste to bring it all together. It’s all quite simple from where attention to detail is the name of the game.
12. Adding Detail to the Body PT 4
Paul has rushed ahead of us and started to add all the little signs and buttons with some white edible paint. Don’t worry, it’s not difficult and takes no time at all. For the bigger parts such as the lens Paul has opted to use an edible printer and print out some images to help add realism.
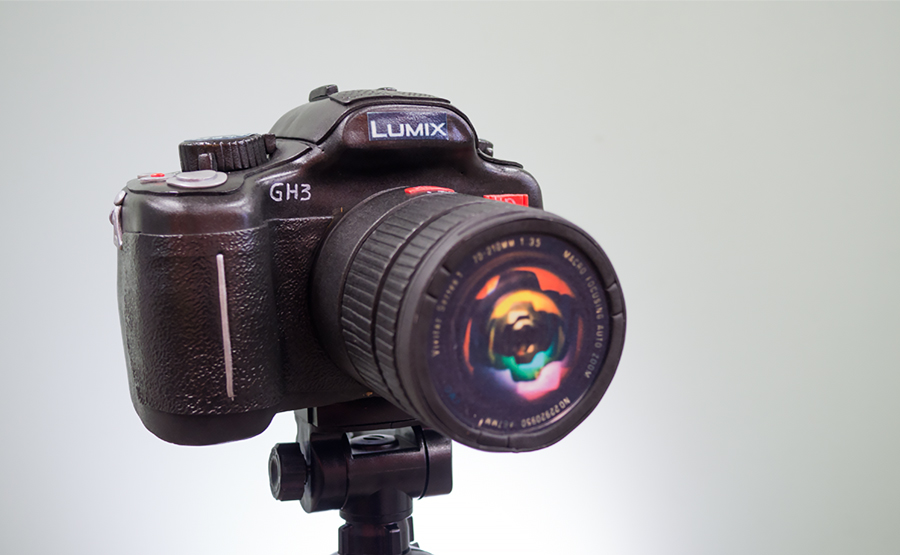
13. Finishing Touches
Now for the scary part! You may notice that Paul is reluctant to even attempt adding the lens but unfortunately he’s the only man for the job. All the extra support has paid off (even milk choc ganache) and is nice and secure! Just a few little extra bites of paint and sugarpaste and then the very final touch…some edible glaze spray. And there we have it..a 3D camera cake that attaches to a tripod!
14. Other Ideas
Here Paul share some other ideas you can implement when making this cake to make it unique to you. We are sure you have some of your own by now as well and we would love to see them.
Please share your pictures with us on our facebook page.
15. Pro Lesson
In this lesson Paul shares some insider information vital for any professional cake designer.
Don’t forget to share your interpretations of this wonderful cake with Paul and the rest of the CakeFlix Family on our Facebook group. There are plenty more cakes to choose from in the extensive CakeFlix Library.