Tutorial Preview


Highlights
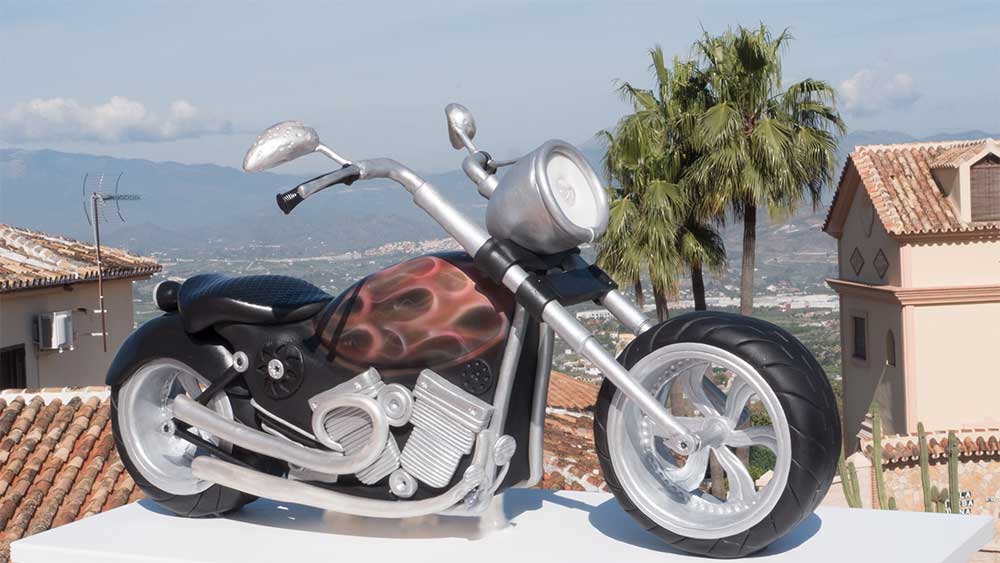
Highlights from the Chopper Motorbike cake tutorial
1. Making the stand
The stand is quite complex with a lot of woodwork involved. However, Paul will take you through each stage where he explains the components and sizes.
By his own admission, Paul is no carpenter, but manages to work it all out by himself. However, if you do have a carpenter or joiner handy around the house then it might be worth enticing them to help with a few cupcakes!
2. Cutting out the wheels
This is a messy job so worth getting it done before the cake comes out. Watch how Paul turns two 8” round dummy cakes into the tyres of his motorbike.
3. Making the stand food safe
In preparation for the cake, Paul now makes the stand ‘food safe’.
This is just a case of making sure that when the cake is added it doesn’t touch the wooden stand.
4. Adjusting the back top plate
Having slept on the design overnight, Paul decides that the back plate needs to be shortened. He explains his thought process then proceeds to shorten the plate down to just 3cm.
5. Layering the cake
After all the preparation, it’s finally time to add the cake. Paul sizes, cuts and shapes pieces of the cake and adds it to the stand like a jigsaw. He then leaves the cake to set in the fridge in preparation for carving.
6. Carving and ganaching
There’s not too much carving to be done but it’s important to get the shape of the fuel tank and seat just right. Watch how Paul achieves great results by carving just a little at a time. Once finished he then applies a layer of ganache.
7. Shaping the fuel tank
Using stiff ganache, Paul starts to refine the shape of the fuel tank. This is such a distinctive part of the design that it’s worth spending a bit of time on it just to ensure you get the shape just right.
8. Covering the cake
This is an awkward shape to cover but watch how Paul applies the paste then works his way around the design. Smoothing, cutting and manipulating to get a snug, neat finish.
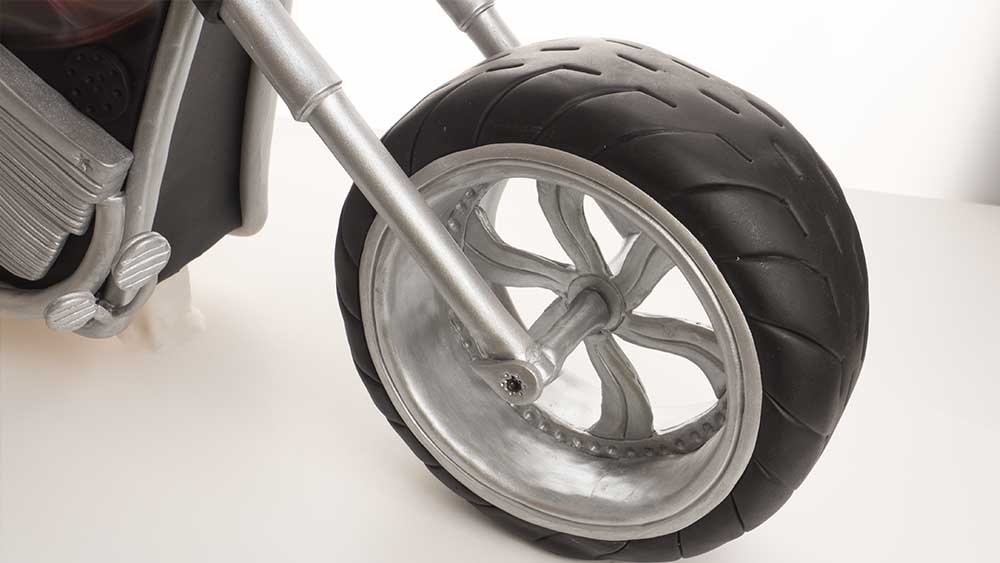
9. Covering the tyres
This is another tricky covering challenge which Paul takes you through step by step.
10. Making the inner wheel
Paul shows you how to create your own template for the inner wheel, which allows you to be creative to come up with your own design for the spokes. However, if you want to follow Paul exactly, his templates are attached. The inner wheel then needs placed inside the tyre then the rest of the wheel added, before finishing with some neatening up. This is a tricky part of the design, but worth spending the time to get the details just right.
11. Adding the flames
Using the template provided Paul starts layering up his colours to get the dark flame effect.
By layering slowly and steadily he builds up the base before adding more colour and shading and finishing off with several coats of glaze to get the desired metallic effect.
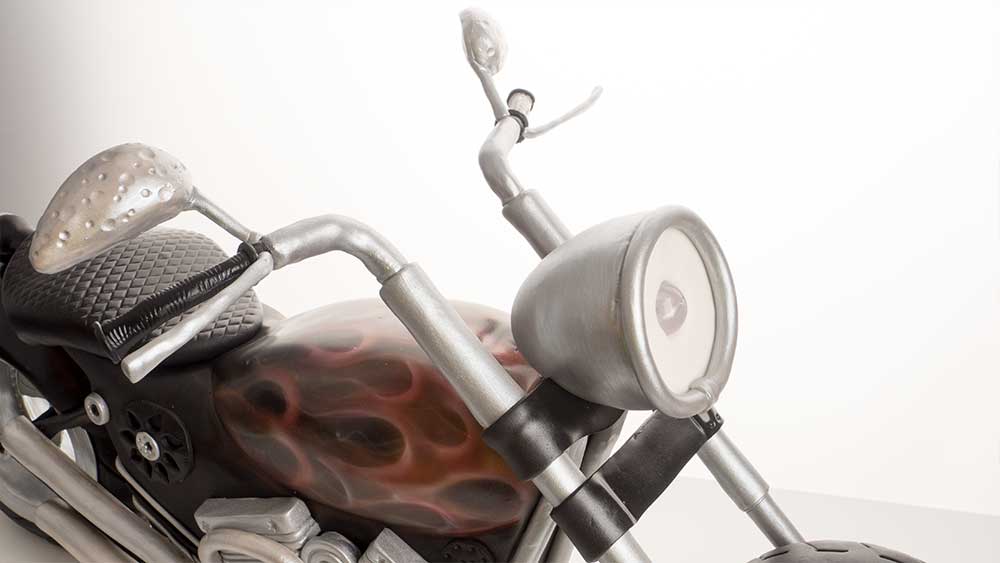
12. Adding the handlebars and mirrors
The motorbike needs some extra details before adding the sugarpaste. Time to add the wing mirror and brakes wiring to the handlebars.
13. Covering the handlebars
This is a tricky one, but watch as Paul goes through adding the different pieces to bring it all together. I’m sure you deserve a coffee break by now!
14. Handlebar details
It’s now time to cover the mirrors and the hand brakes. So long as your wiring is good this should just be a case of rolling out the shapes and covering the wires. Paul takes his time and goes into detail with this one, so worth watching for his little hints and tips. Once covered, it’s time to get out the paint!
15. Adding the front wheel
After finishing the decoration on the front, Paul now adds the front wheel. This was a little more tricky than he thought, but with patience and perseverance, he gets there in the end.
16. Adding the headlight
Paul now cuts the egg shaped dummy to 3”x3” then hollows out the centre, to make way for the bulb. He then covers and paints the headlight to give it a stylish finish with a fully working bulb!
17. Adding the back wheel
The bike finally gets its final shape as the back wheel is added. Paul also adds the mudguard and rear suspension.
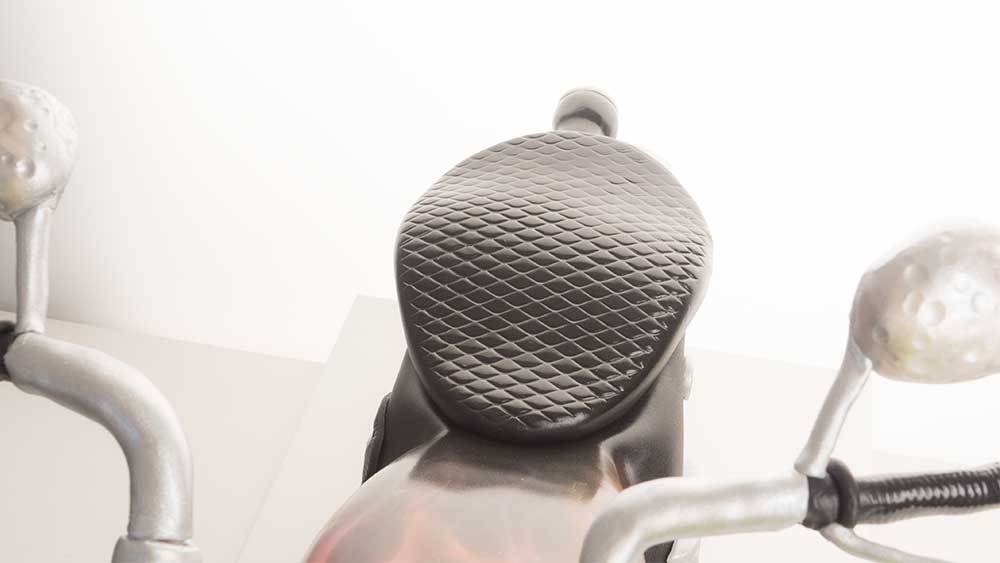
18. Adding the seat
Time to add the seat. Paul uses sugarpaste but also suggests that rice krispie treats could be used as an alternative to bulk it out.
Once you have your seat it’s just a case of positioning on the bike then adding the rear light.
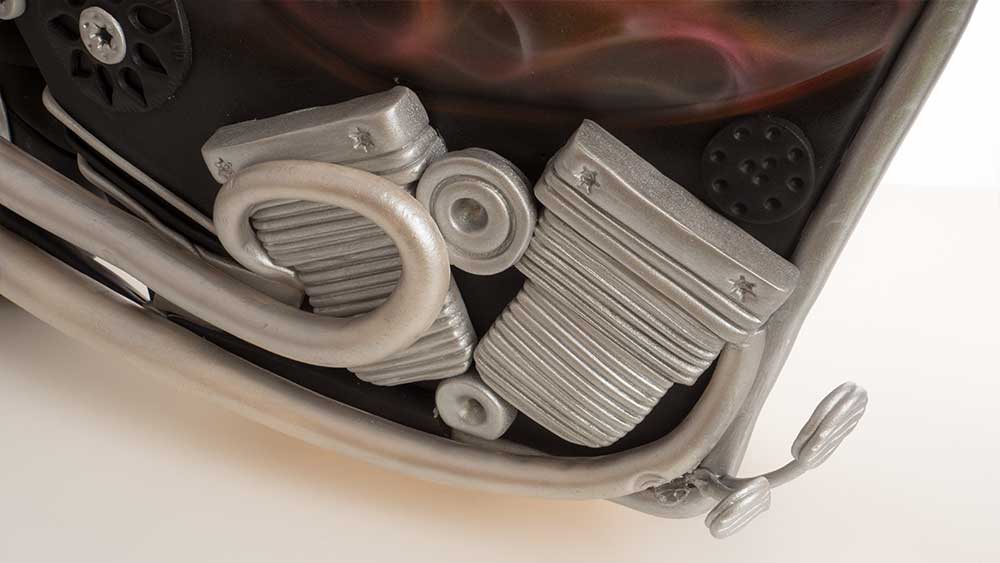
19. Adding the engine parts
Using a draft sketch Paul now starts to build up the engine parts before adding to the cake.
Paul used google images to find the basis of his engine. If you are looking for a different or specific design, then google would be a great place to find inspiration.
NOTE: Sorry, but there was an audio issue between 5 mins 10 secs through to 12 mins 19 secs. We had to revert to the camera’s audio, which gives an echo effect.
20. Adding the gear changer
The next morning Paul came in to find the lower exhaust had fallen off (insert sad face)
To fix this issue Paul offers additional support to the exhaust to make sure that it was set and secure before adding on the gear changer pedals, which is just a case manipulating an 18g wire.
21. Finishing Touches
Paul finishes off with some painting and tweaks and is very proud to present the finished Chopper Motorbike.
22. Other ideas
Paul shares with you some other ideas that could be achieved using the techniques and skills learned in this tutorial.
23. Pro Lesson
Everything someone who plans on selling a cake like this needs to know about pricing, time, cost, overheads etc.
Chopper Motorbike Cake Tutorial
Learn how to make this incredible Chopper Motorbike cake with this easy to follow tutorial. Join the multi-award winning Paul Bradford, as he shows you step by step how to create this mesmerising cake!
Perfect for motorbike fans of all ages, there are lots of great techniques to learn in this one!
In the following tutorial, you will learn how to:
- Build a complex structure
- Carve awkward shapes
- Airbrush the flame effect
- Create 3D spoked wheels
- and much, much more
Don’t forget to share your interpretations of this wonderful cake with Paul and the rest of the CakeFlix community on our Facebook group.
View hundreds of more world-class tutorials only at www.cakeflix.com.