Tutorial Preview


Highlights
In this lesson we have carefully selected all the key moments and condensed the whole tutorial into a 13 min lesson that should be more than enough to get you started.
1. The Design and the Quilted Effect
First of all Danielle takes us through her beautifully drawn design detailing the inspiration for the design as well as all the design aspects such as decorations and colours and so on. A very well thought out cake and she encourages us to do the same. It’s always good to have the cake well planned before starting. Danielle starts of by showing us a fantastic technique that creates a lovely realistic quilted effect using only a spatula and some edible gold balls. As this is the middle tier you needn’t worry about doing the top of it as it will be hidden. Once you have covered the cake in your red sugarpaste go straight on to this technique as you won’t be able to do it once it starts drying.
2. Making the Decorations
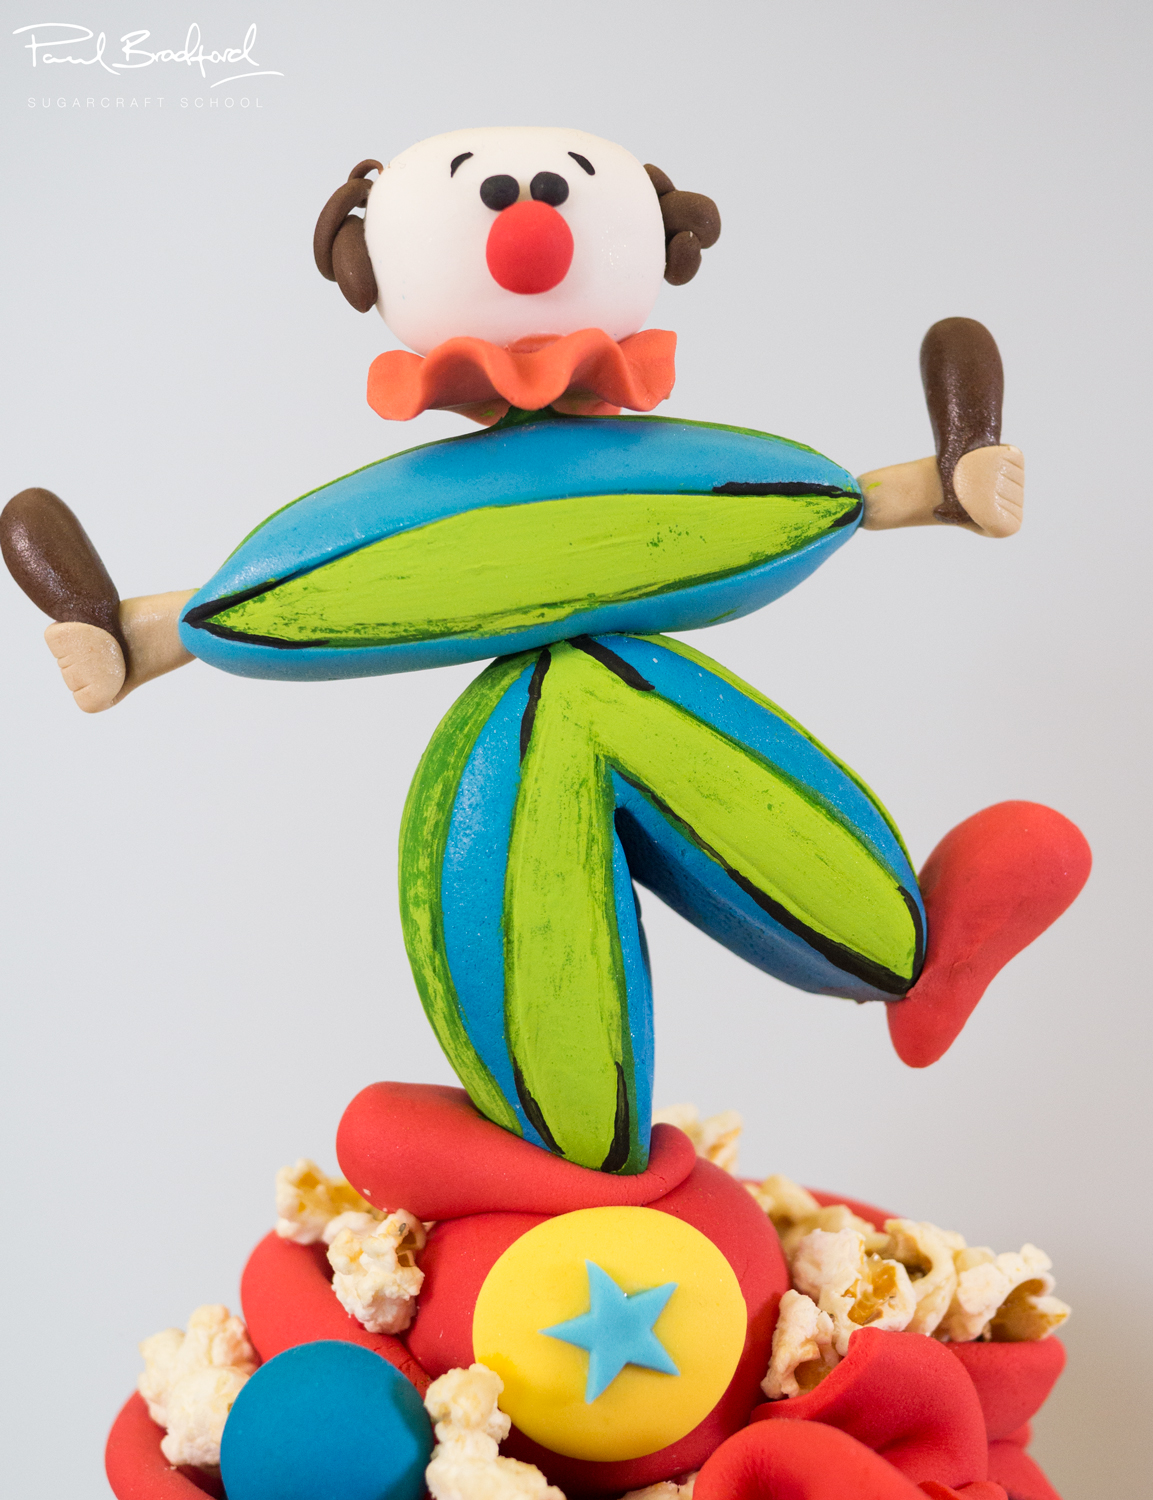
In this lesson Danielle shows us how to make a quick easy clown using spaghetti to support it and hold it all in place. You don’t even need to make four limbs…just two pieces of sugarpaste that form the arms and legs. All you will need is something like a spatula to make lines on the paste and some spaghetti. Danielle uses red, blue, brown, black and flesh coloured sugarpaste but as it’s a clown you could really use any colour you like. You will want to make the clown early on as it will take some time to dry properly so definitely do this before moving on.
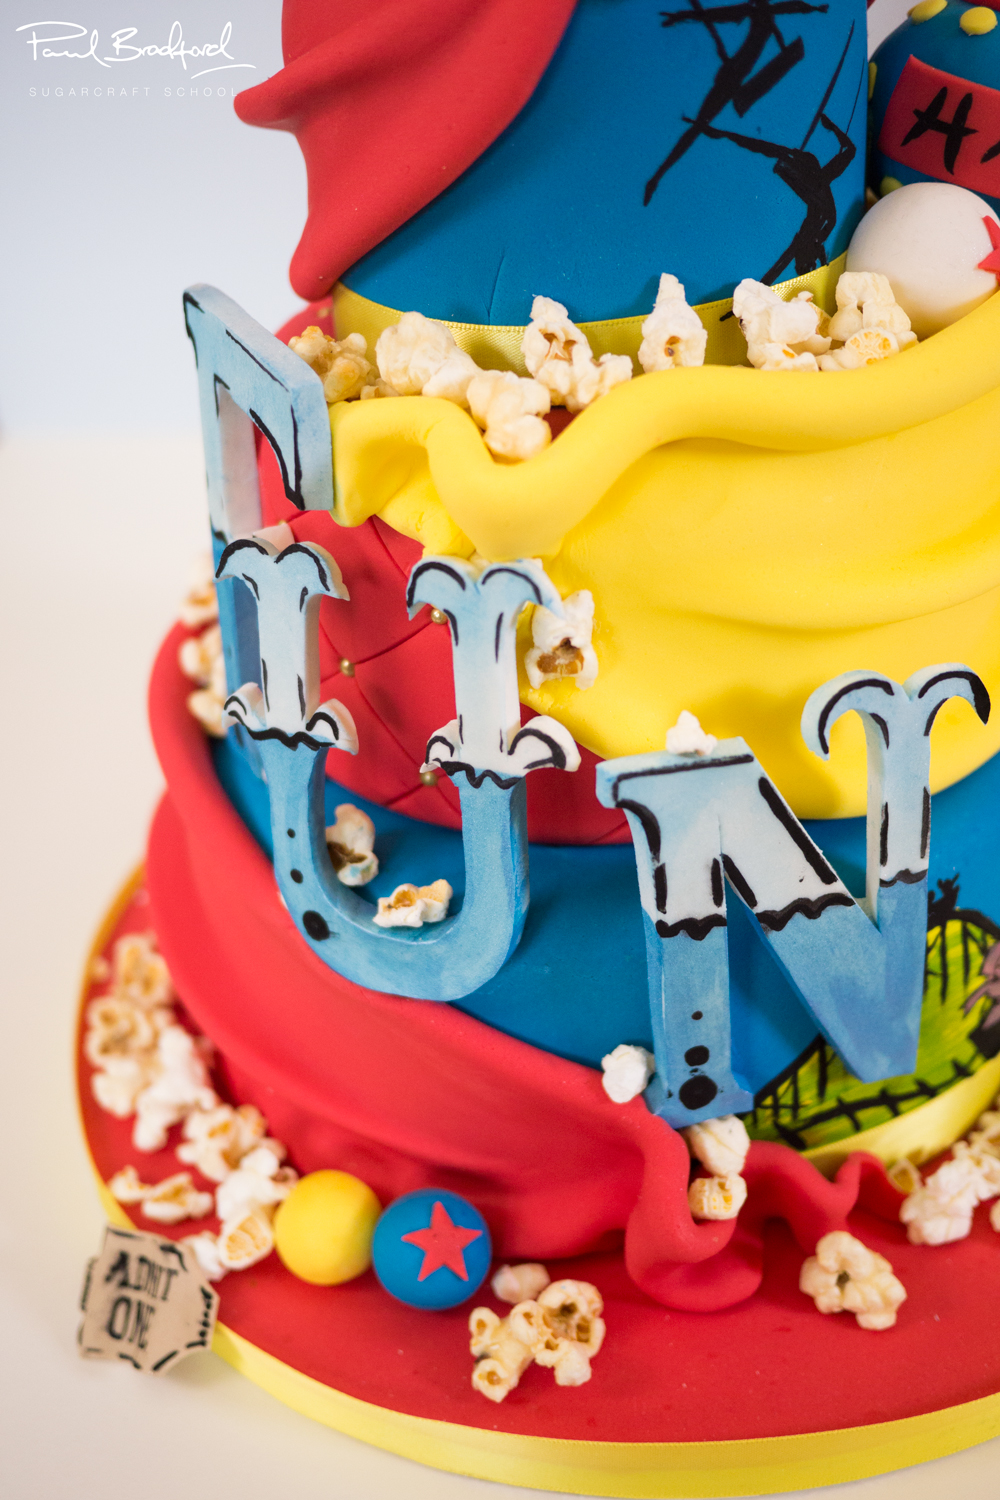
3. Making the Letters
So this will take a lot longer than simply using letter cutters but the results are well worth it. If you practise this skill you will be able to make custom messages with your very own serif. To make the letters you will want to roll out flower paste or sugarpaste with CMC to about 5mm in thickness and make sure it is the same thickness throughout. Use a craft knife and be very careful. You could even make your own templates to cut around if that make things easier although templates are available for download in the tools section of you want to copy Danielle’s.
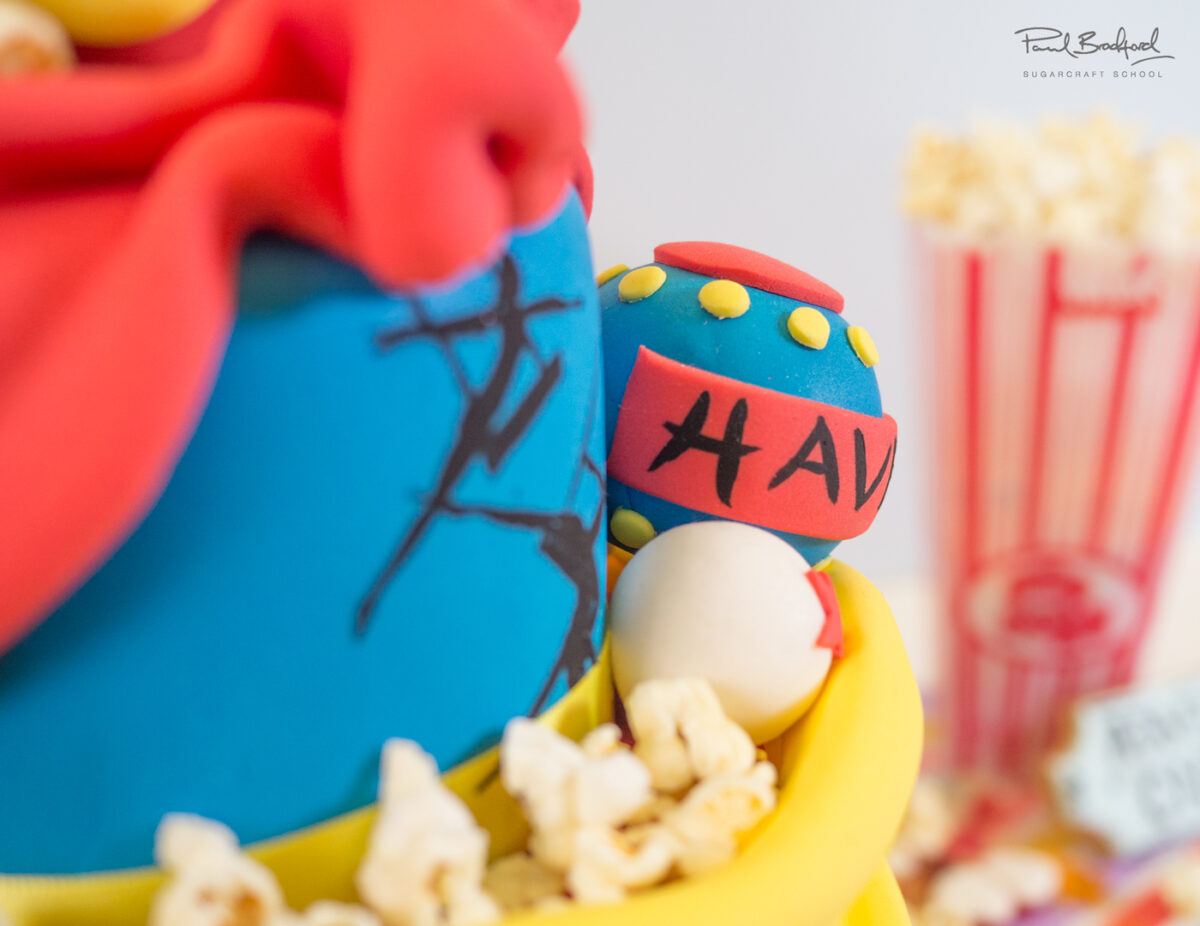
4. Making the Bouncy Balls
This is a nice simple lesson that takes no time at all and could actually be followed without any tools at all other than perhaps a knife. Plunger cutters and some cutters will make your life easier however. Simply roll out some nice colours of thin sugarpaste after rolling out nice round balls of sugarpaste and start cutting out shape to attach to them. Use a little bit of edible glue to keep them in place and once they are nicely decorated leave them to dry for a few hours.
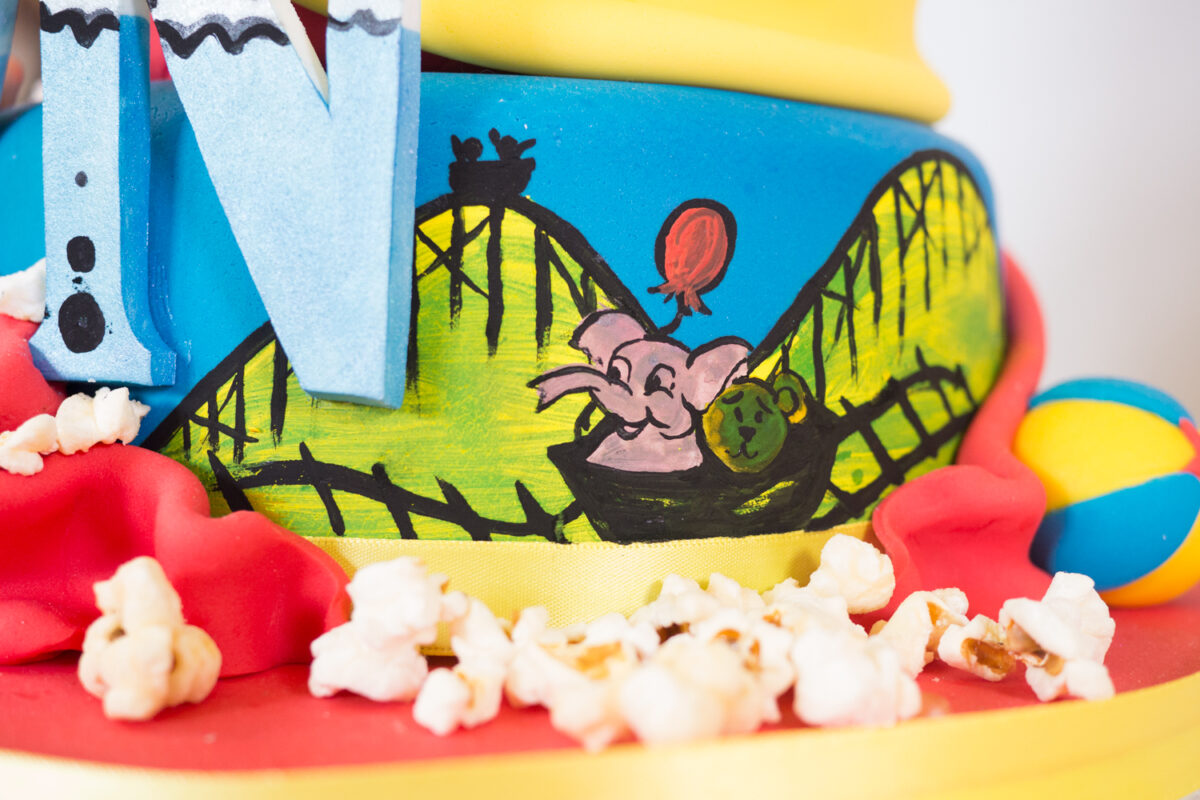
5. Edible Painting
Don’t be intimidated by the lesson title. The painting is as intricate as you make it and doesn’t need to be complicated to look good. If you’re not familiar with edible painting (same technique as normal painting) what to do is make the paint extra watery and as you grow more confident with your design start to thicken up the paint. As you see Danielle has drawn out what she wants to paint first which is always a good idea. If you make little mistakes you can even scrape them away with the craft knife once the paint has dried.
6. Edible Painting Pt 2
Now we move onto painting the letters. Danielle goes for a nice ocean to sky look for the letters and does this by painting on dry blue lustre to the top of the letters and fades it down as she goes further down the letter. For the bottom of the letters she uses a darker dust and adds rejuvenator to it and paints them dark blue. she breaks up the colours with a thin line of black and adds some nice black lines to the edges of the letters. Now it’s just to finish the painting on the cake now that it’s dried.
7. The Wrap Technique
Danielle’s sought after wrap technique has drawn a lot of attention to her and her unique cake designs. You will be amazed and relieved to see just how simple it is. As long as you roll out the correct shape and thickness of sugarpaste, you cannot fail. Create a fat lip shape (or a croissant shape) of sugarpaste in your hand and then roll it out. Once you have done that, cut away the excess and fold in the edges to create nice rounded edges, then a crease down the centre using your middle finger positioned underneath, while pinching lightly with your thumb and index finger with your other hand. And you’re done! Now it’s just a case of attaching it to the cake with some water (if you’re fast) or some edible glue.
8. Finishing Touches
In this lesson Danielle adds her dried decorations to the cake and finishes of little details in the paint work. Notice how the wrap sugarpaste is still soft when she is placing the balls onto the cake. Make sure you do the same and add your decorations before it drys. When adding the letters and the decorations with words make sure they are placed in a way that your eyes naturally follow so it clearly reads like a sentence. You could finish it all off by giving it a little spray with edible glaze but just make sure that everything is dry beforehand.
9. Other Ideas
In this lesson Danielle shares some ideas that you can use when making this cake to make it unique to you. We’re sure you have some of your own by now and we would love to see your version of the fun circus cake. Please share your pictures with us on our facebook page as well as Danielle’s.
10. Pro Lesson
In this lesson Paul goes into detail about the cost to make this cake as well as how much to charge if commissioned to make it as well as advice on how to market it. Vital information for any professional cake designer.
Danielle Gotheridge introduces us to her colourful Fun Circus Cake, which incorporates her famous wrap technique and skills including painting, letter cutting and basic modelling. This cake is perfect for a variety of kids’ celebrations! Well suited for intermediate level cake decorators, it will take two half days to create.
We would love to see your take on the Fun Circus Cake – please share your photos with us on our Facebook Page!
Danielle Gotheridge
Multi Award Winner Danielle Gotheridge has been designing wow factor cakes for over 10 years and has taught herself and created techniques for 5 years. Danielle’s fresh approach to edible art has attracted thousands over the years, leading her to produce cakes for many celebrities including Justin Beiber, Pauline Quirk, The Wanted and many more!