Tutorial Preview
Hanging Chandelier Wedding
with Dawn Butler
Skill level:
Intermediate
HD Lessons:
13
11:19
Highlights
This is the place to be if you’re struggling to find time to watch the whole tutorial. We’ve carefully selected the key parts of each lesson to enable you to make this cake in no time at all!
17:03
1. Preparing the Cake Lace
If you are a fan of cake lace, then you are going to love this technique! It adds a whole new dimension to cake lace and only takes a little longer to prepare than the conventional method. For this cake, you will prepare the cake lace in two stages and for the first coat, make sure to not allow it to dry too much. You want to make sure you add your second coat before the first coat begins to dry and lift, otherwise the second coat will bleed through the first. If you are using an oven to dry the layers, you want to go for approximately 3 minutes for the first coat and 7 to 10 minutes for the second.
08:43
2. Preparing the Cake
This cake will be made up of four tiers – 4″, 6″, 8″ and 10” rounds, but feel free to adjust these sizes to works best for you. In this lesson, Dawn shows us the initial stages of preparing the Cake Frame – it may be a lot easier than you think!
12:18
3. Preparing the Cakes pt 1
In this lesson, Dawn further demonstrates how to get the Cake Frame prepared and to start off, we will be threading wire through the first tier. You can purchase the wire here. This will take a great deal of weight. Then it’s onto the yummy part…ganaching. First of all, we will ganache the boards and then the cakes once we have placed them on the boards.
12:41
4. Preparing the Cakes pt 2
Now that the cakes are all ganached and we have allowed time for them to solidify, it’s time to smooth them off with some hot water. Recently boiled water is advisable as it is free of germs and will be hot enough to easily smooth the ganache. Now it’s onto covering the cakes in sugarpaste. The bottom three tiers don’t have to be perfect as they will largely be hidden, especially the middle tiers, so there’s no need be too careful with them.
04:27
5. Airbrushing the Cakes
This lesson involves very simple airbrushing for the purpose of adding a nice pearlised finish to the cake. This takes no time at all and once you have done this, it’s on to assembling the cake!
12:23
6. Assembling the Cake
Now for the fun part! Let’s get this cake assembled shall we? You will definitely want to pay close attention to exactly what Dawn is doing as this part can get a bit tricky, but will be obvious to you once you get familiar with all the different parts and fixtures.
18:13
7. Adding the Cake Lace
This is where it starts to look so pretty! You’ve done all the hard work and now it’s time to bring it all together. Dawn uses piping gel to stick the lace on, which she says works brilliantly as it doesn’t dissolve the lace and has a nice sticky consistency to secure it in place. You’ll notice that Dawn doesn’t lose her cool when bits break off – cake lace can very easily be repaired without anyone noticing any mishaps, so don’t worry if it gets a little damaged in the process.
07:24
8. Finishing the Cake Lace
In this lesson, we will be finishing off the cake lace and adding some lovely ribbon as a final touch – feel free to choose one that compliments the colours you chose for your airbrushing and your Cake Lace design as these may well be different to Dawns.
06:10
9. Hanging the Cake
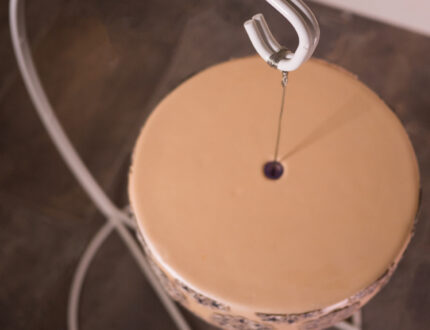
You may want to get a second pair of hands to help you here as your cake may be a lot heavier than Dawn’s and we don’t want any horror stories of fallen cakes! We advise you have a practise with tying those knots before committing to the cake. If you follow Dawn’s instructions you will be fine and you can trust the stand. It is very sturdy and that cake won’t be going anywhere. Once this step is complete, we’re all done!
01:11
10. Other Ideas
In this lesson, Dawn shares some ideas that you can implement to make this cake unique to you. We’re sure that you’ll have some of your own fantastic ideas and we would love to see them! Please make sure to share your creations with us on our Facebook Page as well as Dawn’s.
19:03
11. Cake Frame Demonstrated
In this video, Dawn demonstrates various ways in which the Cake Frame can be used and the different designs you can create with it. It really is an amazing product and has so much potential to really change the way you design and present your cakes!
04:15
12. Interview with Dawn
Let’s get to know the person behind Cake Frame and Dinkydoodle, shall we? If you would like to see some other fantastic cakes made with Cake Frames, click here and have a look through some pictures.
Learn how to make a hanging chandelier cake with Dawn Butler…
Dawn Butler of Dinkydoodle Designs and inventor of Cake Frame introduces us to this fantastic hanging chandelier cake.
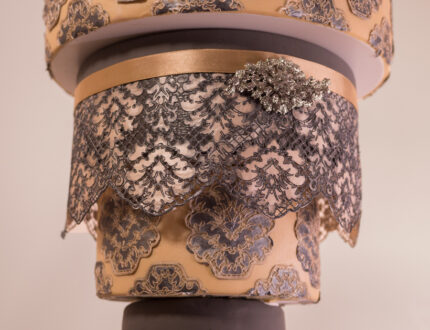
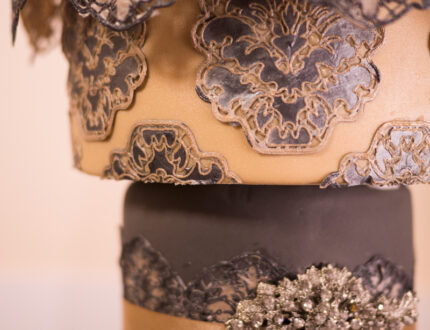
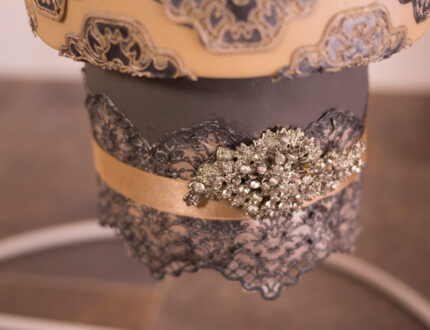
The hanging chandelier cake will allow you to take your cakes to the next level by creating amazing new designs and innovative ways of presenting your cakes. Dawn demonstrates how to use Cake Frame’s Hanging Cake Stand by creating her stunning Chandelier Wedding Cake, complete with delicate cake lace in shades of vintage gold and silver. This cake is ideal for intermediate level cake decorators and will take one and a half days to complete.
We would love to see your take on the Hanging Chandelier Wedding Cake! Please make sure to share your creations with us on our Facebook Page as well as Dawn’s.
Dawn Butler
Dawn found her passion for cake decorating over 20 years ago, when she took a job in a local bakery. In 2010 I was persuaded to turn my love of cake decorating into a business, and using the pet name my Dad gave me, it became "Dinkydoodle Designs" In such a short space of time I have gained recognition for my ability to produce stunning and lifelike novelty cakes. I also enjoy teaching too and regularly put down my rolling pin to share my passion and experience with others. This has since led to my desire to share my experience worldwide and the search began to source and develop a brand new airbrush kit and other cake craft products.


