Masquerade Ball Cake Decorating and Baking Tutorial

Tutorial Preview

Join NOW to access 1710 courses Watch Now
7 Day FREE Trial
Masquerade Ball
with Janette MacPherson
Skill level: Intermediate
HD Lessons: 17
Decorating time: Two Half Days
Now Playing
06:05

1. Levelling and Carving the Cake Layers

Struggling for time? Why not watch the entire tutorial in under 18 mins?

Janette starts off by showing us how to level the layers in a very quick and simple way using a serrated knife. Bare in mind that this is going to be carved so it doesn’t have to be perfect. Then it’s onto carving it into a lovely big flowing dress shape. Remember to give the feeling of the dress having a front and back so don’t make the curve too centred. Keep the larger offcuts as you may need them for when you are filling out the back of the dress later in the tutorial.

Now Playing
07:06

2. Finishing the Carving and Covering in Ganache

In this lesson we are neatening up the shape of the dress and then covering it in ganache. Not only a big feeder but a very tasty one. Once you’ve covered it and it is looking lovely and smooth, place the cake in the fridge for little while before moving onto decorating it.
Now Playing
10:30

3. Covering the Board and Making Rose Petals

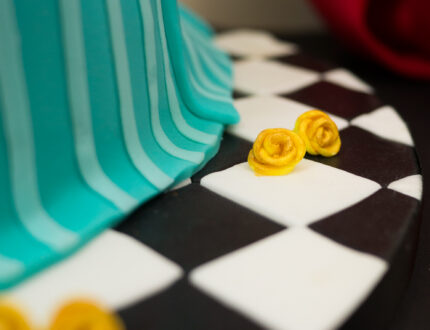
The board is an integral part of the whole design with this cake. Janette shows us how to make a lovely chequered floor using strips made up of black and white sugarpaste. Get your square cutter at the ready and as soon as you have cut out all your squares put them in the freezer to firm them up a little. The reason for this is so that they don’t lose their shape as we work with them on the board.
Now Playing
13:42

4. Adding Shape and Sugarpaste to the Dress

Now we can start adding some shape to the dress to get a flowing effect using some of those cutaways you kept from earlier. Place them around the bottom of the cake to form a nice gradient from the dress to the board and don’t worry about it having to be smooth as the ganache will take care of that. Then it’s onto attaching the two white panels to the front of the dress along with some frills. Jannette uses a very simple technique to make the frills by using a decorative circle cutter, taking seconds to make with minimal effort.
Now Playing
14:13

5. Adding Blue Panels to the Dress

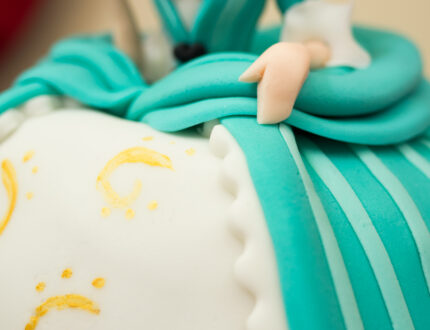
In this lesson you will learn a very simple technique for creating patterned sugarpaste. This could be made as complex or as simple as you like and can be created using different colours of sugarpaste, a cake smoother and a little baking paper. Once we have created our dress pattern all we need to do is cut it into panels, smooth the edges and then attach it to the cake, overlapping with the previous panel. Remember to make the panels longer as you move toward the back of the cake as the dress gets longer. You don’t want to be stretching it as you smooth it on or it may start to look like a worn-out dress!
Now Playing
09:27

6. Making the Bustle for the Dress

We’re now onto adding more detail to the dress and in this lesson we will be focusing on the bustle. Very simple techniques are used here by simply rolling out a rectanglular shape and then folding it back on itself to create nice thick material folds. Try not to roll the paste too thin or you will lose the fold effect.
Now Playing
17:28

7. Making the Body

For this section, the key is not to rush and be very sensitive with the sugarpaste. When figure modelling always give yourself plenty of drying time. It is vitally important to make sure that 2” of skewer is left poking out of the top of the body to allow plenty of support for the head. Then we will be adding bows to the bodice which is as simple as rolling a tiny sausage of sugarpaste and denting it either side – a brilliant time-saving method!
Now Playing
16:58

8. Working on the Head

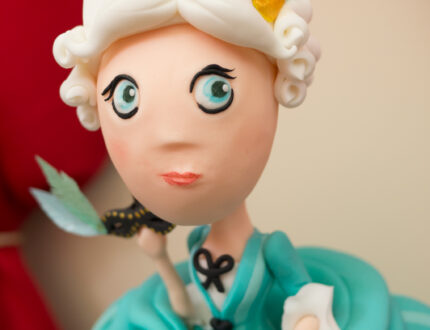
If you are working on the head separately on another skewer, make sure that you don’t pierce it anymore than 2” otherwise it will put pressure on the neck of your figure when you place it on. You want the depth of the hole to be the same as the length of skewer poking out of the top of the figure. To stop the head from being too heavy, Janette cleverly creates the shape with tin foil which will then be covered with sugarpaste. Be mindful when creating the hair shape as you want to make sure you are creating an obvious front and back to the head. When making the eye sockets on your head, don’t worry if you can see the polystyrene as they will be filled in later on. Make sure you use the same colour of sugarpaste as the face when creating the lips as this will allow you to blend them into the face using water and your leaf tool.
Now Playing
18:34

9. Working on the Face

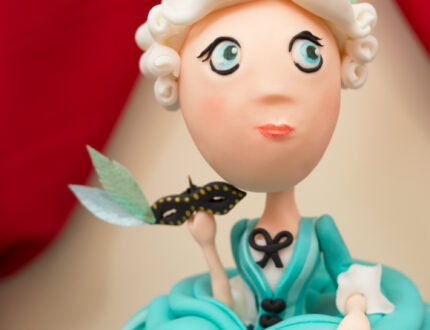
By the end of this lesson the face will be complete and looking fit for a ball. When making the eyes, it’s always a good idea to roll out both of them at the same time so that they are both the same size. Be careful when painting on the eyes and make the paint quite thin on the first coat and then thicken it for the second when you are confident you like the shape and size. When it comes to the lips, be careful not to use too much water as the sugarpaste will become soft. Pay close attention to how little Janette uses and how she makes very small adjustments at a time making sure she gets the shapes just right. This lesson is definitely one for steady hands so make sure you are relaxed and take your time.
Now Playing
18:47

10. Working on the Hair

You have complete creative license here – if you’re feeling confident then go crazy but try not to add too much sugarpaste as we want to keep the weight of the head light. Janette goes for a simple three panel hair style with three rolls on either side of the head and two tear shapes for the fringe. If you are working quickly and your sugarpaste is warm then it should all attach with ease, otherwise a little water will do the trick. By using your leaf tool, you can add a lovely texture to the hair which Janette quickly demonstrates.
Now Playing
18:16

11. Inserting the Body and Attaching the Arms

Once we have carefully inserted the body into the dress, it’s time to make the arms. We will be making them in two sections – upper and lower. This might take a bit of practise as it can be tricky getting a nice smooth arm and elegant shape to the wrist and hand. There will be no fancy tools here but just good old thumb and fore finger to roll and create the shapes. Although Janette steams on ahead for the sake of the tutorial, she does recommend that you give yourself plenty of drying time for all of these pieces.
Now Playing
12:07

12. Lesson 12 Making the Mask and the Feathers

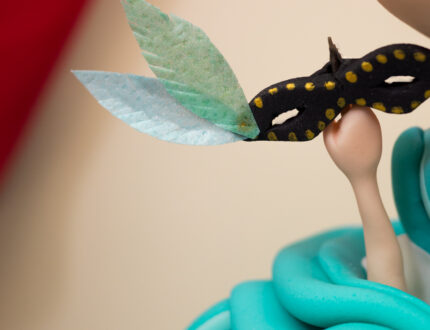
When making pieces as small as the mask, add plenty of CMC otherwise it will be very difficult to work with and add to the cake. As you will see, it holds its shape very well as Janette cuts the mask and picks it up. You will be relieved to know that the feathers are made of rice paper and not very thin sugarpaste! When attaching them to the mask and hair, make sure not to add too much water as they will simply dissolve. We will be attaching them in the next lesson.
Now Playing
07:52

13. Finishing the Roses and Adding the Decorations

Now we are going back to the roses and painting them gold to really make them stand out. Once we have done that, it’s just a case of tastefully adding them to the board. We can now add those lovely feathers and as Janette mentioned, be careful not to add too much water when doing so or they will simply dissolve. You will notice that the tiny little gold dots that she adds to her mask are enough to keep the feathers attached.
Now Playing
04:57

14. Finishing Touches

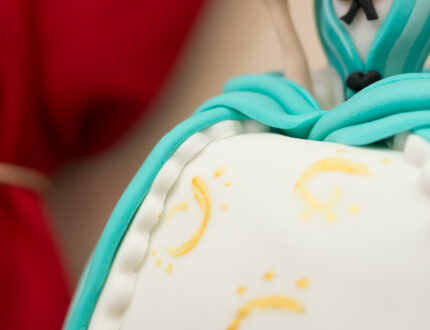
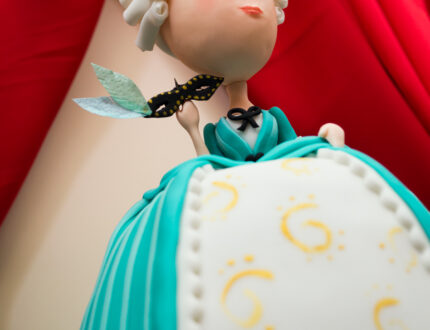
The gold paint will now be used to decorate the dress – get creative and paint any kind of design you like! To really give the impression that this part of the dress is an under-layer, copy Janette’s idea and paint half of the design on the far left and right of the front panel. Simple and effective. Now that the arms have had time to set and the mask is dry, we can add them to the cake before adding the head. Be careful not to squash the neck when adding the head and keep a close eye that they are not touching too much as the head will put pressure on the neck. To finish it all off, we can now add the ribbon and voilà…we have a beautiful Masquerade Ball Cake!
Now Playing
01:15

15. Other Ideas

Paul and Janette share some ideas with us to get the creative juices flowing and we’re sure that you will have plenty of your own as well. Remember to share share your creations with us on our Facebook page as well as Janette’s!
Now Playing
17:37

16. Fast Forward

Strapped for time? Why not watch the entire tutorial in under 20 mins!
Now Playing
02:01

17. Video Blog

Paul introduces us to Janette McPherson of Janette McPherson Cake Craft and her lovely Masquerade Ball cake. This week’s tutorial will be covering cake carving and modelling and you will also learn a great way to make a beautiful tiled floor effect cake board. This tutorial is aimed at intermediate level and beginners looking for a challenge and will take two half days to make, to allow for drying time. We look forward to seeing your take on this wonderful cake – please share your creations on our Facebook Page as well as Janette’s!
Janette MacPherson

Janette MacPherson

Janette is a self-taught cake designer based in Drumnadrochit in the beautiful Highlands of Scotland. With a University Degree in Animation and a previous career as a Graphic Designer, she is now a lucky Mummy of three who unleashes her creative needs in cake form. Janette specialises in bespoke, personalised, highly detailed designs which capture memories, create a talking point and have even brought tears to eyes. Figure modelling is her speciality. She can create figures and pets from photographs and also replicate any personal items such as beloved teddies, favourite hobbies, outfits.... whatever you need!
* indicates a required field
7 Day Free trial