Tutorial Preview
Highlights
Struggling for time? We have carefully selected all the key points that you will need to be able to make this cake in no time at all.
1. Carving the Cake
Struggling for time? Why not watch our Highlights lesson where all they key points are covered in 15 minutes.
Don’t worry if carving is not one of your strengths as this is carving at its very simplest. All you will be doing is cutting cakes in half so that you have four sections which will then be ganached and covered. Remember to keep the off cuts as they will be used for the top of the cake so put the butter and jam away. You will have seen from the Overview video that this turns into a beautiful bed…how exciting!
2. Layering and Ganaching the Cake
So just a little more detail in the carving and in this lesson we will be creating a nice dipped bed feel where the little princess will be sitting. This is where the off cuts come in handy. Simply apply ganache between each layer and make sure it’s warm enough not to damage the cake when you spread it. Just a few seconds in the microwave for the ganache should do it.
3. Carving and Ganaching the Cake
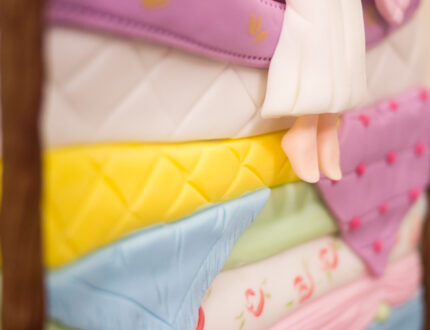
In this lesson, Janette adds a little more detail to the carving of the cake to add the effect of mattresses without having to cut the cake into more sections. Not a great deal of accuracy or attention to detail is needed for this – simply create a shallow notch approximately 2mm all the way round the middle of each layer. Just make sure you don’t cut too deep as this will affect the cakes stability. Remember to bring out those notches again once you have covered the cake with ganache to allow the icing to shape around them.
4. Icing and Detailing the Cake Board
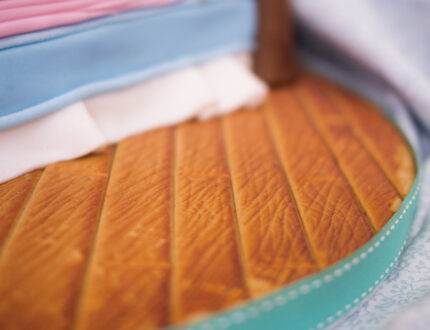
This is a great lesson and you will learn how to create a lovely yet simple wood floor effect that takes no time at all. Simply roll out some brown sugarpaste to about 3mm in thickness and then place it over the cake drum where you will cut off the excess with a sharp knife by following the edge. Once you have done this, use a cake smoother to press the impression mat into the sugarpaste repeatedly around the board. Use a food safe ruler or any firm edge and press into the sugarpaste to create floorboards. You can then use a leaf veining tool to further define the lines and then use a toothpick to create holes where nails would be. The general idea is to keep it quite rugged and you don’t have to be too precious about how neat it is.
5. Airbrushing the Board
With some simple airbrushing, you will achieve a very realistic wood effect. In this lesson, you will learn a simple technique for creating texture with one colour. As Janette is airbrushing brown onto brown sugarpaste by simply concentrating on certain areas of the board, she creates texture and dimension with very little effort and this is also helped with the impression mat and lines created. The key is to airbrush at an angle and keep the board flat.
6. Icing the Bed
Working with ganache and white sugarpaste can be tricky so just be very aware of any rogue chocolate on your hands, work surface or rolling pin. A good general rule when measuring out your four panels is to allow at least an extra inch in length and width to allow for you to cut off the excess to create neat edges. Use the edge of your hand to gently bring out those notches you cut in to the cake to make the lines more visible. Remember to do this as soon as your sugarpaste is on as it dries very quickly.
7. Creating the Mattresses
First of all, Janette goes around all the lines with a leaf veining tool to really accent them. It’s a good idea to do a panel at a time and then gradually join the lines up as you go round to maintain accuracy. The good thing is however that it needn’t be perfect as we want to create a soft mattress affect so perfect straight lines won’t work here. Again, this all needs to be done soon after the sugarpaste is on to make it easier to work with.
8. Transferring the Cake and Adding Coloured Strips
Janette starts off by showing us how to safely move the cake to the board which looks easy enough but as you know, it’s always quite scary. When adding the coloured strips to the cake, make sure you only add water to the section of the cake you are covering so that you don’t cause colours to bleed into unwanted areas. Janette recommends adding the strips on in four sections as opposed to making one really long strip. It makes the whole process a lot easier and you can easily blend the corners (shown in the next lesson) and as there will be trees at each corner of the bed, they will be hidden.
9. Blending the Strips and Creating Piped Edges
A little bit of water and a leaf veining tool or a dresden tool is all you need to blend those strips together. Remember to clean and dry your extruder thoroughly before using it and make sure you have warmed up the sugarpaste before putting it in. If you don’t have an extruder, then you will be fine with some cake smoothers or even your hands to roll out thin sausages.
10. Adding the Pea
Janette uses a very simple technique here to create the illusion of the pea being wedged in between two mattresses. Watch and find out how, it only takes a few minutes to do!
11. Adding More Coloured Strips
In this lesson, Janette continues with adding more colour to the mattresses and begins to add some detail to them such as lines and criss-cross patterns to give the feeling of material and compression.
12. Covering the Top of the Cake
It’s time to use the old faithful stitchy tool to really add realist to the bed linen. In this lesson, Janette just adds stitching detail to the top mattress but feel free to do it to all of them.
13. Painting the Mattresses
Janette uses dusts mixed with alcohol for the edible paint but advises that you can also use airbrush paints which tend to give softer colours. You will want to use a small paint brush such as a 0 or 1. At this stage you could even attach on little edible balls to the sides of the mattresses or make buttons.
14. Making the Cushions
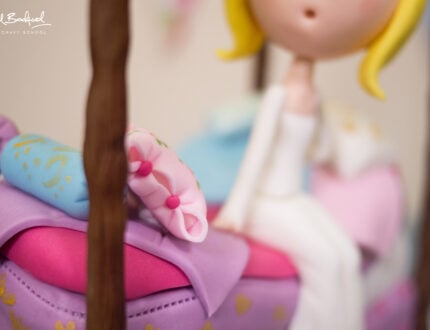
Janette shows us how to make various cute little cushions that are placed on top of the bed. They are very simple to make and can be as minimalist or as detailed as you like. They are shaped with the best tools in the business…your hands! You can then add detail such as stitching or lines with the veining tool to make them look well used.
15. Painting the Cushions
Now it’s time to add some lovely painted designs to the cushions. For continuity Janette uses similar designs to what she painted on the mattresses which keeps everything looking very well coordinated. Feel free to get creative here!
16. Making the Blankets
As always you have complete creative license here to make as many or as few blankets as you wish and make them as intricate or as simple as you desire. A stitchy tool will be handy to have but if you don’t have one then a toothpick or the end of a small brush could be used to make the dots. For creating the design, Janette simply uses her leaf tool to draw lines on the sugarpaste. You could go a step further and paint them or even put someone’s initials on for a personalised touch.
17. Making the Princess’s Body
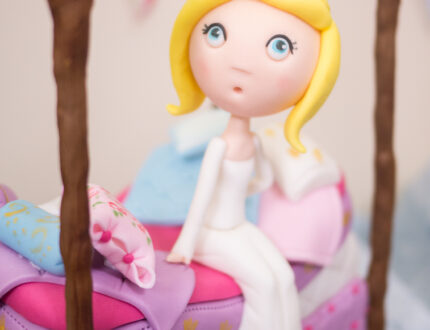
Now that the bed is complete it’s time to make the princess. In this lesson, Janette creates a lovely elegant body using only a leaf tool, a small circle cutter and her hands. At this point, make sure your hands are clean and nice and warm…she is a princess after all. It might be good to have a picture to refer to, perhaps of a woman sat in a dress, to help you shape the dress realistically.
18. Making the Princess’s Feet
Janette makes it look so easy and the final result it cute dainty, little feet. Take your time and and think carefully about the size, shape and positioning of the feet in relation to the rest of the model.
19. Preparing the Head
You could obviously just make a large ball of sugarpaste, shape it and then allow it to dry but remember that it will be sitting on top of a neck and you want to avoid it being too heavy. Instead, Janette wraps some sugarpaste around a 40mm polystyrene ball. Take time to consider where you place the eyes as everything else follows from here so you want to get it right. Generally, eyes are placed in the middle of the head but if you would like to give a more childlike appearance then perhaps even lower.
20. Adding Facial Features
Janette uses a simple technique for the eyes that requires some painting so a steady hand and good concentration is required. Roll out two small balls of sugarpaste to sit in the eye sockets and flatten them into shape once placed in the sockets. Secure them with a bit of water and wait a couple of minutes before painting. Choose any colour you like for the eye colour and simply paint small circles to create the iris. Now you can paint in the pupils and once the paint is dry, add two tiny balls of white sugarpaste to create a realistic reflective look.
21. Adding the Hair
To create the hair, simply make two thick medium sized tear shapes of sugarpaste and then flatten them slightly. Wrap them around the head in to parts creating a hair parting and then create a fringe by rolling out a small tapered sausage of sugarpaste.
22. Making the Crown
Janette quickly creates a cute little crown for the princess – all you need is something small and circular that will cut out nice round notches such as a flower cutter or even a straw. Once you have rolled out the sugarpaste (not too thin) simply cut out a strip of about 1cm in width and then cut out half circles along the top of the strip (six times) and then cut it at the dip of the first and last half circle and then join together to create a circular crown. To make this step even easier, make small ball of sugarpaste to wrap it around and then leave it to dry for a while.
23. Making the Trees
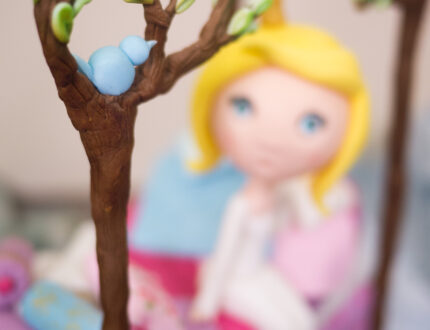
Making all four trees is a lengthy process but actually quite a simple one, so fear not. Wooden dowels, florist wire, confectioners glaze, brown sugarpaste and the leaf tool are requires for this part of the tutorial. Janette recommends using confectioners glaze as opposed to water this time, as water can dissolve the sugarpaste slightly. We would recommend that before committing to the branch size and positioning, measure the height and size of where you think the princess’s head will be so that everything feels proportionate.
24. Adding the Leaves and Airbrushing the Trees
For the leaves, simply make little tear drops of green sugarpaste and stick them on to the ends of the branches. To add shape as well as helping to secure them, mark them in the middle with a toothpick. When it comes to airbrushing, as before try not to airbrush straight into the tree as this will take away the detail but try and do it at an angle and be careful not to over do it – just add depth as opposed to covering them.
25. Completing the Trees and Adding Them to the Cake
Janette now switches to green airbrush paint and begins to add more colour depth to the leaves. Once again, try and be delicate and make the colour deeper at the base of the leaf and along the indent to add realism.
26. Adding the Cushions
At this stage, feel free to throw the cushions wherever you please. Perhaps you could make extra ones to go on the board and perhaps in the tree? You never know…she might just have thrown a little tantrum!
27. Finishing Touches
We’re not on to the final lesson. To start off, Janette makes two cute little birds, each a different colour and made with just a few little bits of sugarpaste. They are nice and simple and due to their size, it’s not a must that they be placed in the trees before they are dry. You will have allowed the head to dry overnight so adding it should be no hassle at all and then it’s simply a case of painting the crown. Janette advises adding a second coat once the first has dried to give it extra shine. Once you have completed this, pick a lovely ribbon and then we’re all done! A beautiful Princess and the Pea cake.
28. Other Ideas
In this lesson Paul and Janette share some other ideas that you can use to make this cake unique to you. Your bound to have some of your own ideas too and we would love to see what you make so please share your pictures with us on our Facebook Page and Janette’s Facebook Page.
29. Pro Lesson
In this lesson, Paul goes into detail about the cost of making this cake as well as what he would recommend you charge when selling a cake similar to this.
The wonderful Janette MacPherson returns to teach us how to create her fantastic Princess and the Pea Cake. This is guaranteed to be a big hit as a little girl’s celebration cake and the tutorial is packed full of techniques that can be implemented on a variety of cakes, as well as some brilliant modelling to create the adorable princess. This cake is aimed at intermediate level cake designers and takes approximately two days to make, allowing for drying time.
We would love to see your version of this cake – please share your snaps with us on our Facebook Page!
