Tutorial Preview
Bite Sized
Here is our short promotion clip for this tutorial.
Highlights
Short of time? Check out the key learning moments in under 14 minutes.
1. Making the stand
Paul starts by putting together the simple stand structure.
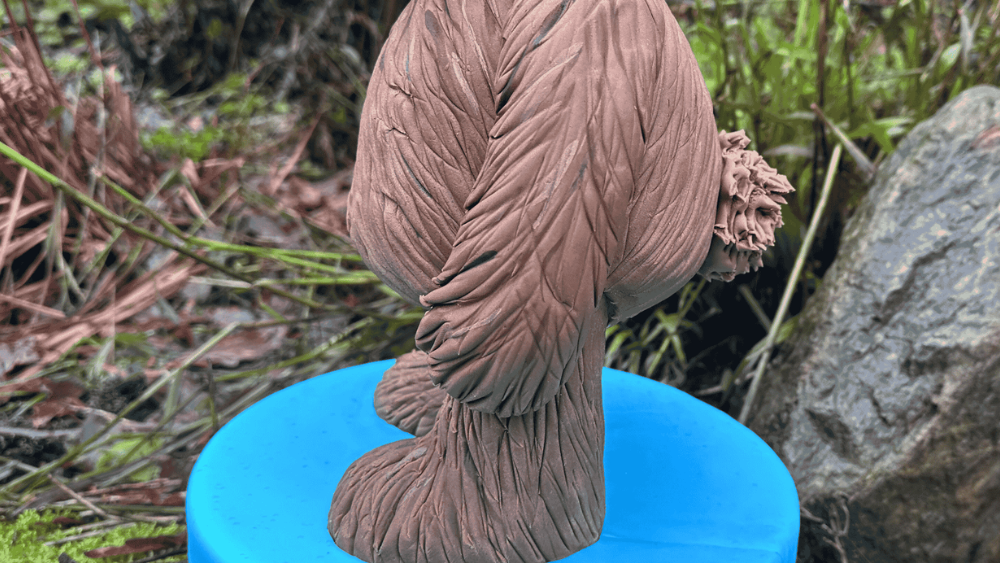
2. Shaping the lower body
Using foil paper and ganache Paul shapes the lower body of the bear.
3. Covering the cake
Time now to wrap the cake in sugarpaste.
4. Adding the fur effect
Using a very simple technique Paul creates the fur effect on the Teddy Bear.
5. Shaping the Head
Using polystyrene Paul now shapes the head and muzzle.
6. Covering and texturising the head
Paul covers the head with sugarpaste before adding the fur texture.
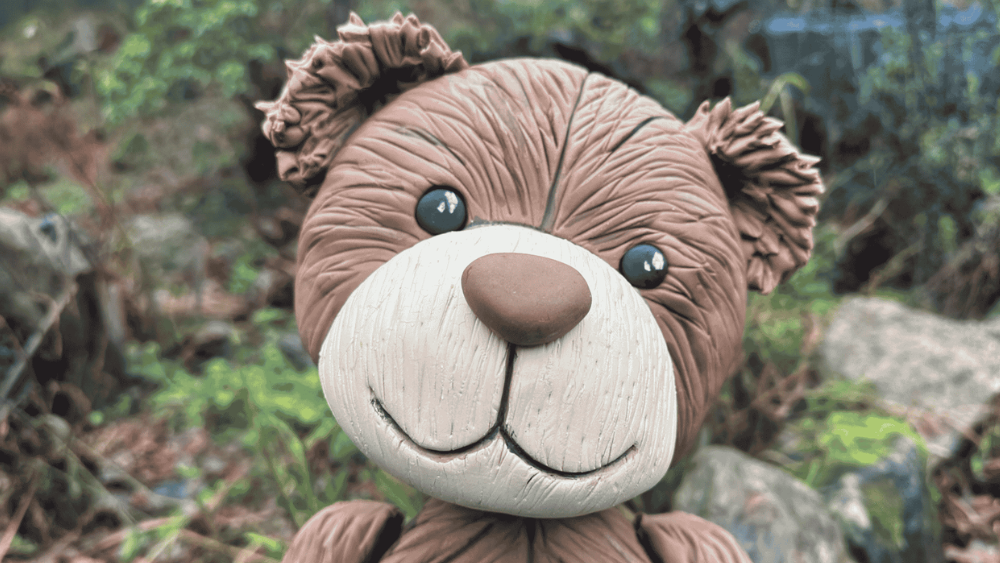
7. Adding the facial features
Time now to add some detail with the facial features.
8. Painting the muzzle
The Teddy Bear starts to come to life now as the muzzle gets painted and the character starts to show through.
9. Covering the board
Time to start the finishing touches starting with covering the board.
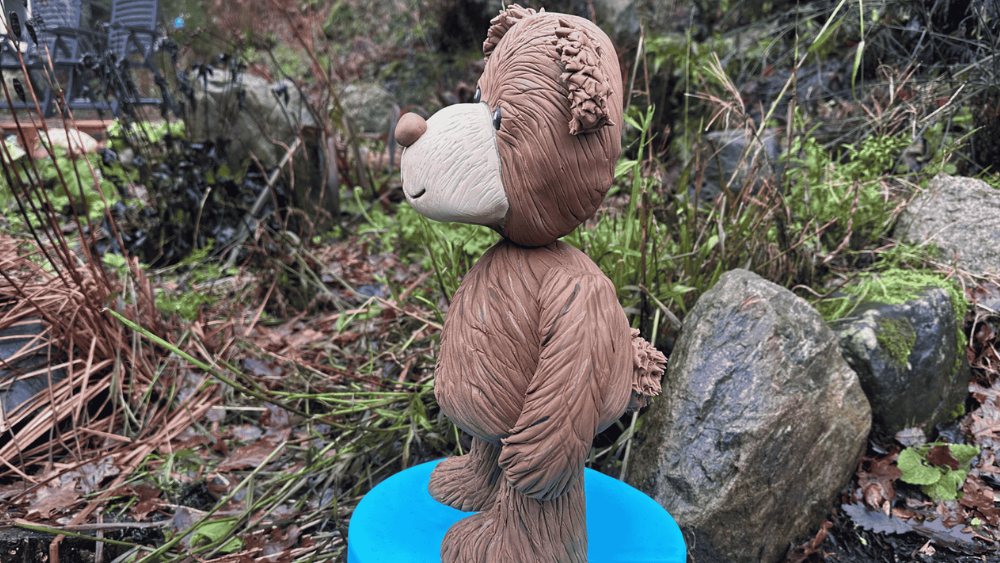
10. Adding the arms
The bear completes complete as the arms are added.
11. Adding depth to the fur
Paul decides to add more depth to the fur, again using a very simple technique.
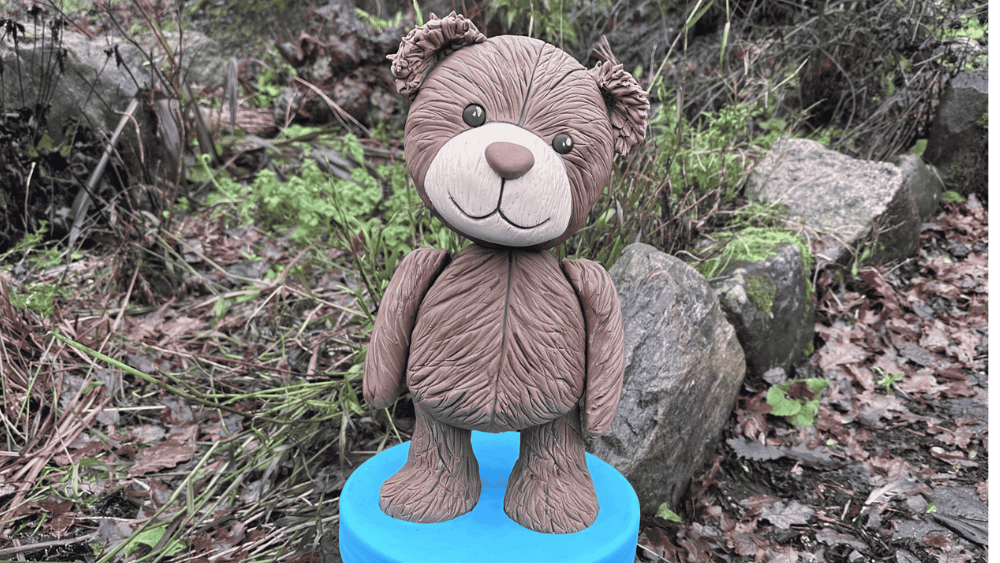
12. Finishing Touches
Time now to complete the design with Paul’s magical finishing touches.
13. Other Ideas
Paul provides some addition ideas and different ways to use the skills learned in this design.
14. Pro Lesson
Paul shares some costing and pricing ideas.
Discover how to create a truly charming Standing Teddy Bear Cake with this step by step tutorial by Paul Bradford. Designed for cake decorators who want to explore sculpted and character cakes, this class guides you step by step through the entire process, breaking down complex techniques into clear, achievable stages. Whether you’re expanding your skill set or refining your novelty cake designs, this Standing Teddy Bear Cake with this step by step tutorial provides the knowledge and confidence to create a professional, eye-catching result.
Paul begins by demonstrating how to make an easy wooden internal structure, explaining how to build a strong yet simple framework that safely supports a standing cake. You’ll learn why structure is essential and how to create stability without overcomplicating the process.
Next, Paul takes you through carving the cake body and shaping a polystyrene head, showing how to achieve correct proportions and a balanced, teddy-bear silhouette. This combination of cake and dummy ensures both practicality and a flawless finished look.
You’ll then move on to covering the cake in ganache and sugarpaste, learning how to achieve smooth, clean surfaces that form the perfect base for decoration. Paul shares tips to help you avoid common problems and achieve a professional finish.
Finally, the teddy bear truly comes to life as Paul demonstrates all the cute finishing touches. You’ll learn how to create realistic fur texture, apply subtle painting for depth and character, add expressive eyes, and complete the cake with those all-important final details that give it personality and charm.
By the end of this tutorial, you’ll not only have the skills to recreate the standing teddy bear cake, but also the confidence to apply these techniques to your own creative sculpted cake designs.
Don’t forget to share your interpretations of this wonderful cake with Paul and the rest of the CakeFlix community on our Facebook group.
View hundreds of more world-class tutorials only at www.cakeflix.com.