Tutorial Preview
Highlights
Here we have carefully selected the key parts of the tutorial and condensed it into a short video that should provide more than enough to get you started.
1. Explaining the Design
In this first lesson, Paul explains his thought process behind the design, as well as how he is going to put it all together. Paul uses cake dummy for part of the cake but as he explains you could use something like rice krispy treats if you want to keep it all edible (not advisable if it’s for a paying customer).
2. Making the Box
Here Paul shows us how to put the box together, now that the panels have been cut out. It’s all very simple, using only some hot glue and a few screws or alternatively small nails which might be better. You could get away with just using a bit of hot glue, but Paul likes to play it safe by adding some extra security – always a good idea, especially if it’s for a paying customer.
3. Icing the Box
Paul has discovered the box is a little squint, but this won’t cause any issues, so best just to keep going. A way to avoid this is to place a smaller square inside the box as you are putting it together and place it into each corner as you go. Paul then moves onto icing the inside of the box with black sugarpaste, with the help of some edible glue and cake smoothers.
4. Icing the Box Pt 2
In this lesson, Paul goes onto adding an inner lip inside the box and all around the lid to add a realistic touch.
5. Icing the Box Pt 2
Here Paul finishes covering the box by focusing on the inside and adding details such as lining and stitching to help bring the box to life.
6. Finishing the Box and Carving the Cake
Paul finishes off the box with some stitching detail, using a ruler to help keep things nice and straight. He then moves onto carving the cake which is very straight forward. He covers it with a layer of ganache and leaves it to set for a bit, and now we can move onto the next part.
7. Covering the Cake and Working on the Watch Face
Here Paul rolls out some black sugarpaste and covers the cake making sure it keeps a nice smooth surface, as well as slightly rounded edges. He then moves on to working on the watch face by adding pieces of grey sugarpaste all around the cake dummies, and then shaping them with a ball tool.
8. Making the Watch Crown
The same technique is used here as for the last lesson, while basically creating a smaller version of the clock face. This will then be placed upright on the side of the cake to create the crown.
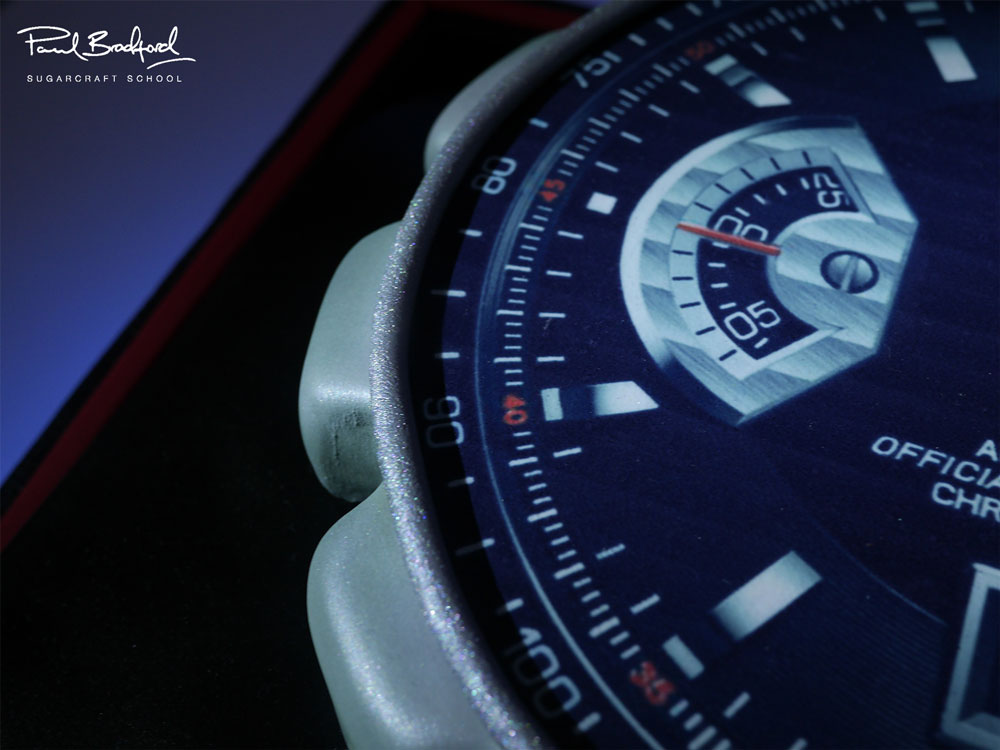
9. Adding Detail and Painting the Cake
Now Paul begins to add some extra functionality parts to the watch, to further create a realistic feel. He then creates a nice grey metallic paint, using different dusts mixed with alcohol, which is then painted onto the cake. Paul then uses a large soft brush to buff it, bringing out the metallic brushed look.
10. Adding Detail and Adding the Watch Face
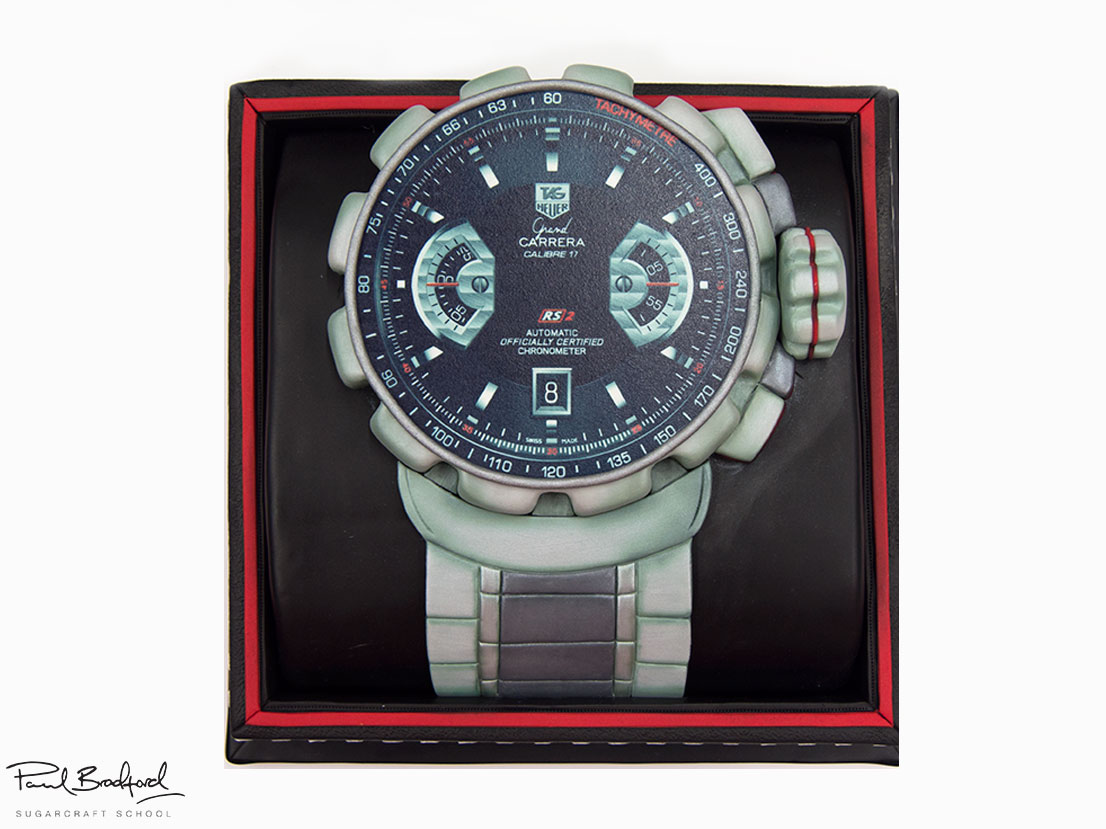
In this lesson, Paul adds another layer to the watch crown and adds the watch face, which was printed using an edible printer. All you need to do is find an image that you like, and then resize it accordingly using software such as Photoshop or PicMonkey.
Follow the link if you would prefer to use Paul´s Watch Face image.
11. Finishing the Box and Adding the Crown
Paul now finishes the box by adding thin strips of red sugarpaste, which run along the edges of the box. He then fine tunes the shape of the crown and attaches it with some edible glue.
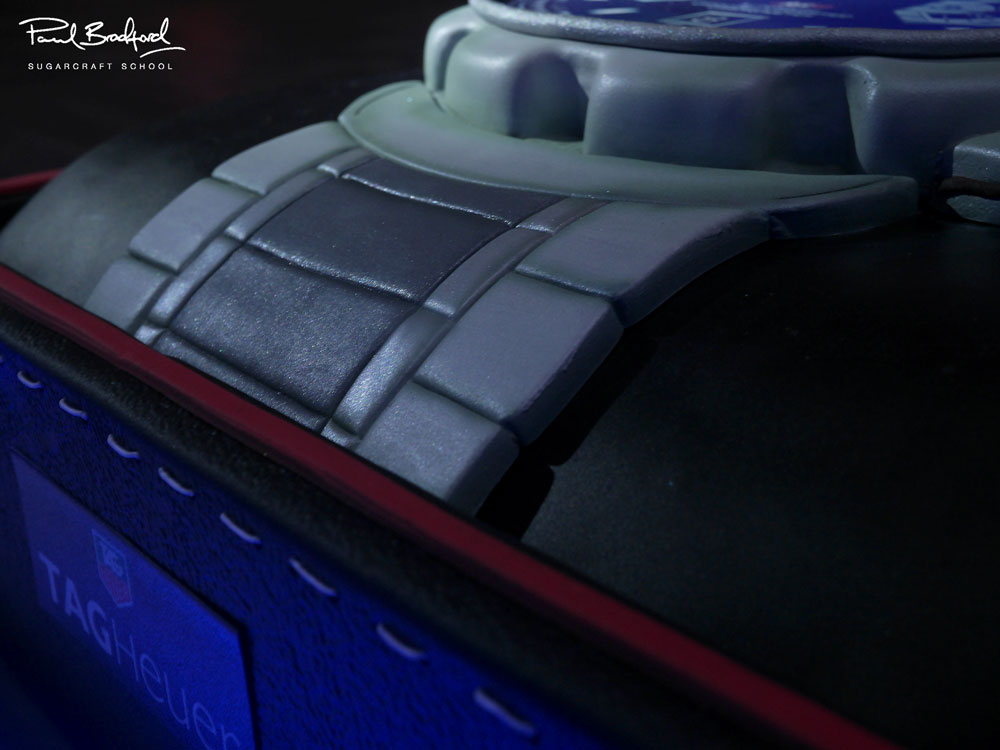
12. Making the Strap
Paul shows us how to make the strap for the watch and template used is available in the ‘templates’ section below. All you have to do is simply roll out thick grey sugarpaste, cut around the template, place the template over the sugarpaste and indent where you see lines with a leaf veining tool. Once you have all your marks, go over them again with the back of a knife making them deeper and more defined. Then paint over it with the same paint you created for the watch itself.
13. Adding the Strap
In this lesson, Paul adds some extra little pieces of detail to the strap and then adds it to the cake, securing it with a little edible glue. Once it’s in place, he then goes over certain sections of it with a darker shade of grey which really gives it a fantastic look.
14. Further Details
Paul gets the extruder out and makes some long sugarpaste sausages in grey and red, to add some extra detail to the overall design.
15. Finishing Touches
Here Paul goes on to add the finishing touches to the box, by adding some nice stitching detail along the top with some piped royal icing. Then it’s airbrushed with some black to add another dimension to the watch, as well as the the whole cake.
16. Other Ideas
In this lesson, Paul shares some other ideas to inspire you when making this cake to make it unique to you. We’re sure by now that you’ll have some of your own ideas and we would love to see them.
Please share your snaps with us on our Facebook page!
17. Pro Lesson
Here Paul goes into detail covering things like portions, ingredients costs and pricing and lots more. It’s vital information for any professional cake designer!
In this tutorial, you’ll learn some basic woodwork, as well as how to create many different shapes and textures using only sugarpaste. Paul gets creative using simple tools and techniques, to create a intricately detailed cake. You’ll also learn how to get metallic colours by mixing various dusts, along with cake carving and basic piping with royal icing.
This cake would be perfect for a birthday or even the celebration of a product launch. All the techniques learned on this Swiss Watch Designer Cake | CakeFlix, are transferable to any cake design, and it’s the perfect tutorial for a beginner looking to go on to the next level.
A Brief History of Swiss Watches
The history of Swiss watchmaking dates back to the 16th century, when Calvinist refugees from France brought their watchmaking skills to Geneva. In the 17th century, the first watchmaking schools were established in Geneva and Le Locle. In the 18th century, Swiss watchmakers began to develop new technologies, such as the lever escapement and the balance spring. These innovations made Swiss watches more accurate and reliable, and they soon became the standard for timekeeping around the world.
In the 19th century, Swiss watchmakers continued to innovate, developing new types of watches, such as the chronograph and the wristwatch. They also began to use new materials, such as gold and platinum, to create luxury watches. In the 20th century, Swiss watchmakers faced competition from Japan and other countries, but they remained leaders in the industry by focusing on quality and innovation.
Today, Swiss watches are still considered the finest in the world. They are known for their accuracy, reliability, and craftsmanship. Swiss watchmakers continue to develop new technologies, such as the quartz movement and the atomic clock, and they are always looking for new ways to improve their products.
Don’t forget to share your interpretations of this wonderful cake with Paul and the rest of the CakeFlix Family on our Facebook group.
View hundreds of more world-class tutorials only at www.cakeflix.com.