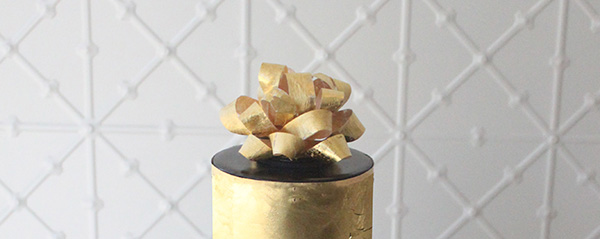
Faye Cahill of Faye Cahill Cake Design the leading Australian wedding cake artist known as the Queen of Lustre, has created an edible retro bow so apt for this time of year! Using wafer paper and gold leaf, the retro bow will give your cake the finishing touch it deserves! The edible retro bow can be made with plain or coloured wafer paper, or as shown here, finished with edible gold leaf.
Faye coated only one side of the paper in gold but for added glam, both sides can be gold or even one side gold and one side silver. Faye says “It’s a great way to add a fun texture without using flowers, it especially suits stronger and more masculine looks”.
You Will Need:
- 1 sheet of wafer paper
- 8 x Gold Leaf Transfer sheets
- piping gel
- paintbrush
- cutting blade
- cutting mat
- silicone paper or non-stick parchment
- edible glaze spray
- A small amount of royal icing to secure bow to cake
Step 1.
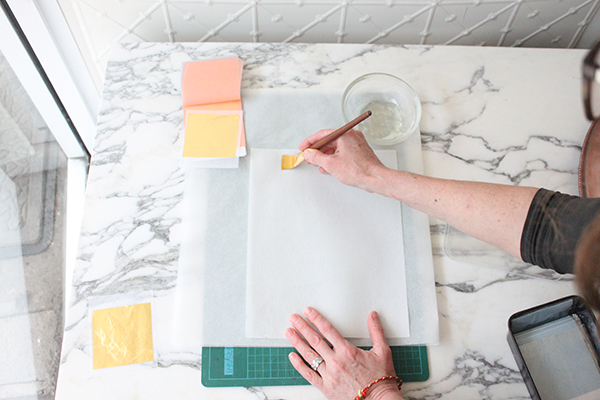
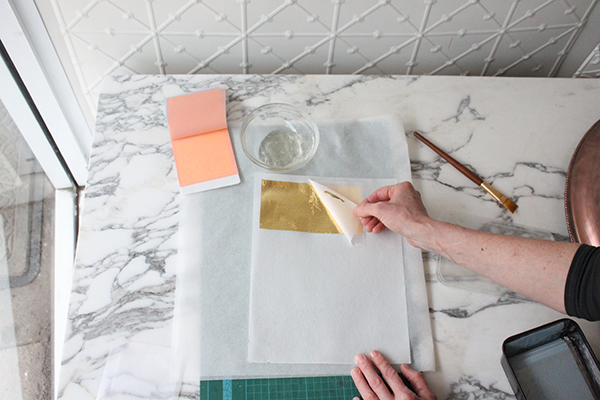
Paint piping gel onto the wafer paper. Paint an area bigger than a sheet of gold leaf.
Step 2.
Place the gold leaf face down onto the gelled area and rub all over the backing sheet softly. Faye used her fingers but a soft paintbrush is good too. Peel away the backing sheet and check for any ‘puffy’ areas that have not adhered properly. Place the backing sheet over these areas and give an extra rub.
Step 3.
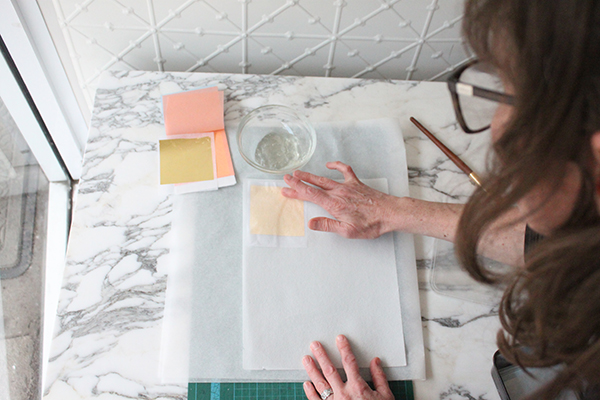
Paint another section and add a second sheet of gold leaf, overlapping by 5mm. After removing backing sheet, lay back down, aligning over seam and give it an extra rub. Continue process. To cover both sides, flip paper onto a sheet of silicone paper and repeat process on second side. Spray with edible glaze and allow to dry.
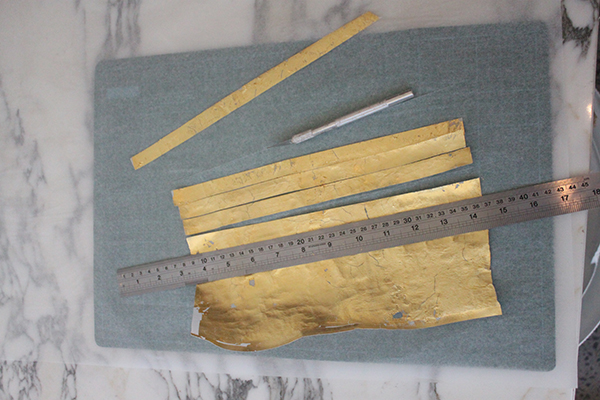
Step 4.
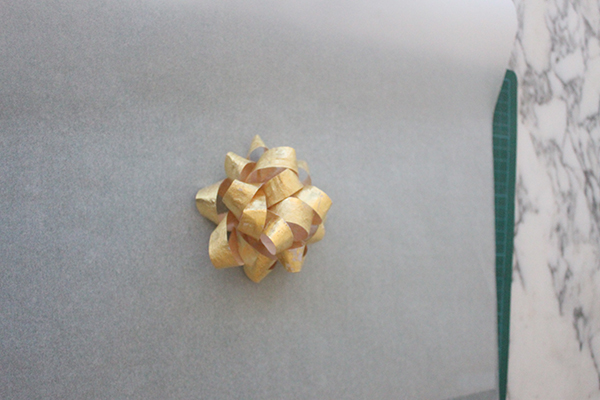
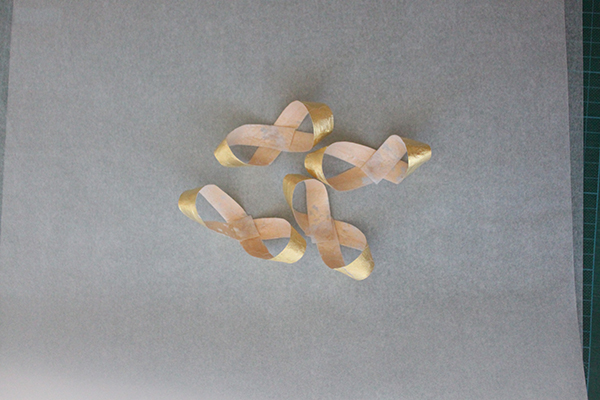
Using a cutting mat and a sheet of silicone paper, cut the gilded paper into lengthways strips that are half an inch wide. For one bow we need 6 strips that are 9” long, 3 that are 8” long and one short strip around 2.5” long. Cut this one a bit wider, around 3/4 inch.
Step 5.
Take one of the longer lengths and begin to form into a figure 8 by looping it back on itself. Secure the join with a small spot of piping gel and press firmly.
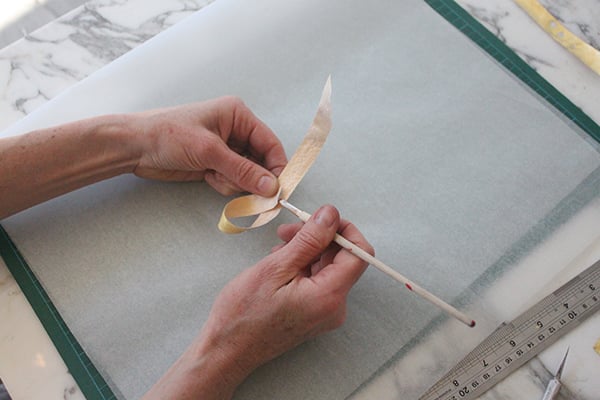
Step 6.
Now repeat this process on the other side of the ‘figure 8’ to complete the loop.
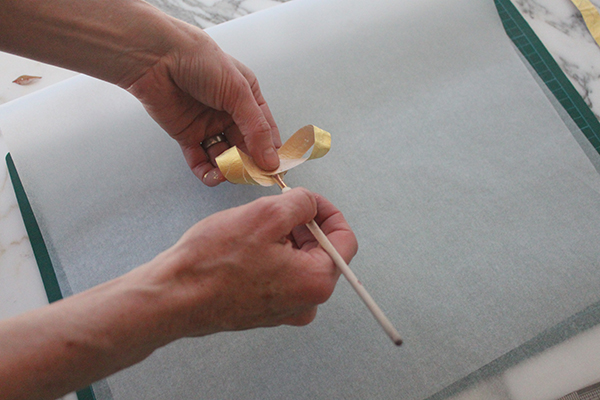
Step 7.
Continue with all of the pieces apart from the short one. Form that one into a normal circular loop.
Step 8.
Begin by assembling the bow by taking the six longest loops and stacking them up to form the outside layer. Give each addition a firm press to secure. Add the slightly smaller figure 8 loops to fill in middle and the small single loop to cover the centre and conceal joins. Adhere bow to cake using royal icing.