Tutorial Preview
Highlights
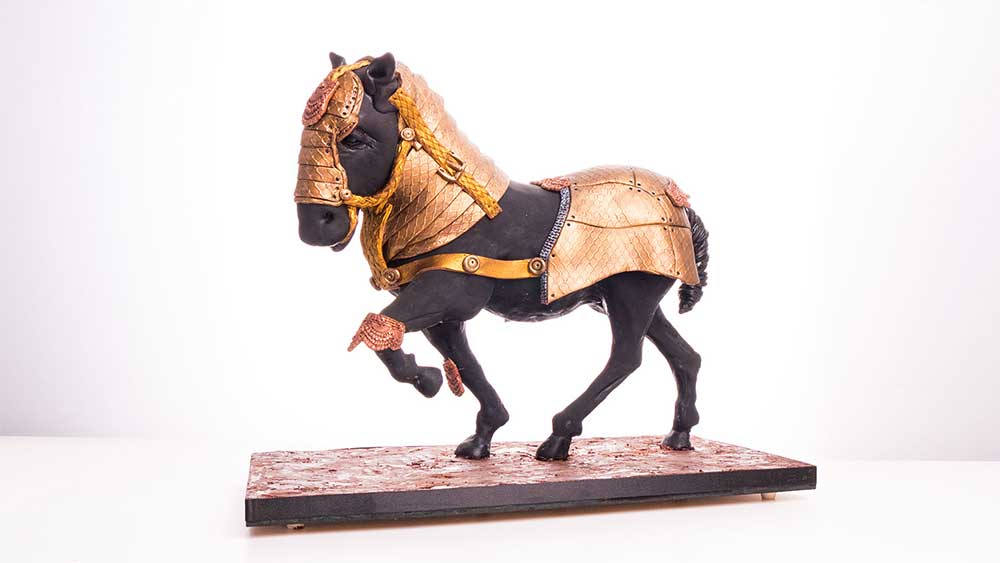
Highlights from the armoured horse cake tutorial course.
1. Talking through and drawing the structure
First of all, it’s important to know that much of the overall effect of Dot’s cakes comes down to good planning and making sure that the finished design is proportionally accurate.
This requires a bit of work at the sketching and planning stage. However, Dot takes you through this step by step. This not only works for this design but any lifelike cake you plan on making in the future.
NOTE: See templates below for reference…
2. Making the stand
In this lesson, Dot shows how to create the stand and shows how to shape the metal rods to exactly the shape of the horse’s legs. This is where the work from lesson 1 starts to pay off as the sketch will show you exactly the shapes required.
3. Carving the cake
It’s very important to get the carving right for this design. Using the templates Dot cuts out the basic shape then gets to work shaving off the detail before adding to the stand. She finishes by coating the cake with compound chocolate, then leaves to set.
4. Shaping the compound chocolate
Dot now adds another layer of compound chocolate over the whole cake, then with the remaining chocolate (which is now setting) starts to shape and sculpt the horse’s features.
5. Modelling the horse
Now it’s time to get some real structure and those distinctive horse features added. Dot shows how to add modelling chocolate to shape and sculpt the cake.
6. Adding the sculpting detail
Before covering in sugarpaste, it’s time to get those all important details added to our design. It’s the detail that makes the cake look so realistic so it’s worth taking your time at this stage.
7. Covering the horse’s face
With great skill, Dot covers the horse’s head in sugarpaste and adds those all-important facial features to give the horse it’s personality and character. If you’re replicating Dot’s design there’s no need to add so much detail as it will be covered in armour, but offers great practice when covering animal faces in future.
8. Covering the body
After rolling out sugarpaste to approximately 2mm (Massa Ticino) Dot then covers the horse. But it’s the trimming and massaging after covering that gives that all important detail.
9. Covering the legs and adding detail
Repeating the process, it’s now time to cover, mould and shape the legs.
Dot adds the exaggerated tendons and muscle shaping to the legs, using the download image as the guide >>> Armoured-Horse—Scale <<<
10. Adding the ears, tail and hooves
Using simple techniques, Dot now adds the ears, tail and hooves with great commentary along the way to help not only with this design, but other alternative designs.
11. Painting the horse
Much of the horse will be covered in armour. However, it’s better to be thorough and give the whole horse a coating of dark paint.
12. Creating the armour
Using a selection of moulds Dot creates a variety of armour designs. You’d be surprised at the moulds used, which were not originally intended for a Medieval horse!
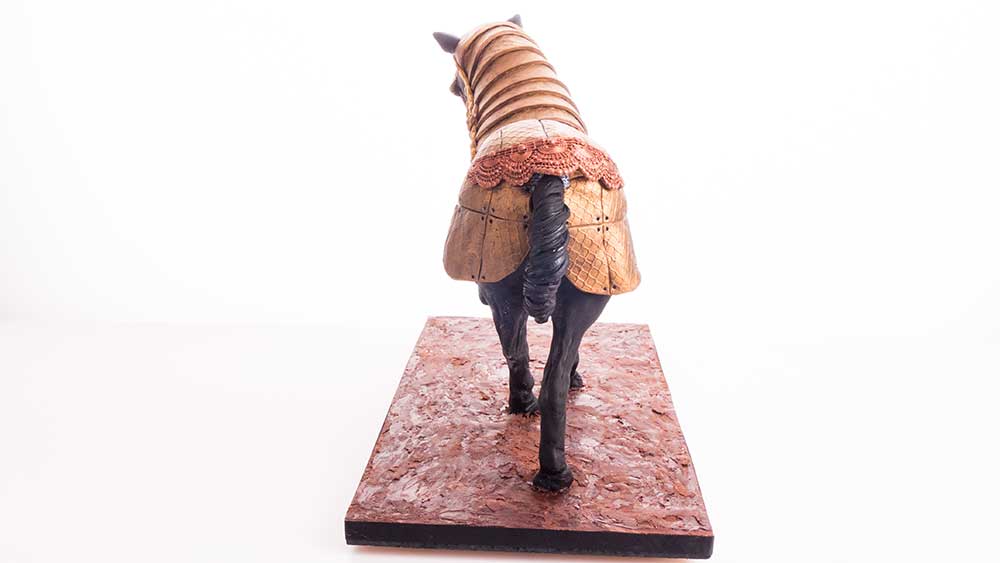
13. Adding the rear armour
Now our horse starts to get his armour on to give that Medieval look. Such a simple technique that gives such a great effect.
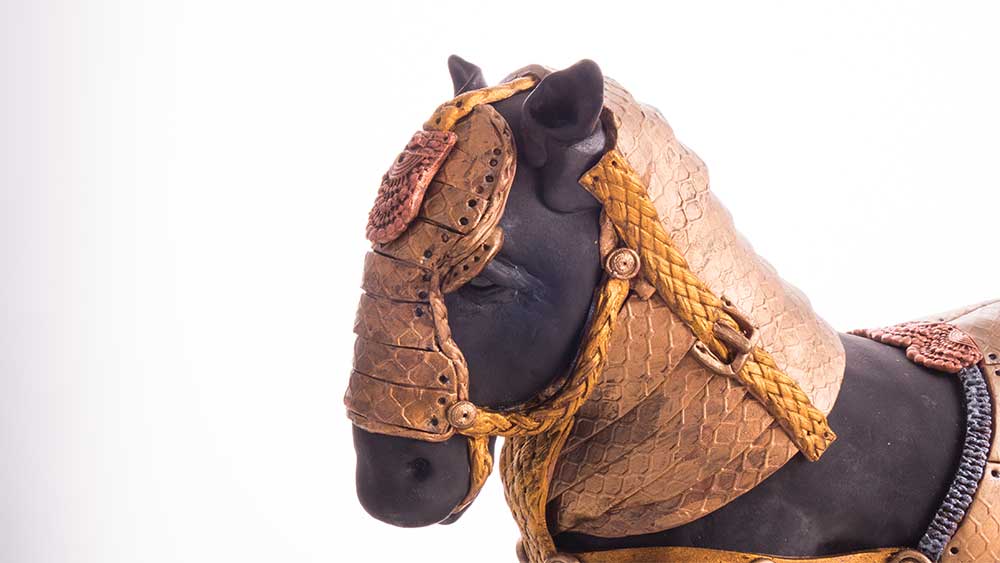
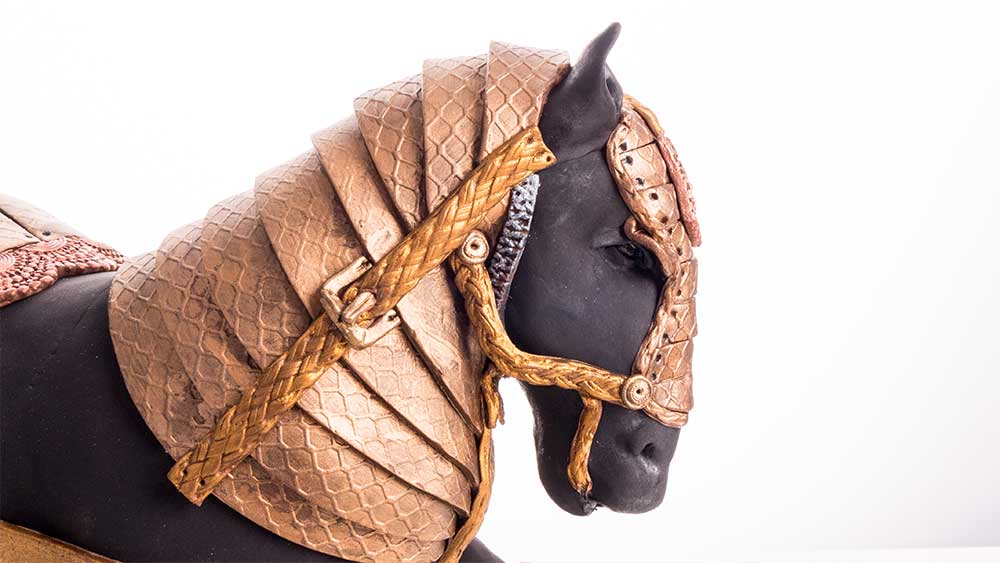
14. Adding the neck and nose armour
Time now to add some additional armour. It’s using the same mould cut outs, but cutting and shaping to achieve the desired shapes.
15. Adding detail to the armour
It’s all about the detail and in this lesson Dot adds a lot of additional straps and buckles and extras, which really give this design that extra WOW factor.
16. Painting the armour
You can leave the armour in the colour of your modelling chocolate if you like. However, to really bring the cake to life it’s best to add some metallic colours. Watch how Dot mixes and paints the armour to get this amazing finish.
17. Finishing touches
Finally, Dot covers the board and adds the ribbon. And here you have it… one beautiful medieval horse!
18. Other Ideas
Dot shares with you some other ideas you can create as a result of the lessons and techniques you have learned in this cake tutorial.
19. Pro lesson
Everything a professional cake decorator or shop owner needs to know about a design like this.
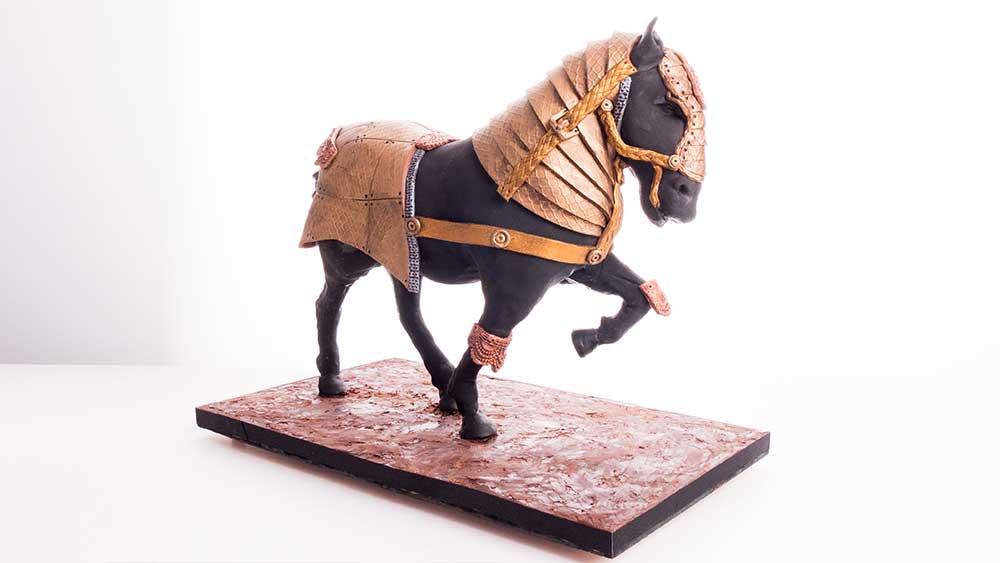
Create an Armoured Horse Cake with Dorothy Klerck
In this tutorial, the multi-award winning Dorothy Klerck shows you how to make this incredible armoured horse cake design.
Dorothy is an award-winning sugar artist from South Africa renowned for her incredibly realistic animal sculptures. This cake got plenty of attention at this year’s Cake International and it’s certainly not hard to see why!
Join Dot as she takes you through all her intricacies and techniques to really bring your horse to life!
In this tutorial you will learn how to:
- Advanced sculpting
- Advanced carving
- Creating a to-scale sketch and plan
- Shaping a sculpted stand
- and much, much more
Don’t forget to share your interpretations of this wonderful cake with Paul and the rest of the CakeFlix community on our Facebook group.
View hundreds of more world-class tutorials only at www.cakeflix.com.