Tutorial Preview
Highlights
Highlights from the course.
1. The design
Paul talks through his thought process and the outline sketch he drew, before he starts to decorate. Although this is an outline design, he caveats that he may use poetic license later, depending on how things go.
2. Marble effect
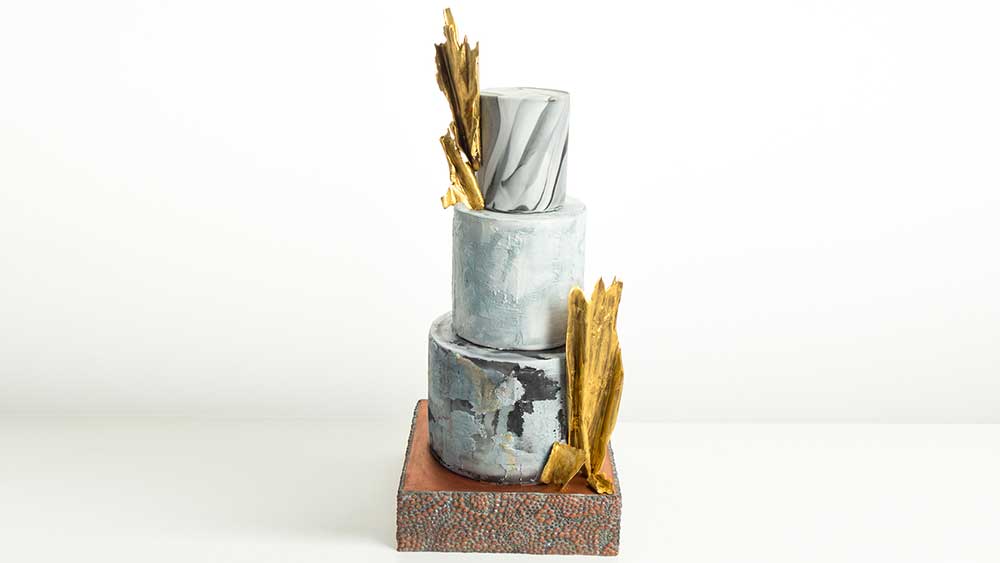
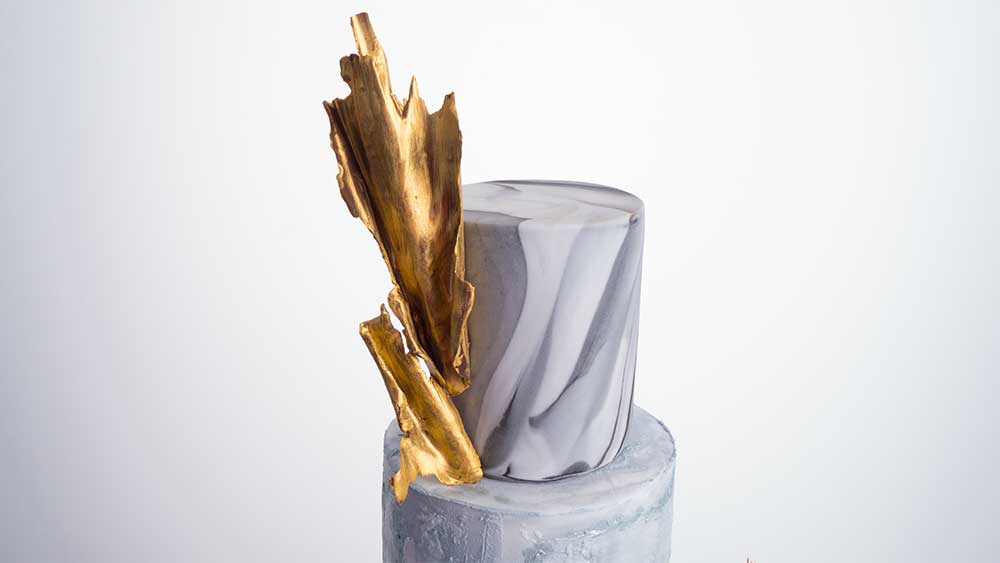
Paul starts by mixing the white, grey and black to get the marble effect. It’s all about the positioning of the colours and knowing when to stop mixing. He then smooths the cake with some improvised smoothers!
3. Cover the base
The base is a dummy, which Paul first covers the top then adds the four side panels all decorated with Karen Davies’ mould.
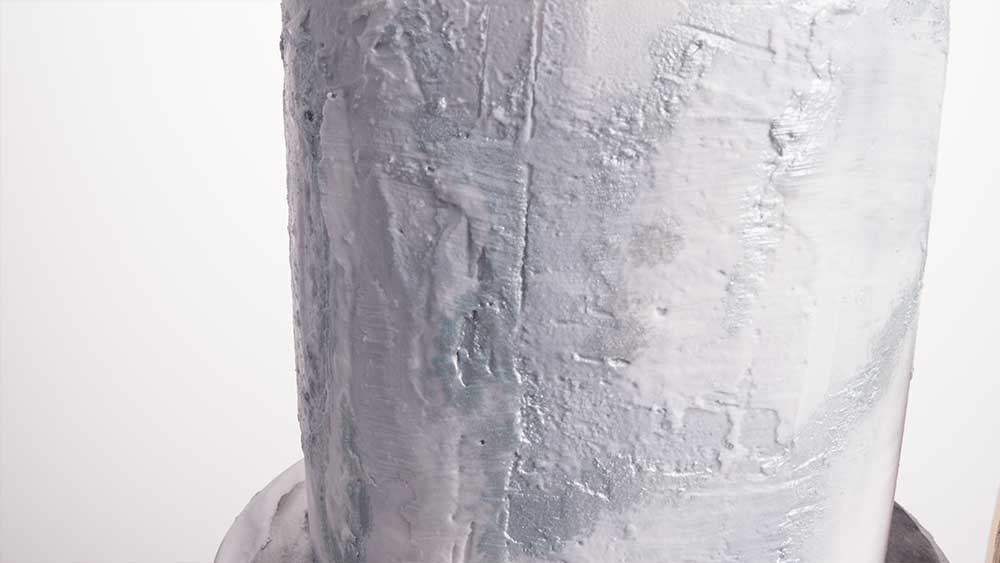
4. Getting the concrete effect
Paul brings out the covered 8” cake so he can add the concrete effect.
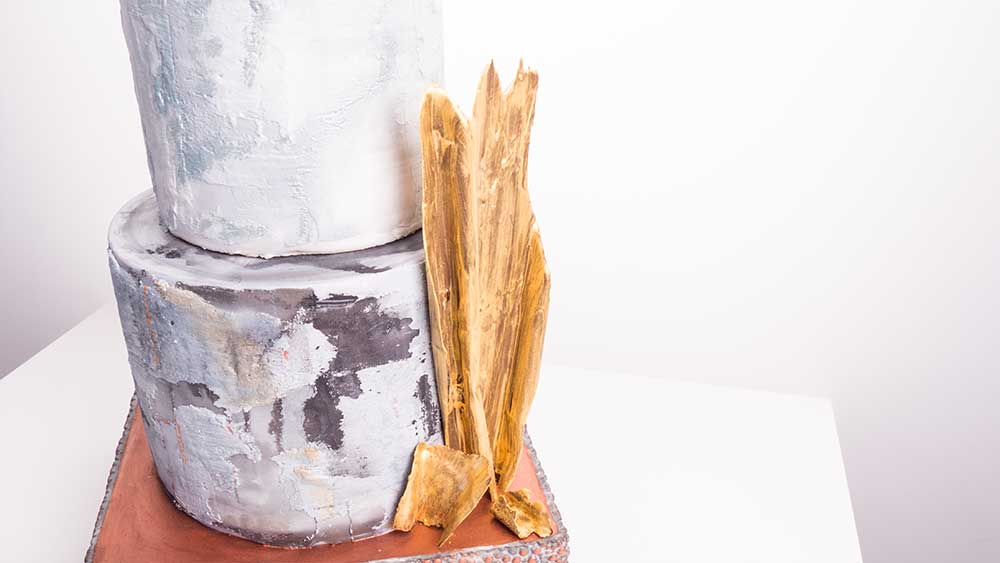
The great thing about a concrete effect cake is that concrete comes in all shapes and textures so choose the one that best suits your overall design. Note that he keeps building the colour until he gets the finish he’s looking for, which isn’t always right first time around!
NOTE: If you need a refresher on how to cover a double depth cake click HERE.
5. Painting the cakes
It’s time to get artistic with the smallest of brush strokes, coupled with a great selection of colours, which really brings the concrete effect to life.
6. Painting the stand
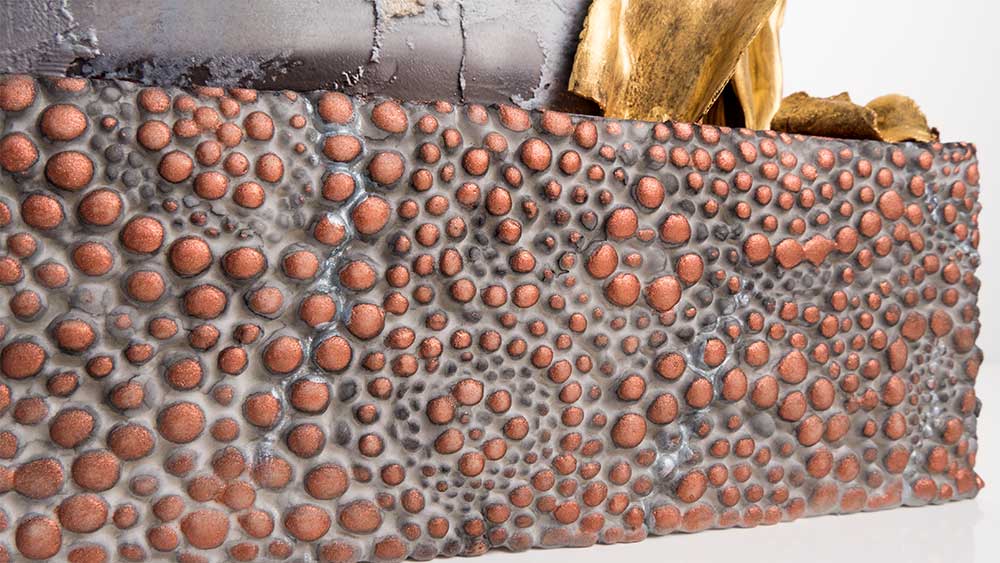
Paul uses some simple techniques to create an amazing effect which highlights the copper against the brushed dark background. It’s all about the detail so he then starts to add some extra colour to give it that special finish.
7. Stacking the cakes
Paul has used dummy cakes, which makes stacking a whole lot easier, but he still has decisions to make in terms of what sides of the cake are to be front facing.
NOTE: For videos on stacking cakes click HERE.
8. Making the chocolate sails
Paul tries out a couple of experiments using both a textured and smooth finish plus adding colours before and after the chocolate sets. Skip over to the next lesson to see what works best!
NOTE: Paul tries making the sails on an impression mat, but later discards them.
9. Painting the sails
After much trial and error, Paul gets the sails he wants and chooses to paint them all a beautiful gold in preparation for adding to the cake.
10. Finishing touches
Paul then chooses the pieces of chocolate he wants and places them strategically on the cake. It’s the final piece in the jigsaw for this very contemporary design.
11. Other ideas
Paul shares with you some other ideas for a design like this.
12. Pro lesson
Everything a Pro needs to know about making this cake.
Concrete effect wedding cake tutorial.
In this fun-filled cake tutorial, Paul Bradford shows you how to make this concrete effect wedding cake.
In this tutorial you will learn how to:
- Create a concrete effect using edible paint
- Marble a cake
- Make chocolate sails
- Use moulds alternatively
- and much, much more
Don’t forget to share your interpretations of this wonderful cake with Paul and the rest of the Sugarcraft community on our Facebook group.
View hundreds of more world-class tutorials only at www.cakeflix.com.