Quilted Designer Handbag Cake Decorating and Baking Tutorial

Tutorial Preview

Join NOW to access 1661 courses Watch Now
14 Day FREE Trial
Quilted Designer Handbag
with Paul Bradford
Skill level: Easy
HD Lessons: 15
Decorating time: Half a Day
Now Playing
12:03

1. Carving the Cake & Applying the Ganache

Struggling for time? You can watch the fast forwward version in just 11 mins here.

To start us off, Paul shows us how to carve the cake and apply the white chocolate ganache. We apologise if you are currently dieting as the first few lessons are mouth watering to say the least. The cake is then put in the fridge to set.

Now Playing
07:54

2. Applying the Chocolate Ganache

Now that cake is fresh out the fridge and nice and firm, it’s time to add the milk chocolate ganache to the front and back of the cake before placing it back in the fridge.
Now Playing
03:05

3. Cutting Off the Excess Ganache

There are just a few more steps to go and then the cake will be covered in smooth ganache and all ready for the sugar paste. Paul shows us how to get those lovely sharp edges and if you are new to ganache you will be excited to see how easy it is to work with.
Now Playing
05:20

4. Colouring the Sugar Paste

You will have noticed the lovely light jade colour Paul has gone with for this handbag design. Four colours were used to create this shade and Paul shows us which colours he uses and how much of each. Feel free to skip this section if you would prefer to use another colour. Perhaps you could create one of your own?
Now Playing
06:44

5. Icing the Sides of the Cake

So how did he get those lovely pleated sides on the cake? Watch this lesson and you will be surprised at the simplicity of it.
Now Playing
02:23

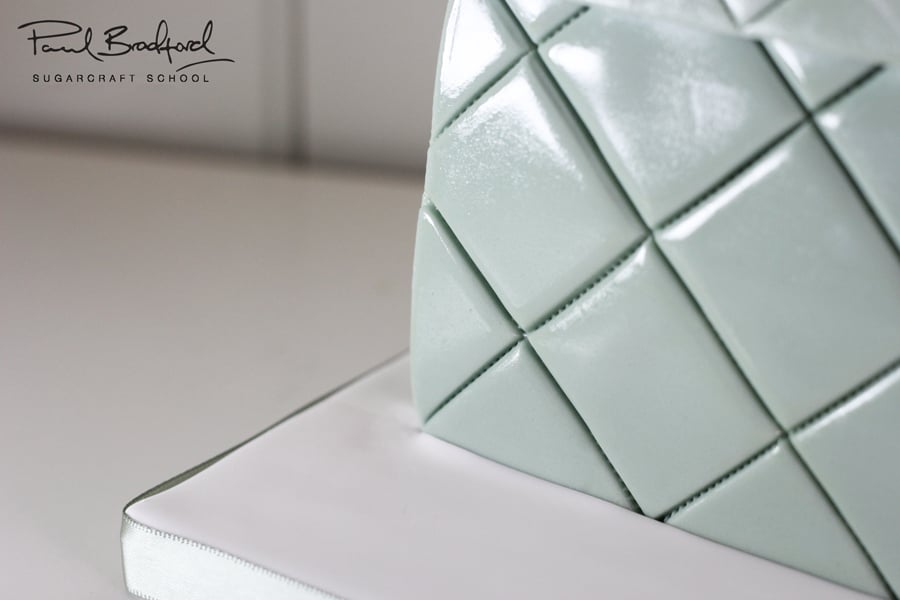
6. Stitching the Side

Now let’s add some realism to the pleated sides. The trusty stitchy tool by PME can always be relied upon and in this lesson Paul shows us how he uses it to get the desired hand-stitched feel.
Now Playing
18:00

7. Icing the Front & Back

This lesson is packed with great techniques that can be applied on any cake. Paul moves on to icing the front and back of the cake in a seamless way and then adding a very realistic touch to the sugar paste using a combination of the dresden tool, stitchy tool, a set square ruler and a paint brush. Get your tools at the ready!
Now Playing
10:00

8. Starting the Flap

Now it’s onto creating the flap for the handbag. Paul prepares his own template to cut around and then gets the sugarpaste nice and rounded. This whole process should be done as quickly and carefully as possible as you don’t want the sugarpaste to dry and become difficult to work with.
Now Playing
04:05

9. Completing the Flap

Now it’s time to apply those same techniques we used earlier for the front and back of the cake to this newly made flap. Once it’s on, it’s just a case of doing some more stitch work and smoothing off the edges to make it all feel attached to the rest of the bag…oops…cake. That’s how realistic it is!
Now Playing
08:06

10. Creating the Metal Plate and the Logo pt 1

In this lesson, Paul makes a start on making the gold plate for the top of the bag as well as the CC logo (circle cutters and a knife) to attach to the front of the bag.

Please note: Paul doesn’t  go with the gold plate in the end as you may have noticed from the pictures so feel free to fast forward a little. He looks a little deflated by the end of this lesson and think you will agree that we’ve all been there! Also, due to copyright laws, the brand logo has been adjusted for the photographs of this cake and differs slightly from the logo created in this lesson.

Now Playing
08:28

11. Creating the Metal Plate and the CC Logo pt 2

As mentioned in the previous lesson, the gold plate gets set aside and Paul opts for a much more sleek design but we’ve kept it as a lesson for you to watch anyway. In this lesson, Paul gets a nice gold effect over the gold sugar paste but just doesn’t like the font. What do you think? He does the same for the CC logo and then attaches it to the front of the cake.

Please note: Due to copyright laws, the brand logo has been adjusted for the photographs of this cake and differs slightly from the logo created in this lesson.

Now Playing
15:41

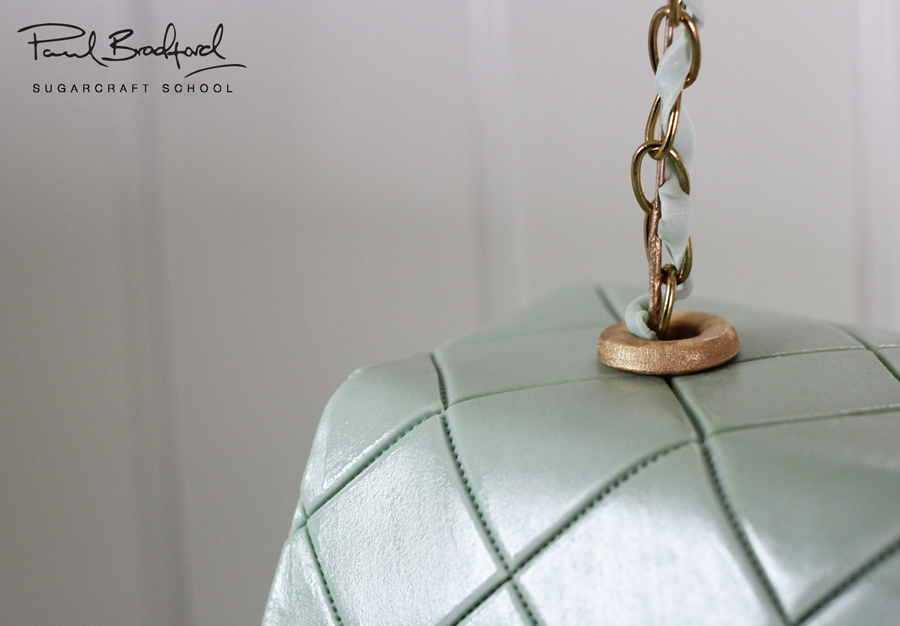
12. Adding the Gold Chain

You’ve possibly been trying to figure out how Paul got that lovely floating chain effect. Well, let’s watch and find out. It’s a very simple idea but quite fiddly and an extra pair of hands to help is recommended. Once you have completed this, the cake is now finished and it’s onto the board!
Now Playing
04:50

13. Icing the Board

Paul decides to go for a nice simple white sugarpaste to keep it classy and simple and to draw the eye to the cake. You may decide to go for something completely different depending on the colour of your cake. And that’s it, the elegant Quilted Designer Handbag Cake is complete!
Now Playing
11:00

14. Fast Forward Designer Handbag

Struggling for time? Why not watch the whole video in 11 minutes!
Now Playing
03:22

15. Other Ideas

Paul now shares with us some other ideas we can use when making this cake to make it unique and hopefully it inspires some of your own ideas. So get creative and get making!We would love to see your versions of this cake – make sure to share your snaps on our Facebook Page!

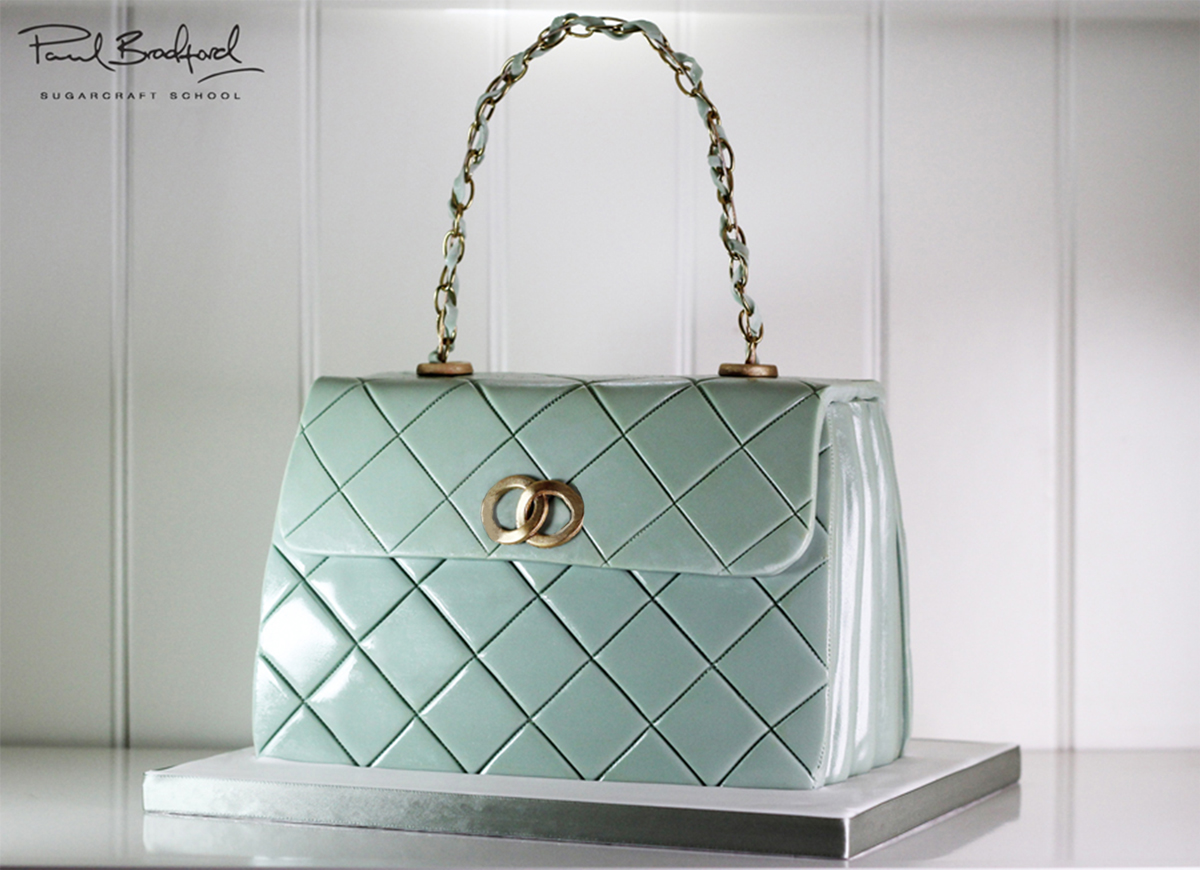
Paul introduces us to this stunning Quilted Designer Handbag Cake. We absolutely love the gravity defying handle effect and the chain is a very classy touch. This course is for intermediate level or confident beginners looking for a challenge and is perfect as a celebration cake for a handbag addict!

We would love to see your take on the Quilted Designer Handbag Cake – please share your photos with us on our Facebook Page!

Paul Bradford

Paul Bradford

Paul Bradford´s mission is to ‘Empower people to achieve their cake decorating dreams’ by providing a range of cake decorating courses and online tutorials through their website, which currently teaches 195,000+ students.  
14 Day Free Trial