How To Make A Japanese Maple Cake Decorating and Baking Tutorial

Tutorial Preview

Join NOW to access 1698 courses Watch Now
7 Day FREE Trial
How To Make A Japanese Maple
with Robert Haynes
Skill level: Intermediate
HD Lessons: 8
Decorating time: Two Days (including overnight drying time)
Now Playing
09:47

1. Making the Japanese Maple Leaf

Struggling for time? Why not watch the whole tutorial in five minutes!
Robert gets straight to it and has mixed together various colours of flower paste by A Piece Of Cake including Spring Green, Mint Green and Cream to get a lovely leaf colour. Robert uses a Japanese maple leaf cutter by Orchard Products and we recommend that you have plenty of corn flour to hand, it is of most importance as you will quickly see. You will be surprised at how simple this lesson is but don’t get ahead of yourself…we haven’t started dusting just yet!
Now Playing
08:59

2. Making the Glaze

In this lesson Robert shows us how to make the fantastic glaze that can be adapted to create different finishes.

Now Playing
21:01

3. Colouring the Japanese Maple

This is where it really gets fun and you will be amazed at the variation of colours created with only a few to hand. You can move onto this section when the flower paste is still a bit leathery or when it is completely dry, but you may find it easier to work with it when it’s dry as Robert has. Delicacy is the key here and if you have a picture of a Japanese maple to hand and study it as you go, this will be very helpful. Your dusting will vary depending on the season you want to recreate. Make sure you have a very fine paintbrush and perhaps practise a little with it before painting onto the leaf. Once you glaze the leaf, you will see all of your fine work come to life and it is truly stunning.
Now Playing
04:10

4. Making the Lichen

You will be amazed at the result of this very simple lesson and the huge amount of realism it adds to the overall look. It really is the simple things. A little bit of paste and a balling tool is all you need…oh and some more corn flour. By mixing Eucalyptus dust by Sugarart with white flower paste, you will get the same colour that Robert uses for the lichen.
Now Playing
07:36

5. Constructing the Stem

Some red wine florist tape and a tape shredder will be needed for this lesson. Robert is full of handy tips and one in particular which you will find useful is to actually make your fingers sticky by rubbing your fingers on a strip of florist tape before wrapping it around the stems as it will help secure it. Remember and create a natural gradient starting thicker at the bottom of the stem and thinner as it gets closer to the leaf. It may sound obvious but can easily be overlooked when you are in the zone.
Now Playing
08:50

6. Completing the Japanese Maple

Now we get to attach the lichen! It is so satisfying but a little tricky so do be patient as the payoff is well worth it. Before we do that however we will add some dust to the stem we just constructed. When adding the lichen take a moment between each bit you add to sit back and decide where you will place the next one and whether it needs it as you can easily overdo it. Be warned…it is very addictive. Finally we just need to add a little dust to the lichen for it to appear more rugged and last of all, steam it to lock in the dust and all the colours. If you don’t have a steamer then you can use the steam from a kettle as it will achieve the same results. Just be careful to get the distance right so as not to burn it.
Now Playing
00:54

7. Other Ideas

In this section, Robert shares ideas for other ways in which you can present your Japanese Maple and we’re sure you’ll have some of your own ideas…we would love to see your take on the Japanese Maple – please share your snaps with us on our Facebook Page!
Now Playing
05:08

8. Fast Forward

This is the place to be if you are strapped for time – you can watch the entire tutorial in just five minutes!

NOTE: THIS WAS FILMED BEFORE ROBERT HAD HIS BOTANICALLY CORRECT CUTTERS AND VEINERS. ROBERT USED IS OWN TEMPLATES IN THIS TUTORIAL. THE CUTTERS AND VEINERS ARE NOW AVAILABLE VIA THE TOOLS TAB.

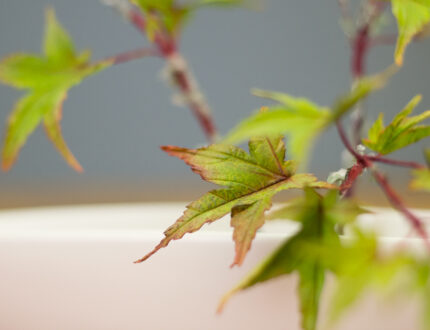
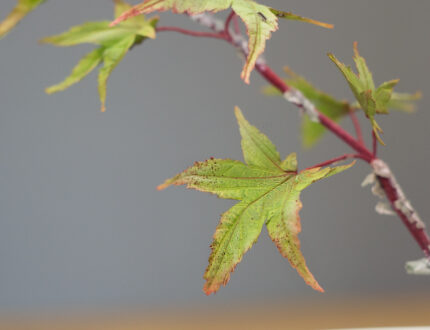
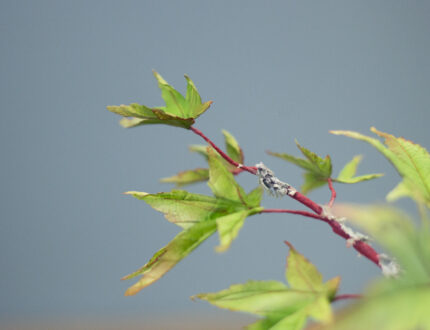
We were lucky enough to have the fantastic Robert Haynes in the studio creating his stunning Japanese Maple which looks incredibly realistic. This is a fantastic piece for competition work or to add to a special cake as decoration. This tutorial is aimed at all levels and with Robert’s thorough and clear instruction you should be fine no matter what your skill level. If you are looking to make an arrangement similar to this, one you will want to give yourself two days to allow for drying time overnight.

We would love to see your take on the Japanese Maple – please share your photos with us on our Facebook Page!
Robert Haynes

Robert Haynes

Robert Haynes is a completely self-taught sugar crafter. He learnt through reading books and studying the anatomy of flowers and foliage and wished he had access to classes and teachers to learn from, so he now does just this and travel far and wide teaching students how to create beautifully realistic sugar flowers and foliage. One of his particular skills is recreating life-size botanically correct blooms which he show-cases as pieces of art.
* indicates a required field
7 Day Free trial