Tutorial Preview


Highlights
Here we have carefully selected the key parts from the entire tutorial and condensed it into on 8 min long video. More than enough to get you started without taking up your time!
1. The design and making the stand
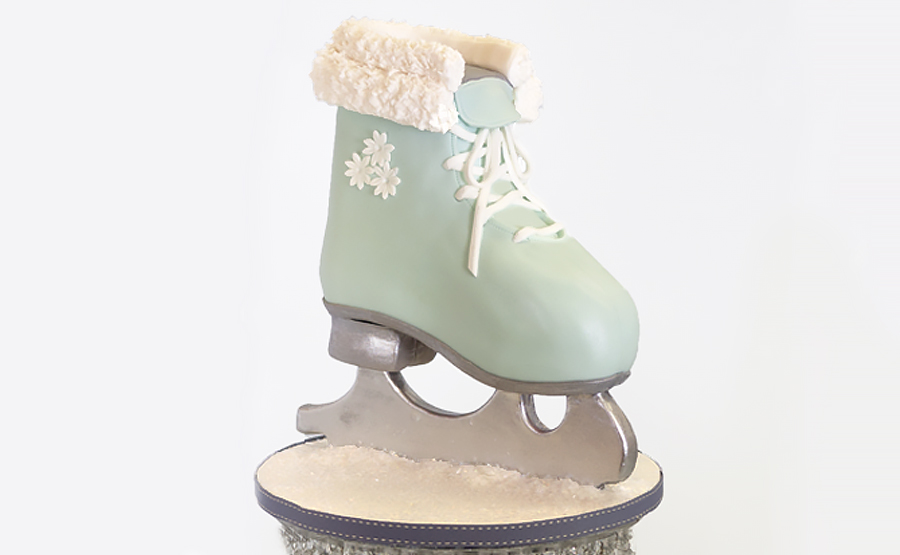
Paul has decided that he would like to make an ice skate which stands up! Paul creates a template (which is available for download) and then from that cuts out the ice skate blade from plywood. Just remember to do this in a non food environment, or go to your local DIY store where they can do it for you.
2. Building up the cake
Here Paul creates another template which he uses to cut out the shape of the boot from chocolate cake. It’s then a case of simply sticking each section down with some ganache and then allowing to chill, before moving onto carving and ganaching.
3. Carving and ganaching the cake
Now that the cake has firmed up a little, Paul moves onto carving. Remember the sugarpaste is still to be added – which will obviously add thickness to the overall look. You can always build it up with cake cuts offs or ganache, if you find you carve off too much. A nice big thick layer of ganache, and then back in the fridge it goes.
4. Finishing the Ganaching
Here Paul smooths off the ganache and fine tunes the shape of the boot. Some nice hot water and a palette knife is all you need. If you don’t mind getting messy, you could even use warm water and smooth it down with your hands and then use acetate smoothers.
5. Covering the cake Pt 1
In this lesson Paul begins to cover the cake using a nice pale green colour. Paul decides to cover the boot first of all, in two sections. He uses the seam which appears on the back of most ice skates as the join, keeping it looking realisitc. However, if you fancy a challenge you can always try covering it in one big piece.
6. Covering the cake Pt 2
7. Adding the laces
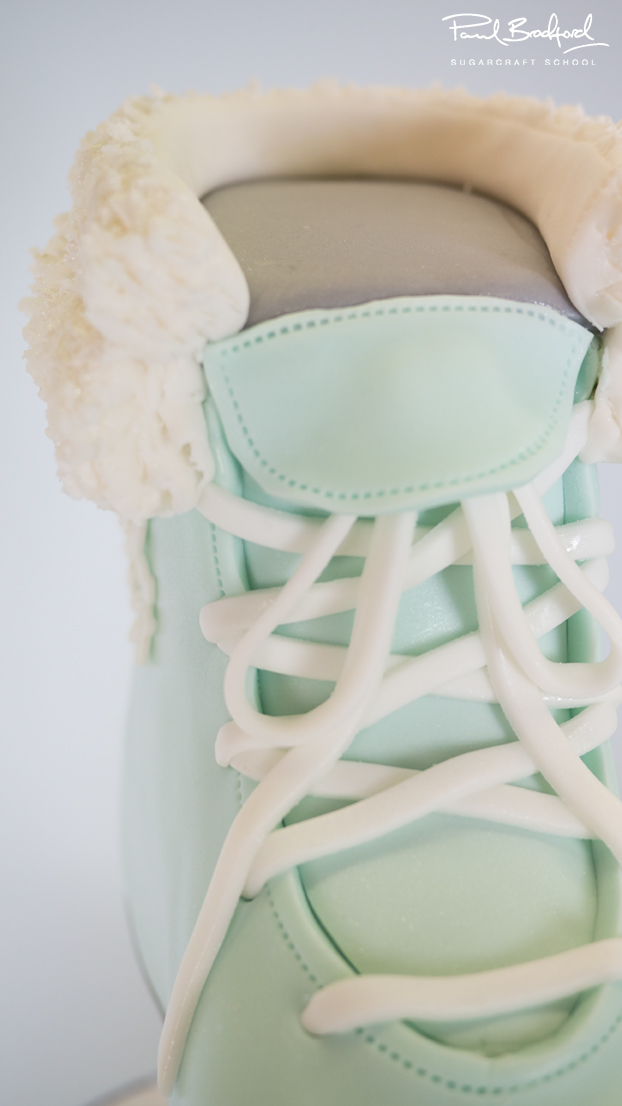
Paul now begins to add some detail to the boot, starting off with some lovely white laces. Paul uses a ribbon cutter to cut out flat laces, as opposed to sausage like laces. He uses a cell stick to make the holes, and then adds the laces by pinching them at either end and placing in the holes in a criss-cross formation.
8. Adding detail to the boot
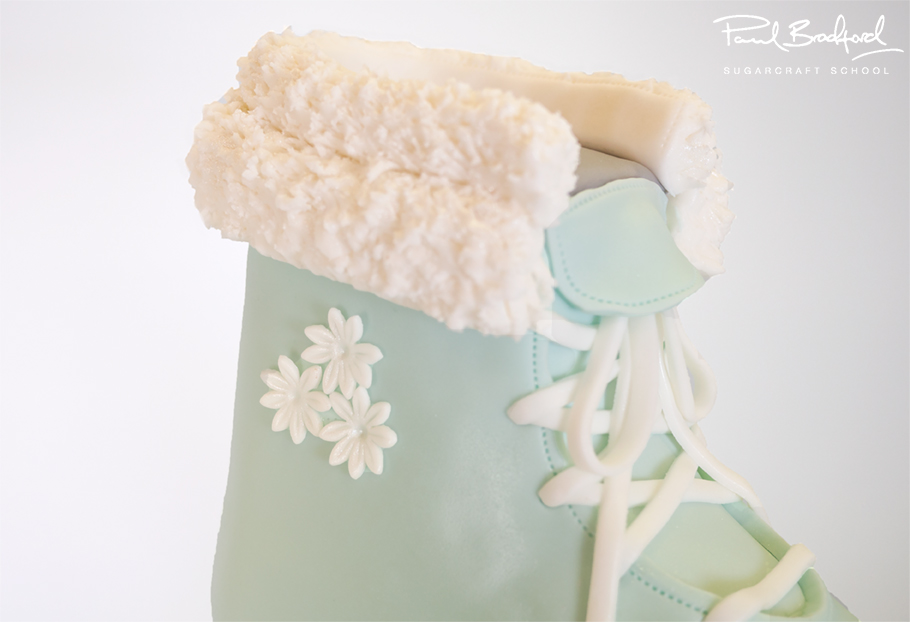
Here Paul adds a seam to the back of the boot with a thin piece of sugarpaste, complete with stitching detail. He then rolls out a large thick sausage of sugarpaste and adds it to the top of the boot. Can you work out how he creates that fluffy fur type effect? Watch to find out…
9. Covering the blade
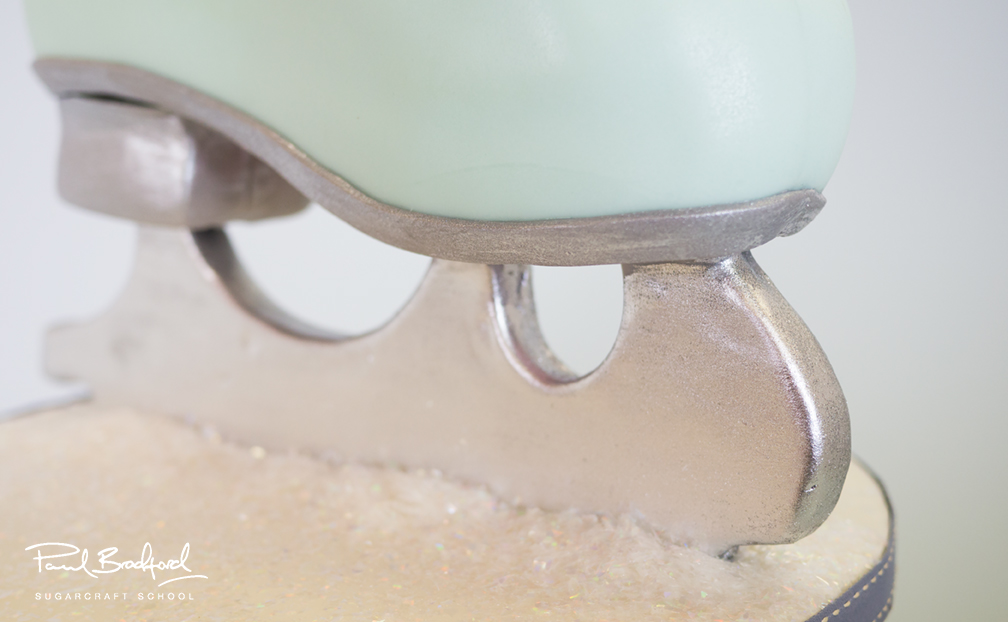
Prior to this lesson, Paul has added another layer of fluffy sugarpaste to the the top of the boot to give it more of a designer feel which really makes the difference. So now it’s onto the blade. Paul simply rolls out some grey sugarpaste, paints some edible glue onto the blade and then covers it in two pieces. He then cuts away the holes and then softens the sugarpaste over the edges with his finger.
10. Adding more detail to the boot
Here Paul adds the heel to the boot, by adding two large rectangular pieces of sugarpaste secured with some glue. Paul finds that the pieces of sugarpaste can slide down or fall off due to their weight, but with some persistence they stay put. He advises that perhaps using Rice Krispie treats would be easier. He then adds the sole to the bottom of the boot, by simply adding a thin piece of grey sugarpaste all the way around, secured with some edible glue. You’ll be amazed at how much this really completes the look.
11. Finishing touches
In this lesson, Paul adds all the final details including some cute decorations on the sides of the boot to add interest. Paul paints the blade to give it more of a metal look, and also paints the sole and sprays the boot with an edible glaze to give a leather look. Just remember that edible glaze can make white sugarpaste go yellow, so be sure to cover your board.
12. Other ideas
Here Paul share some ideas you can use when making this cake to make it unique to you.
We would love to see your take on the 3D Ice Skate – please share your pictures with us on our Facebook page.
13. Pro lesson
In this lesson, Paul shares some insider information about the cost to make this cake, as well as pricing, portions and other vital information for any professional cake designer.
In this tutorial, Paul demonstrates how to make a strong and food safe stand. All the templates have been created and are available to make the process as simple as possible. If DIY isn’t your forte, you can always ask a local carpenter to help you with this part, before moving on to the cake decorating. This tutorial covers numerous techniques including carving, ganaching, texturing, creating realistic boot detail and more.
The 3D Ice Skate cake can be adapted to suit different genders – not to mention different sports – and the skills learned will help you make all kinds of designs. This cake would be brilliant for a birthday celebration or for a fancy sporting event – the possibilities are endless!
We’d love to see your version of 3D Ice Skate – please share your snaps with us on our Facebook page!