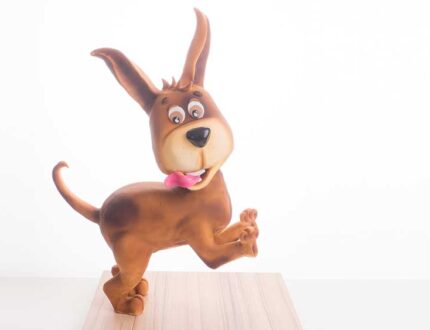
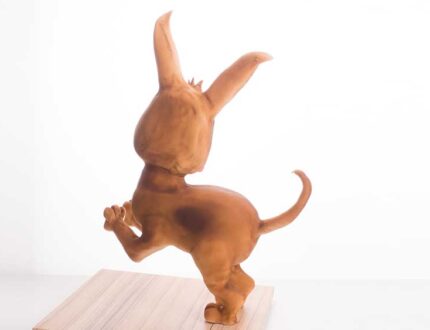
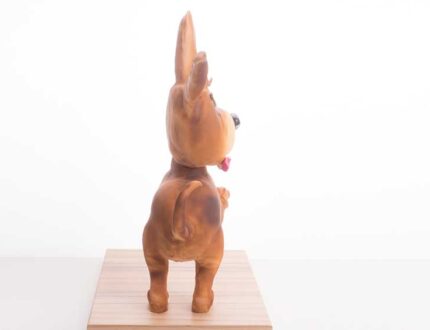
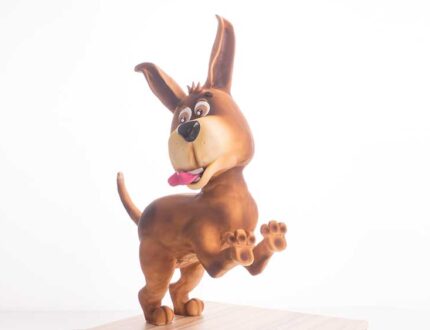
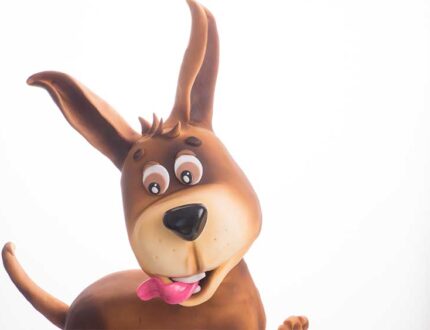
Tutorial Preview
Highlights
Our puppy love cake tutorial highlights
1. Making the Structure
This is a key element of this gravity defying puppy dog cake. Paul talks you through each stage of the stand and be sure to check out the Stand measurements under the Tools details below. You might need an extra pair of hands when it comes to bending the threaded rods!
2. Making the stand foodsafe
With all that exposed wood and metal it’s important to ensure that the cake is made foodsafe. Paul uses ganache and tinfoil and ensures that all exposed edible areas are covered.
3. Carving the cake
Paul now adds the cake and starts carving to create shape and features. It’s worth spending time at this part as once the ganache goes on, there’s no going back!
4. Ganaching the cake
Time to get ganaching! Paul applies the ganache, refrigerates, then smooths. He repeats the process until he is happy with the shape.
5. Adding the legs and neck
Using a mix of modelling and sugarpaste Paul then starts to model the back, then front legs.
Making sure he gets the muscular shapes he then moulds and shapes them into place.
6. Covering the cake
This is the tricky part, but with some planning Paul rolls out a very large piece of sugarpaste, then proceeds to cover the cake. The key thing is not to panic! Let Paul take you through the covering then massaging the paste to the shape, which ends up with a lovely smooth finish.
7. Covering the underside
After covering the cake there are likely to be some areas under the cake, at the dog’s tummy, where the joins just don’t meet. Not to worry, Paul will show you how to fix these areas in this lesson.
8. Covering the head
This will be an easier task than covering the body, but, nonetheless, still needs a lot of care and attention. It’s a similar process with the pre-measuring, cutting, covering, shaping and smoothing.
9. Adding the paws
Remember, this is to be a cute, cartoon like, puppy so cartoon paws are the name of the game here! Using simple shaping techniques, Paul adds the paws.
10. Adding the tail and ears
Now it’s time to cover up the threaded rods by adding the tail and ears. Dogs come in all shapes and sizes, especially cartoon ones. Feel free to adapt your own style or follow Paul as he shapes the tail and ears before securing and shaping them on the threaded rods.
11. Adding the nose and mouth
Paul now makes the mouth or muzzle. The nose is pretty straightforward and there we have it, facial features added!
12. Airbrushing
Paul creates a lovely golden colour, then applies over the whole cake, being careful to note that he will be adding the eye and nose colours later.
13. Airbrushing the detail
Using darker colours Paul now creates the shadowing and patches using the airbrush.
14. Adding the eyes and painting the nose
Paul decides to make the eyes from sugarpaste cut outs to great effect. He makes the eyes off the cake to make things easier then adds to the cake, placing on the eyebrows and eyelids. To finish the lesson he paints the nose a lovely shiny black.
15. Finishing touches
Paul finishes by adding the tongue and a little glaze to some of the facial features, which really gives our puppy that little glint in his eye!
16. Other Ideas
Other ideas for the Jumping Puppy Love cake tutorial.
17. Pro Lesson
Everything a professional needs to know about making and selling a cake like this.
Jumping Puppy Cake Tutorial
Learn how to make this Puppy cake with the multi-award winning Paul Bradford. In this easy to follow, fun-filled cake tutorial we’ll teach you everything you need to know to take your cake decorating skills to new heights.
Perfect for any dog lovers, there are lots of things to learn in this one.
In the following tutorial you will learn how to:
- Make an internal structure
- Carve awkward shapes
- Sculpt
- Airbrush
- and much, much more
Don’t forget to share your interpretations of this wonderful cake with Paul and the rest of the CakeFlix community on our Facebook group.
View hundreds of more world-class tutorials only at www.cakeflix.com.
