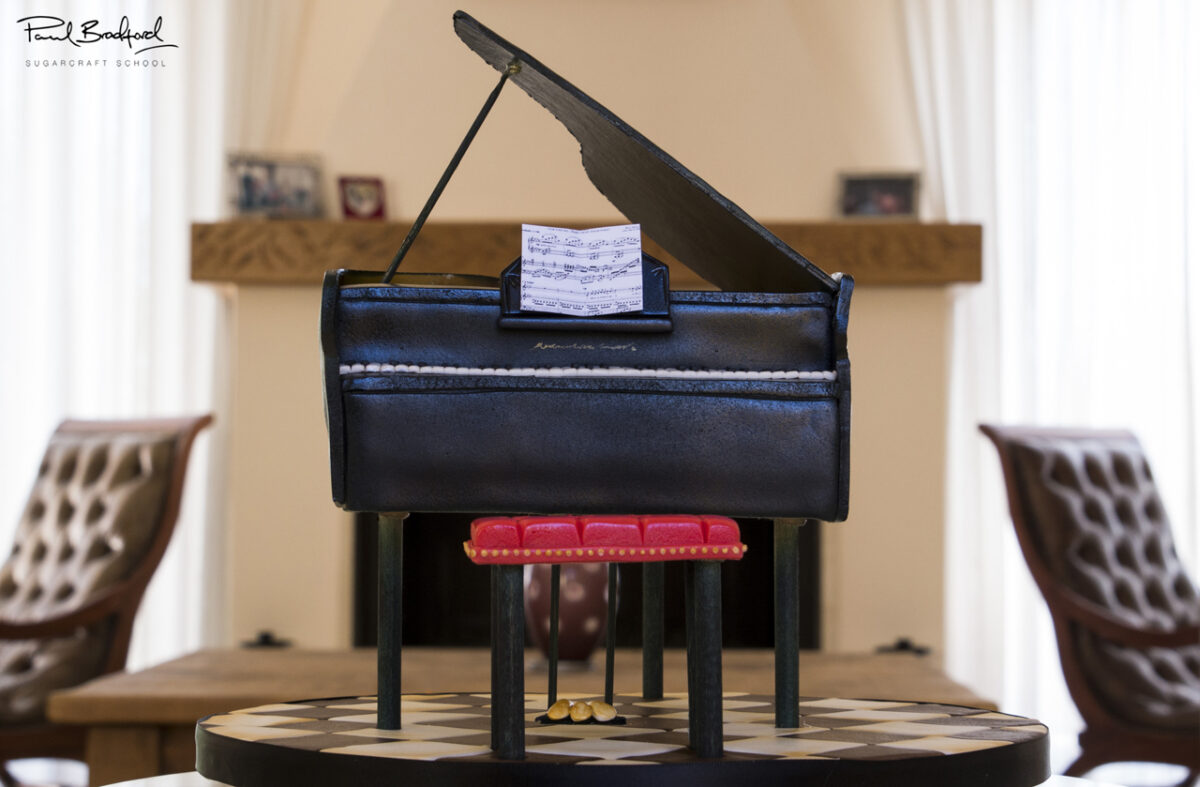
Piano Cake Decorating and Baking Tutorial

Tutorial Preview

Join NOW to access 1661 courses Watch Now
14 Day FREE Trial
Piano
with Paul Bradford
Skill level: Intermediate
HD Lessons: 19
Decorating time: 4-6 Hours
Now Playing
04:15

1. The Design

Paul starts off the Piano course by talking through the structural elements of the cake and how to create the structure using MDF and the template provided.

If you’re making the cake for a customer who has a piano, perhaps ask for a photo of the actual piano to base your cake on.

Now Playing
05:53

2. Icing the Board

Paul shares his techniques for decorating the board in a checkerboard design with ivory and wood coloured squares of sugarpaste.
Now Playing
08:45

3. Carving the Cake

Once the board is complete a ribbon can be added (Paul opts for a black ribbon) and also make sure you can access the dowel holes to attach the piano too later.

In this lesson Paul shows you how to carve and place the cake onto the structure with the use of the template provided as a guide. Following this the ganaching stage is started.

Tip: Make sure to get the piano the right way round! Paul manages to make a little mistake here!

Now Playing
02:45

4. Ganaching the Cake - Part 1

Paul continues to show you how to ganache the piano cake using the palette knife, refrigeration after each ganaching stage helps to achieve a much neater finish ready for icing.
Now Playing
01:06

5. Ganaching the Cake - Part 2

Another step of the ganaching stage, Paul neatly covers the front section of the piano cake with ganache. Refrigerate until the ganache firms up following this lesson.
Now Playing
03:27

6. Ganaching the Cake - Part 3

Following refrigeration Paul shows you how to trim and smooth the ganache using a palette knife to prepare the cake for icing process. The ganache is smoothed to a neat finish using hot water and a pastry brush.
Now Playing
10:24

7. Icing the Cake

Adding detail to the first section of icing will make all the difference to the finished piano cake, follow Paul’s lead in adding detailed design to what will become the interior of the piano.
Now Playing
05:47

8. Airbrushing

The interior section created in the previous lesson is now airbrushed using a copper shaded colour (a mixture of yellow and brown) which will highlight the detail we added earlier.

Tip: You can hand paint this section if you don’t have an airbrush.

Now Playing
07:55

9. Icing the Sides

With the interior section completed we can now add white sugarpaste to the front section of the piano which can be coloured later.

Tip: Make sure to use a very sharp knife to cut away the excess sugarpaste.

Now Playing
06:12

10. Icing the Sides (Continued)

Icing the sides of the cake is one of the trickiest parts of this design so take your time, Paul adds 1 teaspoon of tylose powder per 250g of sugarpaste in an effort to avoid the sugarpaste sliding off the cake.
Now Playing
03:59

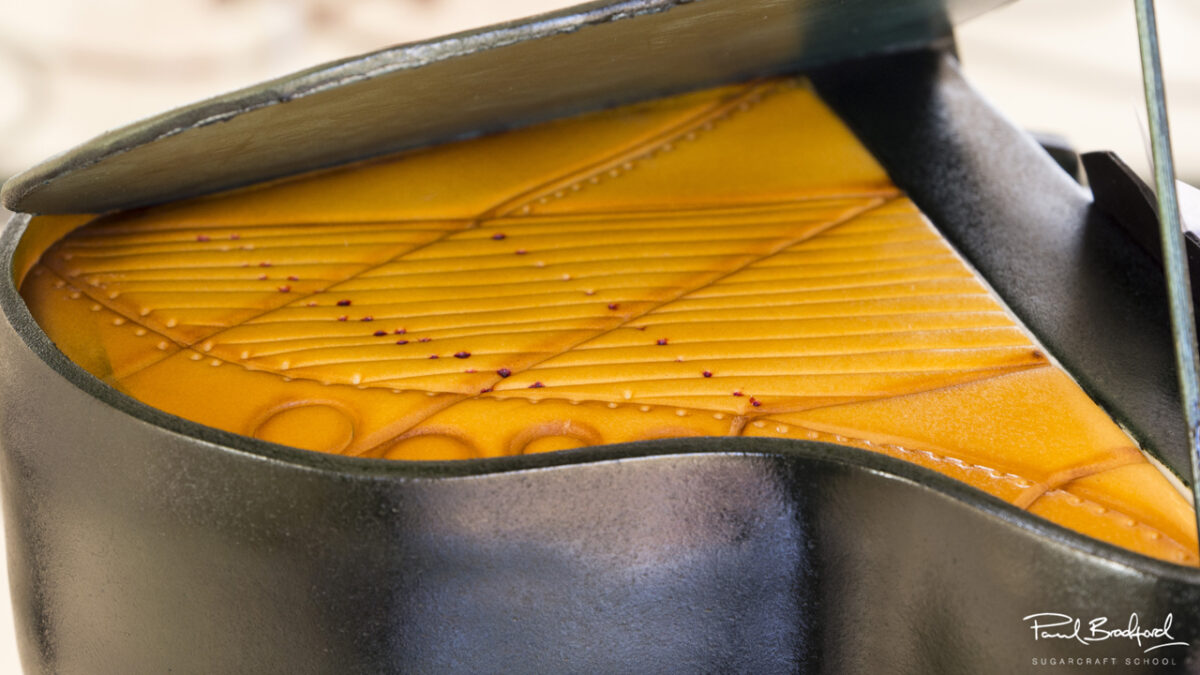
11. Creating the lid

In this lesson Paul shows you how to make the lid of the piano using cardboard (shaped using the template) and sugarpaste.

If you prefer a piece of card can be used without the sugarpaste, simply paint it black.

Now Playing
08:03

12. Airbrushing the Piano

Shading is added to the checkerboard board using the same colour as the interior of the piano.

A mask is then created out of card to cover the interior section when painting the outside black finish of the piano. Build layers of black until you get a nice deep and consistent colour.

Tip: See lesson 13 for some tips when airbrushing the piano.

Now Playing
15:12

13. Airbrushing the Piano (Continued)

With the airbrushing stage finished and the piano looking good, Paul shares some little tricks for the harder bits of the airbrushing. Paul also shows you how to attach the lid, the pedals and how to paint them with the airbrush. The cake is then attached to the checkered cake board using the glue gun to attach the dowels.

Tip: You can use the glue gun to stick the lid to the piano.

Now Playing
24:41

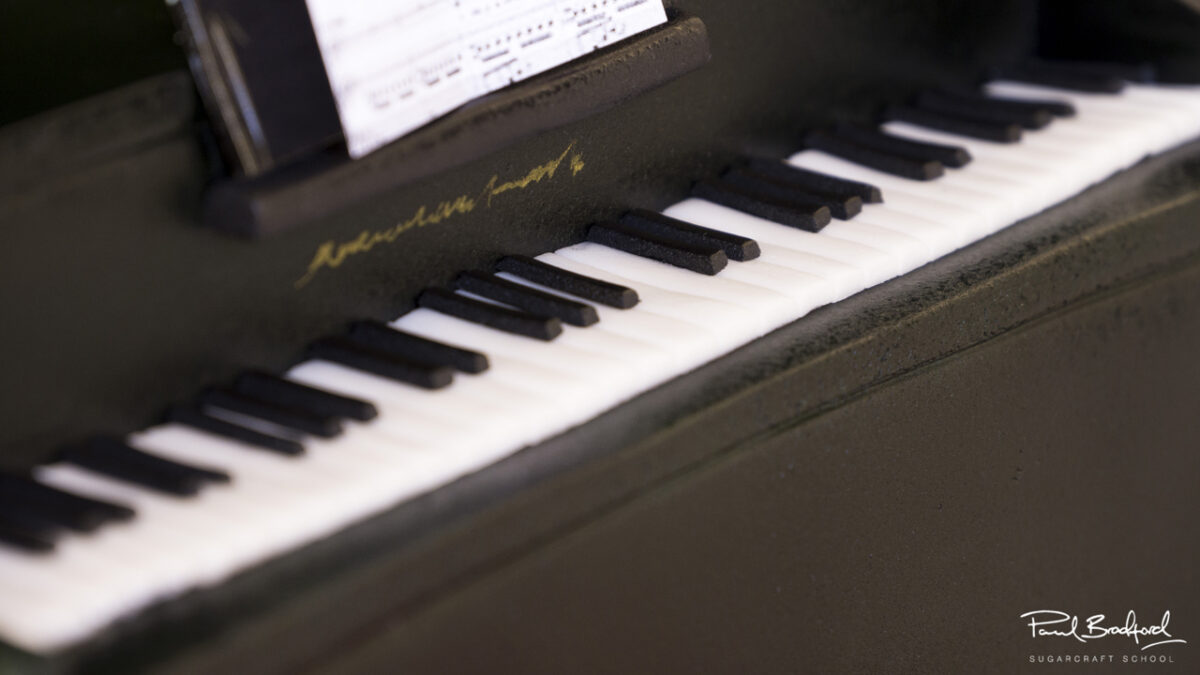
14. Piano Details - Part 1

In this lesson Paul shows you how to finish the pedals, how to make the piano keys and prepare the seat.

Tip: Try to be as delicate as possible with the piano keys!

Now Playing
09:42

15. Piano Details - Part 2

Touch up the piano keys if required using white edible paint as shown. Paul then shows you how to make the piano pedals with sugarpaste and how to paint the legs of the seat and the pedals.
Now Playing
10:49

16. Piano Details - Part 3

Finish the piano seat off with a classic red cushion, Paul shows you a simple way to achieve this with minimal effort and even adds studs for realism.
Now Playing
04:54

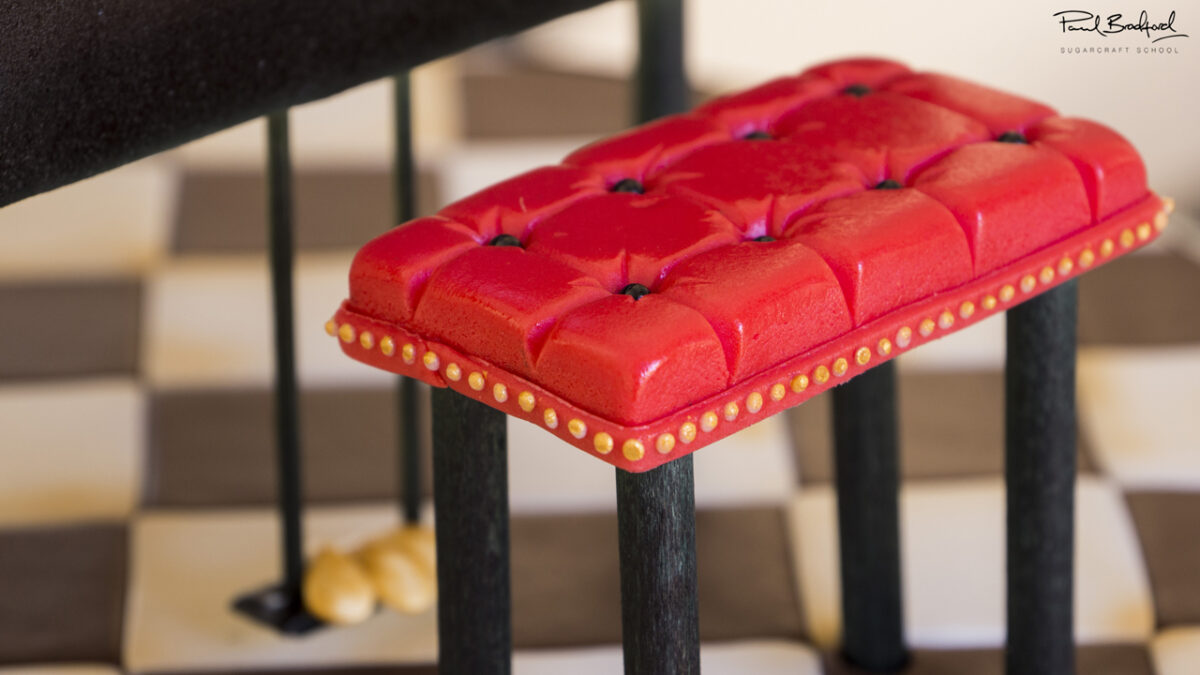
17. Finishing Touches

The addition of a music stand, sheet music and a high gloss shine achieved using PME spray glaze will really bring the piano cake together.

We hope you’ve enjoyed the course, proceed to the next lessons for some other ideas and the pro lesson which is available to pro members.

Now Playing
03:25

18. Other Ideas

Paul shares some other ideas that could be adopted when making the piano cake.
Now Playing
02:21

19. Pro Lesson

Costs, time to create the cake and ways to display the cake are all covered in this Pro lesson which is exclusive for Pro members of the site.

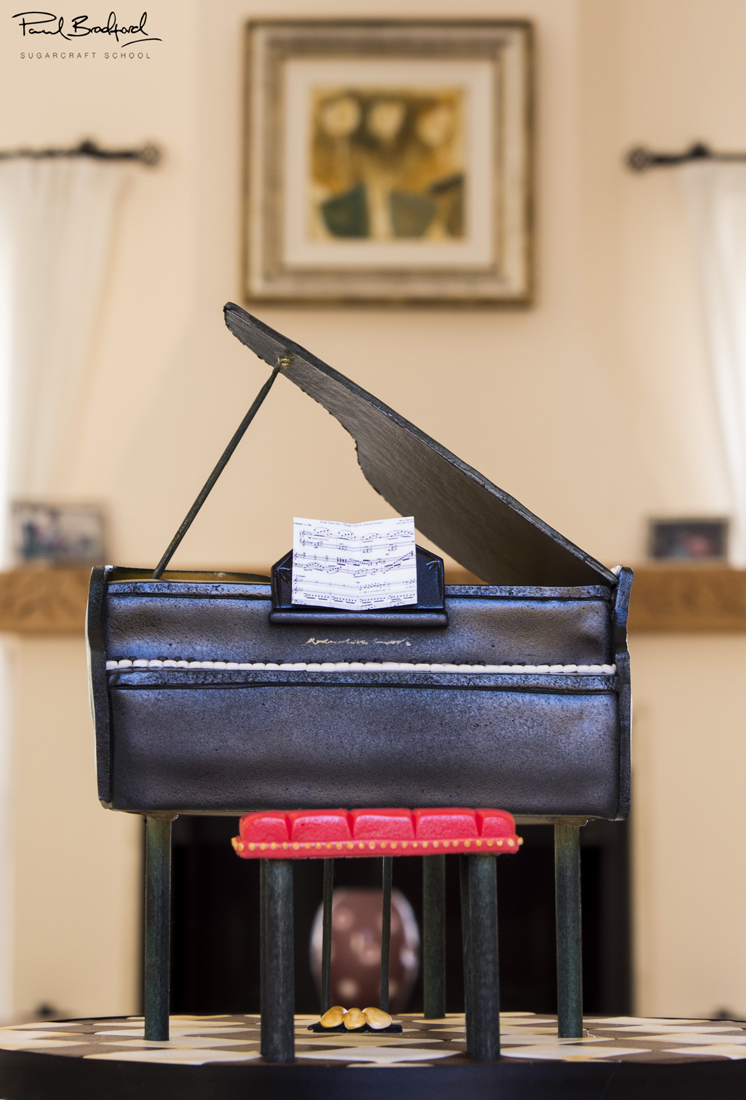
An eagerly awaited addition to our online cake decorating courses, the Piano cake will be perfect for those of a musical disposition. The cake uses a clever structure and is beautifully realistic with no extra drying times needed, perfect for intermediate cake decorators.

Paul Bradford

Paul Bradford

Paul Bradford´s mission is to ‘Empower people to achieve their cake decorating dreams’ by providing a range of cake decorating courses and online tutorials through their website, which currently teaches 195,000+ students.  
14 Day Free Trial