Tutorial Preview
Highlights
Here we have carefully selected the key parts from the entire tutorial and condensed it into on 8 min long video. More than enough to get you started without taking too much time.
1. Preparing the cake
Paul starts off by explaining the design. First he shows us how to level and layer the ganache, in preparation for carving and ganaching. You could place a cake card in the middle of the cake to split up the double barrel cake to make it easier to cut. Once you’ve layered it pop it in the fridge for a few minutes.
2. Carving the cake
To help make carving this shape a little easier Paul gets the cake up nice and high so he’s able to carve with long cutting motions. Once the cake is carved and looking nice and even, it’s time to pop it back in the fridge to firm it up before starting on the ganache. You may want to use buttercream, but ganache is great for keeping shape once it’s covered.
3. Ganaching the cake
Make sure you layer on the ganache nice and thick, as this will make the scraping and smoothing process easier. Remember consistency is key – not too thick, not too thin. Once you’ve got a nice smooth finish allow it to set and pop it in the fridge for a few minutes.
4. Covering the cake
Paul is using white Macatacino sugarpaste – it’s great for covering awkward shapes due to good elasticity and being slow to dry out. Paul rolls out the sugarpaste to around 3mm thick and then drops it over the cake to avoid having to cut down the side of the cake. He then works out the pleats and goes over with plastic smoothers, and getting a relatively sharp corner for the base of the pot.
5. Covering the board
Paul shows us how to create a lovely brick effect for the board, using a very simple but effective technique. The sugarpaste is around 4mm thick and he uses rounded tools, like a cell stick, to indent and create the bricks. He maps them out using a ruler first of all and then goes over it all with scrunched up tin foil.
6. Painting the board
Paul goes on to to mix some edible dusts with alcohol to create whites and greys to cover paint the board which really brings out the detail.
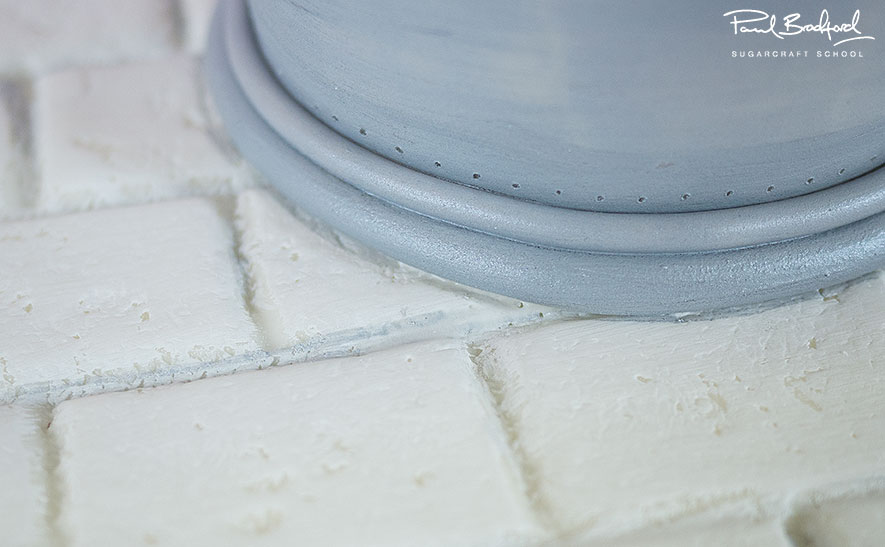
7. Decorating the pot
To create the rings Paul uses an extruder to help keep things even and advises that adding some vegetable fat to your sugarpaste before putting in the extruder keeps the sugarpaste nice and smooth. Paul demonstrates how we can make a neat line to follow when attaching the sausage of sugarpaste. Now it’s a case of doing all again two more times.
8. Decorating the pot pt 2
Paul has to get a little creative here, as unfortunately he doesn’t have the time to allow the cake and the board to firm up overnight. This means having to add the cake to the board a little differently. Next, make the lip of the plant pot. It’s a fairly simple process, and using a bit of tylo powder added to the sugarpaste, you’re sure to make things even easier.
9. Making the roses
Paul uses pink gel by rainbow dusts to turn the white modelling chocolate into a beautiful creamy pink. He then goes onto to show us how to create lovely roses on cocktail sticks.
10. Dusting the flowers and painting the pot
Paul mixes a plum and fuchsia dust to get a lovely pink tone to dust onto the roses to add depth to the overall look, as well as a little realism. Then it’s on to painting the pot.
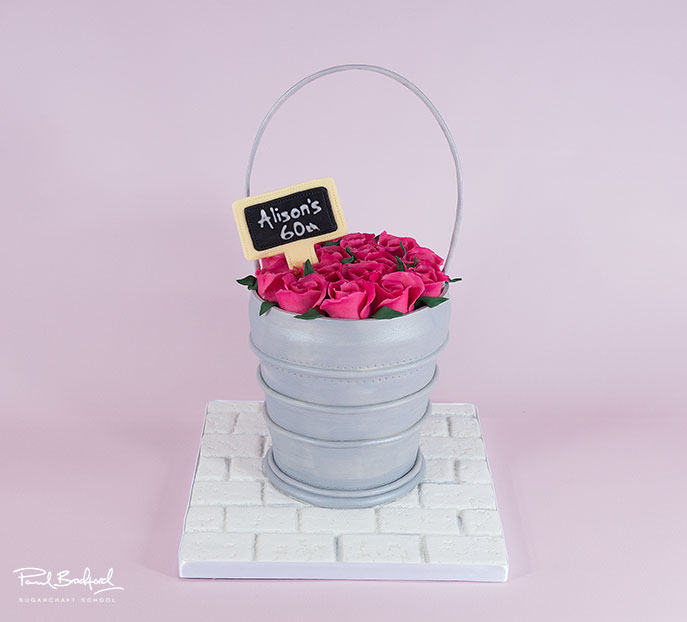
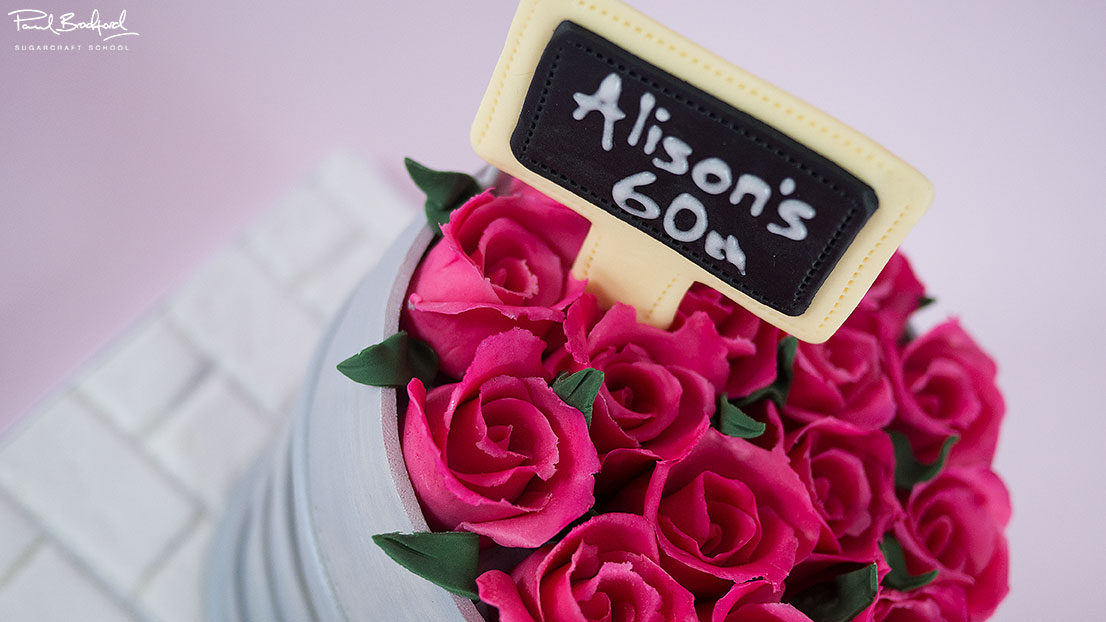
11. Adding the roses and the handle
Here Paul adds the roses to the cake and finds that he’s made too few – so be sure to make no less than 14. Of course, he could have opened up the petals to make them bigger, but decided it would look better just to make more. Paul then demonstrates how to make the handle using 1mm armature wire covered in white sugarpaste.
12. Adding the leaves and the ribbon
Here Paul cuts out some leaves using a tear-drop cutter from green sugarpaste and adds them to the arrangement of roses. Then it’s time to add the ribbon.
13. Finishing touches
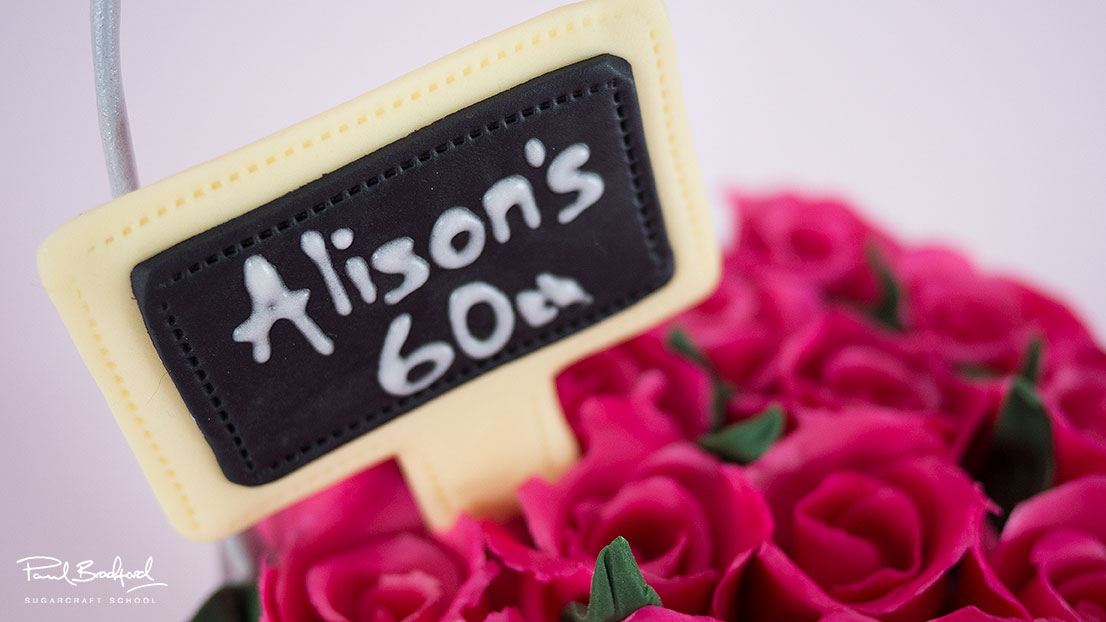
Paul has used a cone tool to add some rivets to the pot which brings it to life. He then goes on to create the little sign post, using some cake card and deep cream and black sugarpaste. He pipes a little message onto it with a 1.5 piping nozzle.
14. Other Ideas
Here Paul shares some other ideas you can try your hand at when making this cake. We’re sure you have some of your own great ideas and we’d love to see what you come up with.
Please share your pics with us on our Facebook page
15. Pro lesson
In this lesson, Paul shares some insider information about the cost to make this cake, as well as pricing, portions and other vital information for any professional cake designer.
We’d love to see your take on the Pot of Roses Cake – so share your snaps with us on our Facebook page!