Tutorial Preview
Highlights
Rushed for time? In this lesson we have carefully selected all the key moments and condensed the whole tutorial into a seven minute video which should provide more than enough pointers to get started on this cake!
1. The Design and Texturing the Cake
Struggling for time? Why not watch the whole tutorial in a condensed 7 min video?
Paul starts this tutorial and advices that when covering the cakes, we don’t need to be at all precious about how smooth they are or getting lovely sharp edges as we will actually be covering the whole things in small dents. Sounds counter-intuitive, but as you will see, we will create a lovely dappled texture…watch on to see how! It works very well and is so easy to do. Just remember to do the tops of the cakes last as you will need to hold the top as you go around the sides of the cake. It’s also a good idea to do the texturing as soon as you have covered each cake so that you do it while the sugarpaste is still soft.
2. Cutting Out the Letters
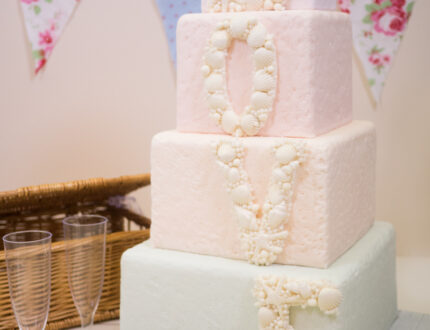
In this lesson, Paul shows us how to cut out the letters that will cascade down the cake to form the word “LOVE”. This is very straight forward and you can download the template here or from the Tools tab at the top of the page. Alternatively, y can always be adventurous and create your own custom templates. Paul is using a 50/50 mixture of sugarpaste and flower paste (Squires Mexican Paste) in a nice ivory colour and uses his pasta roller (setting 1) to get it nice and thin. Paul makes the letters 5 inches tall by 4 inches wide.
3. Decorating the Letters
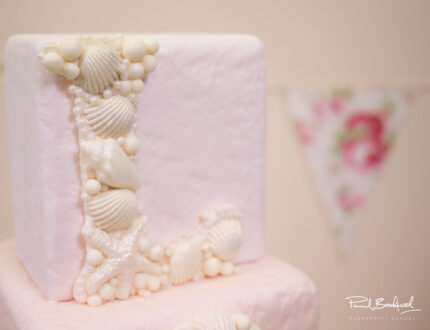
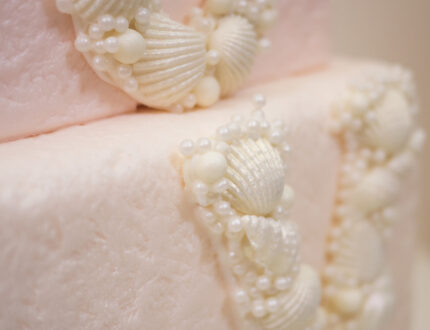
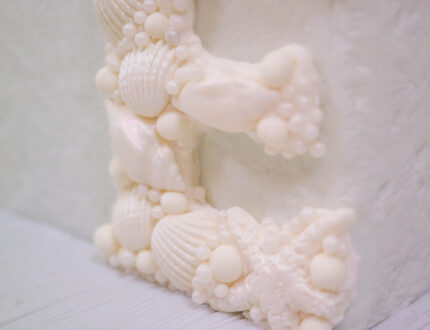
Paul is using some lovely sea shell moulds by Squires Kitchen and his top tip when using them is to brush a little lustre into them before adding the paste which not only makes it much easier to get the paste back out, but also gives it a nice finish. Paul shows us how to use each of the moulds he is using and then adds the shell decorations to the letters by coating them in royal icing and then sticking them on. Just make sure you allow the sea shells to dry before applying them.
4. Covering the Board
Paul has gone ahead and stacked the cakes which looks lovely and to speed up the drying process (for filming purposes) he has placed the letters on the open oven door with the oven at a low heat. When making these at home however, we recommend that you let them dry overnight. For the board, Paul mixes the leftovers for what he used to cover the cakes and goes for a nice light grey colour and creates a white-washed effect to complement the seaside theme. Once the paste is on the board, simply mark in the planks using a ruler so that they are all the same width and to add a distressed feel, Paul uses a shell tool followed by white dust mixed with high percentage alcohol, which is dabbed on to add texture.
5. Adding the Letters
This should be a lot less tricky for you as your letters should be dry and easy to handle but if for some reason you find that they aren’t, then fear not as Paul shows us how to transfer them onto to the cake without any issues. Before sticking the letter onto the cake use your templates to figure out where you want to place them and mark where you will put the letters. Put a little edible glue on the back of each letter and some royal icing on the cake and gently push the letter on. You may want to use toothpicks to hold the letters in place while the royal icing dries and also make sure to you a damp paintbrush to clean any excess away.
6. Finishing Touches
Paul tried to add various things to the board off-camera, but it ended up looking best just as it is. Clean and simple works well with this design so all that we need to do now is add a nice finishing touch with just a little pearlised spray…and we’re done!
7. Other Ideas
In this lesson, Paul shares some ideas that you can implement when making this cake to make it unique to you. We would love to see your version of the Seaside Love Wedding Cake so please share your pictures with us on our Facebook Page!
8. Pro Lesson
Paul shares some insider information detailing the cost to make the cake as well as what you should charge when selling it – essential information for any professional cake designer!
Paul introduces us to his lovely pastel-coloured Seaside Love Wedding Cake, perfect for a summer beach wedding. This tutorial covers techniques including texturing, letter-cutting, creating a beautiful array of seashells and a whitewash effect on the cake board. This cake can be adapted for a number of other celebrations and is aimed at intermediate level taking two half days to make to allow for drying time.
We would love to see your take on the Seaside Love Wedding Cake – please share your photos with us on our Facebook Page!


