Tutorial Preview


Highlights
Here, we’ve carefully selected the key parts from the entire tutorial and condensed it into an 10 min long video. More than enough to get you started without taking too much time.
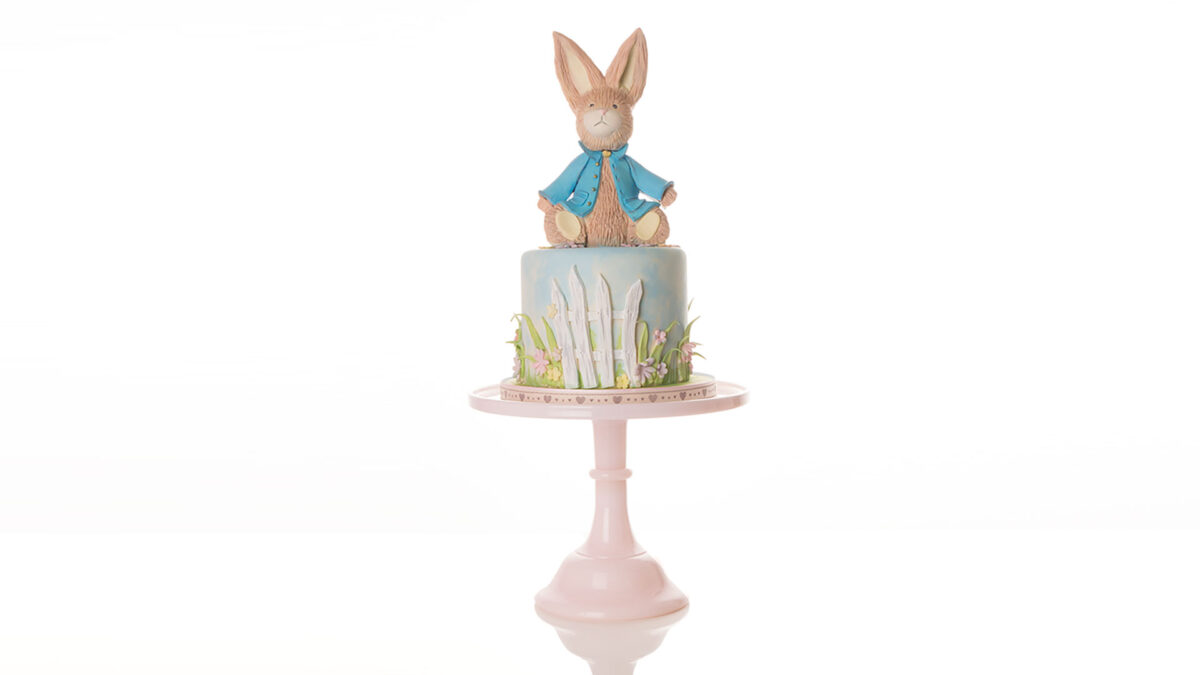
1. Making the rabbit
Paul starts off by shaping a cute little rabbit using modelling chocolate. Once you’ve put it all together, make sure the chocolate is completely set before moving on to covering it.
2. Covering the rabbit’s body pt 1
Paul uses ivory sugarpaste rolled out to around 2mm and covers the body. He adds a second layer to form a coat for the rabbit.
3. Covering the rabbit’s body pt 2
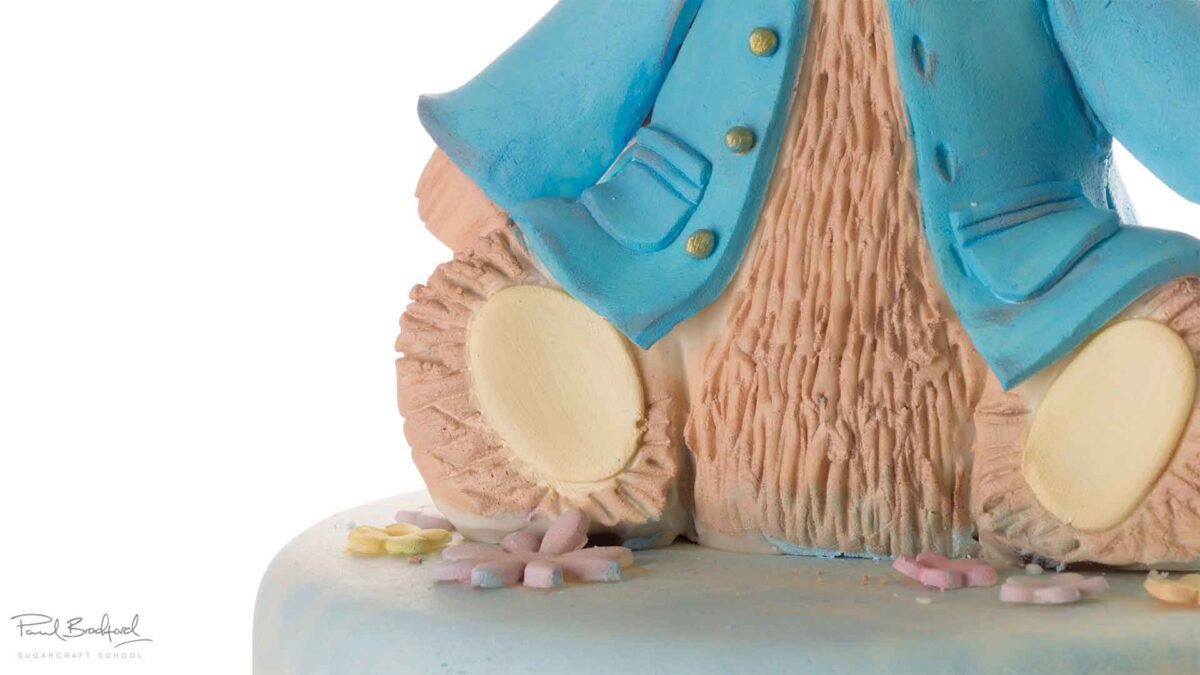
Paul covers the arms and adds some cute little details to the coat.
4. Covering the rabbit’s body pt 3
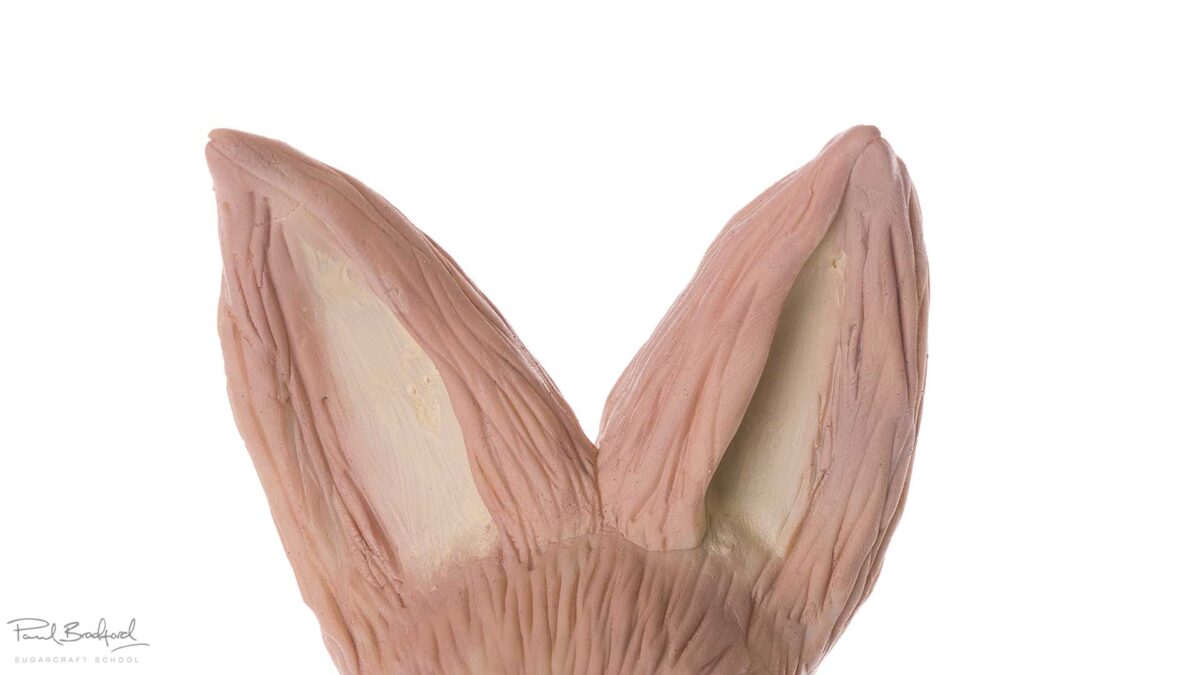
In this lesson Paul covers the ears and adds a little more detail to the coat.
5. Texturing the rabbit pt 1
Paul adds texture to the rabbit using a dresden tool to get a nice fur effect.
6. Texturing the rabbit pt 2
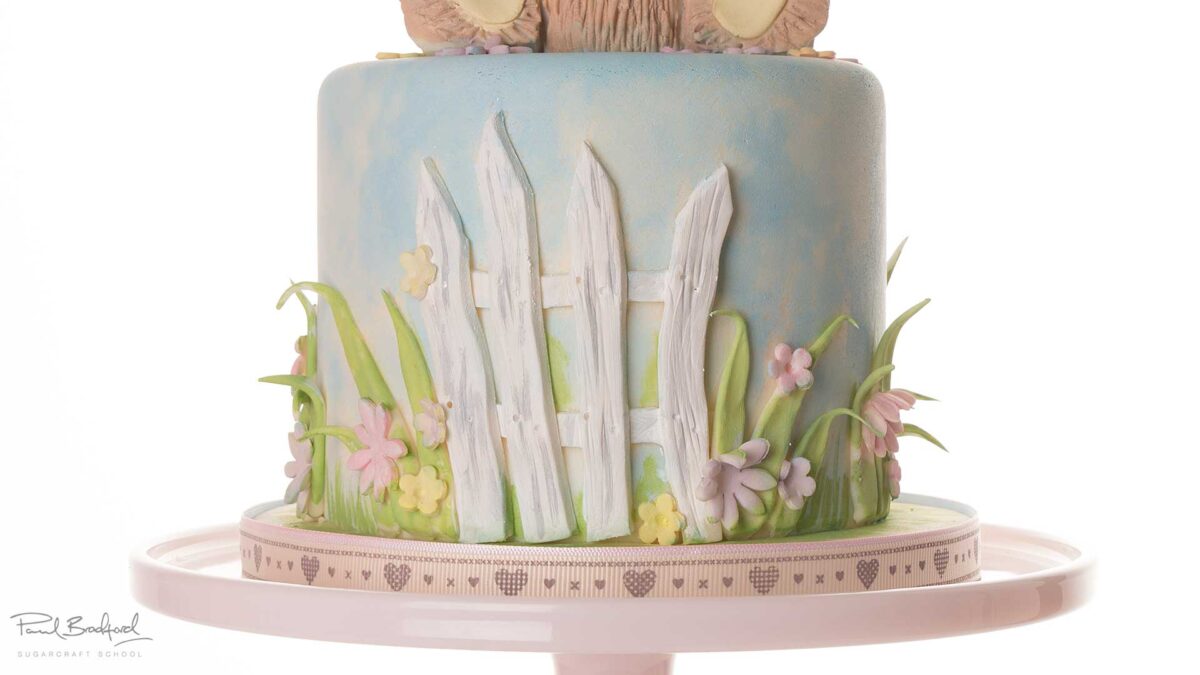
Paul finishes texturing the rabbit and finishing off the ears. Then he adds the fence and bits of long grass.
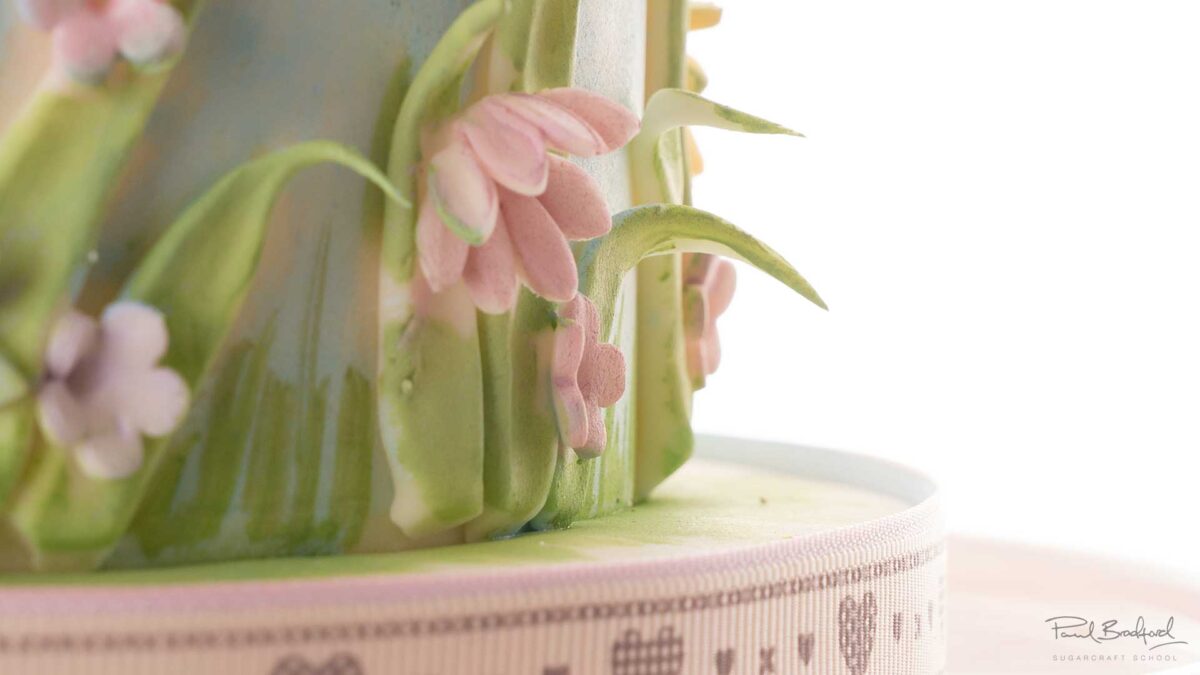
7. Finishing the rabbit and cake
Here Paul finishes off the cake with little flowers, and then attaches the rabbit to the top of the cake.
8. Painting the cake pt 1
Paul starts off with a lovely light blue shade and dabs the brush around to get a wonderful light texture.
9. Painting the cake pt 2
Here Paul finishes off painting the fence by adding nice grey tones to add character. He also adds a touch of colour to the flowers.
10. Painting Henry pt 1
Paul mixes brown and white to get a nice light shade of brown for Henry and uses it to create a fur-like texture.
11. Painting Henry pt 2
Paul finishes off by painting some colour onto Henry’s cheeks.
12. Finishing touches
Paul adds some paint to Henry’s coat and then adds a lovely bit of ribbon to finish it all off.
13. Other ideas
Paul shares some other ideas you can try out during this project. We’re sure you’ve some of your own, and we’d love to see what brilliant alterations you’ve made.
Share your pics with us on our Facebook page.
14. Pro lesson
In this lesson, Paul shares some insider information about the cost to make this cake, as well as pricing, portions and other vital information for any professional cake designer.
We’d love to see your take on the Wee Henry Rabbit cake – so make sure you share your photos with us on our Facebook page.