Tutorial Preview


Highlights
In this lesson we have carefully selected all they key points of the tutorial and condensed it into a short video for you which will be more then enough to get you started.
1. The Design and Carving the Cake
Struggling for time? Why not click here to go to the highlights video?
To start us off, Paul takes us through the design and if it’s going to look anything like the drawing, then we are in for a treat! The templates mentioned in this lesson can be downloaded here or from the Tools tab above. When carving the cake, if you find that it is quite crumbly just put it in the fridge for a few minutes to help firm it up. Take your time and don’t worry if you cut too much off or feel you haven’t carved it well as you can always add cake back on with some ganache. Bear in mind that the shape will change when the sugarpaste goes on so don’t feel that you have to get it looking perfect.
2. Carving the Cake Pt 2
In this lesson, we will start to see the elephant take shape and we will be using some tasty ganache to stick it all together. Paul advises however that if you prefer you can by all means use butter cream as the cake is not overly structural. First of all, place the body and feet onto the cake card and draw around them with a pencil. Cut out the shape and then secure that on the cake drum and place the cake on top of the card template. Once you have done this, simply ganache the whole thing but if like Paul it doesn’t feel quite sturdy enough just pop it in the fridge for a few minutes before moving on to the feet.
3. Ganaching the Cake
Paul finishes covering the cake in ganache and takes a small palette knife and adds a relatively thin layer of ganache over the whole cake. For the head, just remember to ganache in between each layer as well. Once you have done this put it in the fridge for a few minutes until it’s slightly tacky and then you can move onto covering it in sugarpaste.
4. Covering the Cake
Paul starts off by brushing the cake with warm water which helps smooth the ganache as well as making it sticky for the sugarpaste. Paul uses 2.5 kilos of white and 500g of grey sugarpaste to create the elephant’s skin tone. You could always just use white but it does make it easier to paint if you have a base colour. Paul rolls out the sugarpaste to around 5 or 6mm in thickness and once placed on the cake, begins to shape it to the cake with his hands and cake smoothers.
5. Adding the Head and Making the Legs
Paul starts off this lesson by adding the head to the body and secures it by inserting a dowel. To get rid of the obvious gap between the head and body and to add even more security, Paul rolls out a fairly thick long sausage of sugarpaste which he then wraps around under the head. A bow will be placed here later in the tutorial to keep it all looking lovely and neat.
6. Adding the Trunk
For the trunk, roll out a very thick sausage of sugarpaste that gradually tapers – Paul rolls it out to around 10 inches. Once you have a good shape, begin to flatten out and stretch the end that will attach to the face. Paint a little bit of water where you will attach it on the face and legs and then hold it in place for 30 seconds or so and then press it in place. To get rid of the obvious line where it attaches simply wet your finger and gently blend it until the join is no longer visible.
7. Adding Detail to Body
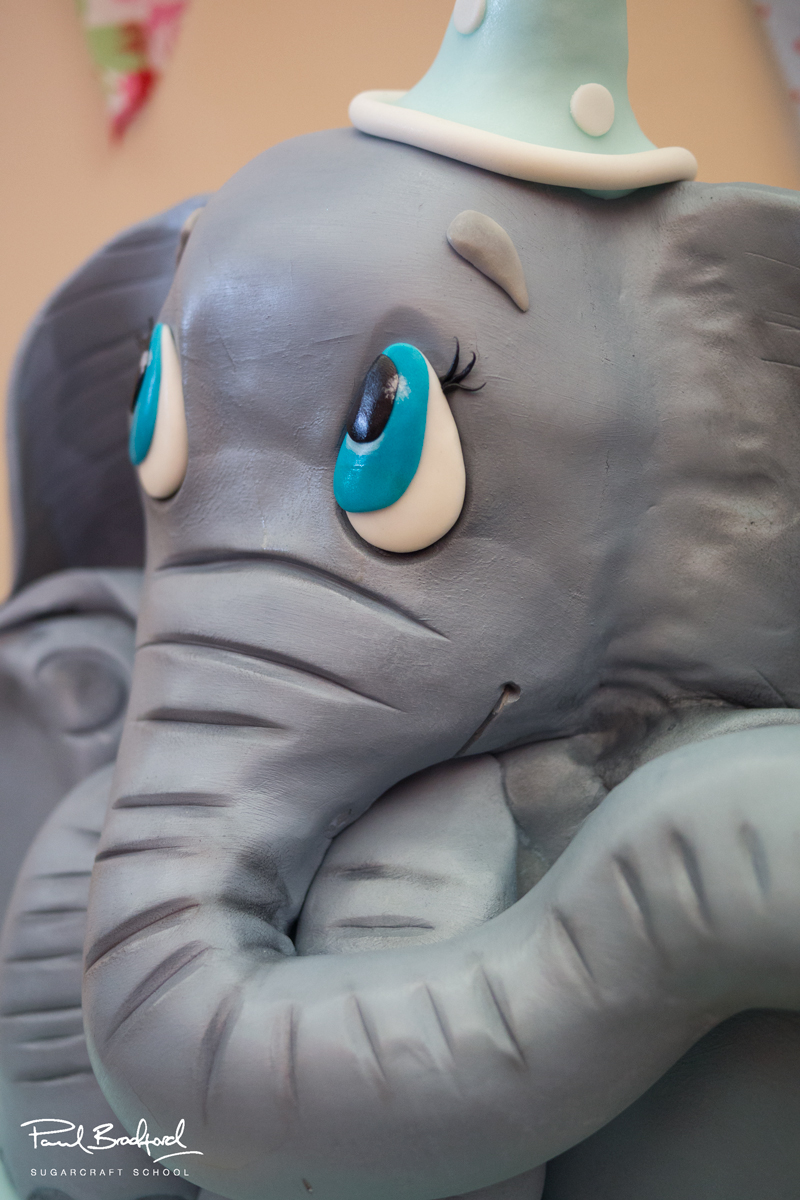
A leaf veining tool will be most handy here and will make everything a lot easier. Paul starts off by adding lines to the trunk by using both ends of the tool to soften them a little. To create the eye sockets, Paul simply uses a small non-stick rolling pin and presses one end into the head and rolls it around slightly to make an oval shape. To further shape them, he wets a small plastic ball tool and goes around the edges. For the toes, Paul draws around a 2.5cm circle cutter on a bit of card and then cuts it in half. He then takes the card and pushes it into the cake to create impressions for the toe nails. Now, as we know, elephants have five toes but Paul has taken creative license here…
8. Adding the Ears
To make the ears, roll out large thick sausages of sugarpaste and then gradually flatten on one side. It may be a good idea to have a picture of an elephant in front of you for reference. Make both ears at the same time to ensure that they are similar to one another. At the thicker end, shape and stretch them much in the same way as the trunk to allow them to attach to the head. Once you have the shape, simply create lines in them with the leaf veining tool. Add some water to the head and feet and a little edible glue to the ear and place it on the cake.
9. Painting the Elephant
Paul uses White Sugar-Mill dusts mixed with high percentage alcohol and just a splash of Black Knight paint to create a nice blue-grey colour. When you start painting it onto the cake you might get a fright and think you need to make it darker or thicker but bear in mind that it will dry much darker and will mix nicely with the grey sugarpaste.
10. Dusting the Elephant
Now, just to add a little more detail to the skin of the elephant. Paul uses Shadow Grey and Black dust from Sugarflair and lightly mixes them together to create a darker grey. The aim is to emphasize all the lines and creases and character of the skin to add realism. What you can do to create really realistic shadows is shine a lamp on the cake from a certain angle and then dust where the shadows are.
11. Finishing the Dusting
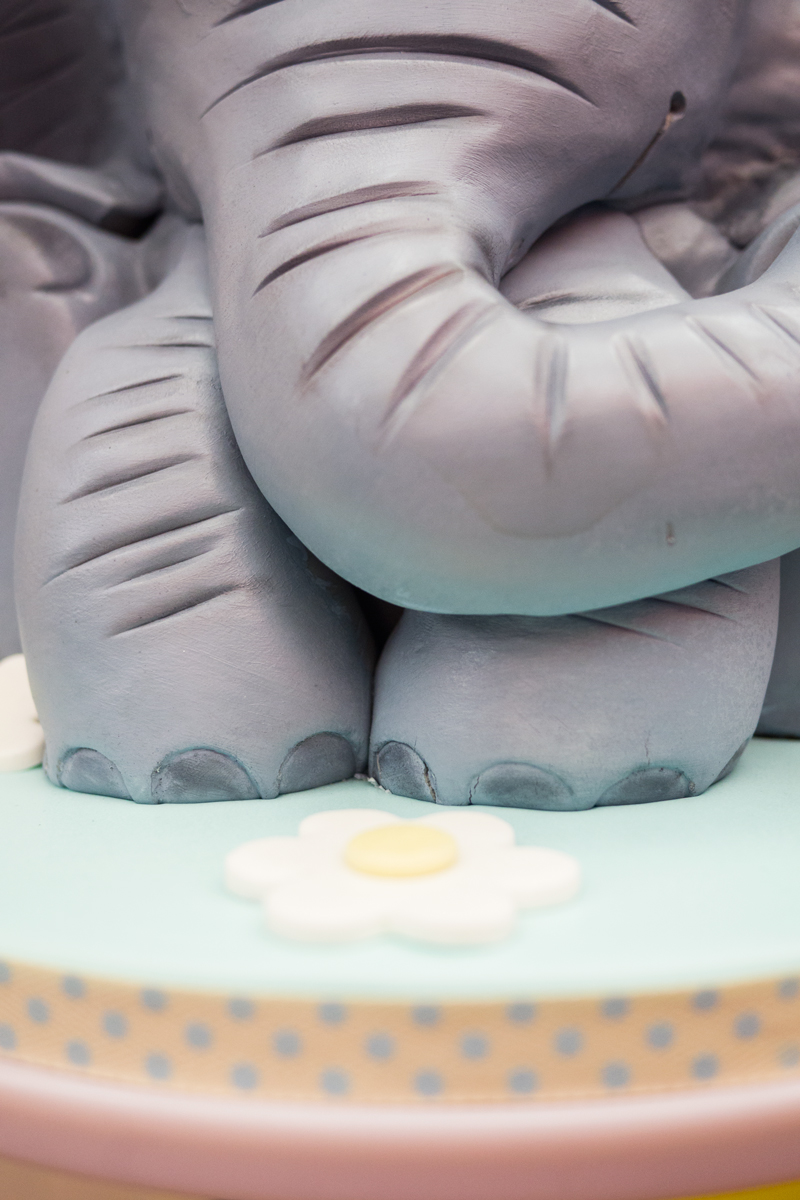
In this lesson, Paul finishes off the dusting and focuses on the eyes, feet and all the little folds and creases. For the feet, Paul decides just to dust them to give the impression of soles instead of cutting them out and adding them on as he feels this would make it feel too teddy bear like. To do this, Paul dusts half circles around the edge of the outside of the foot which adds a nice effect.
12. Adding the Eyes
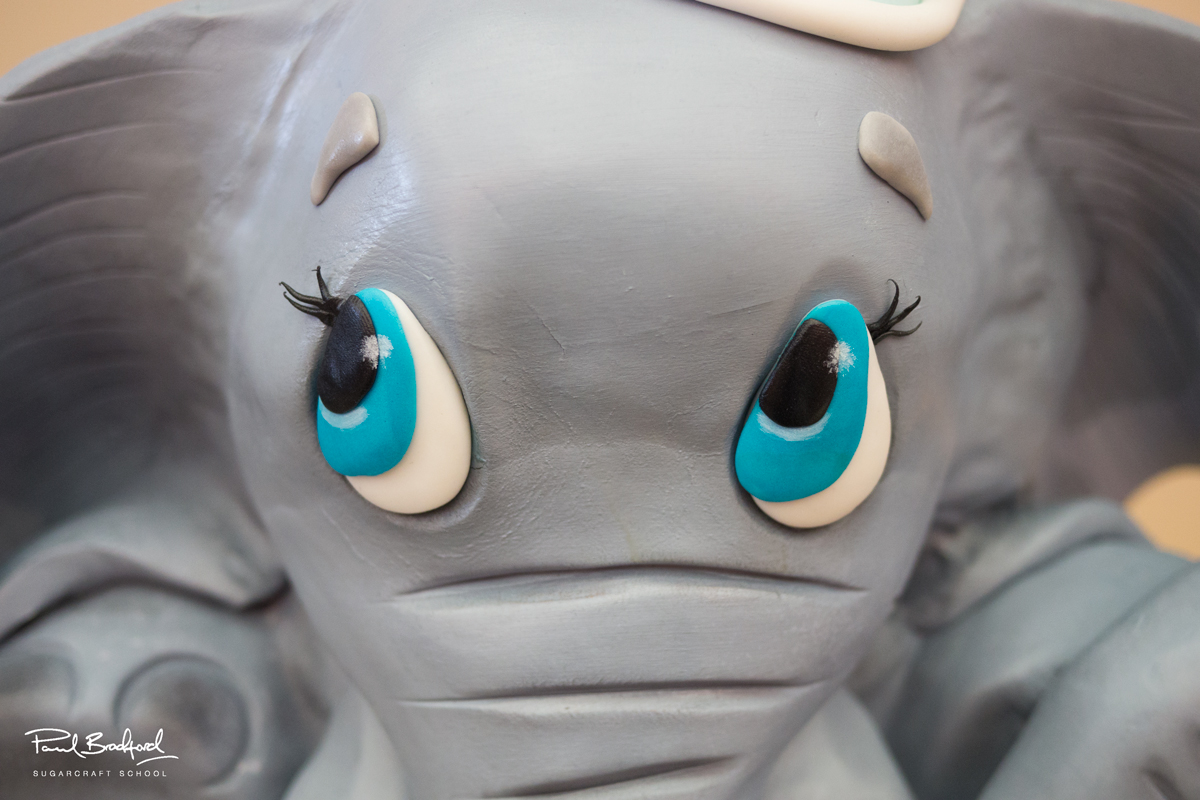
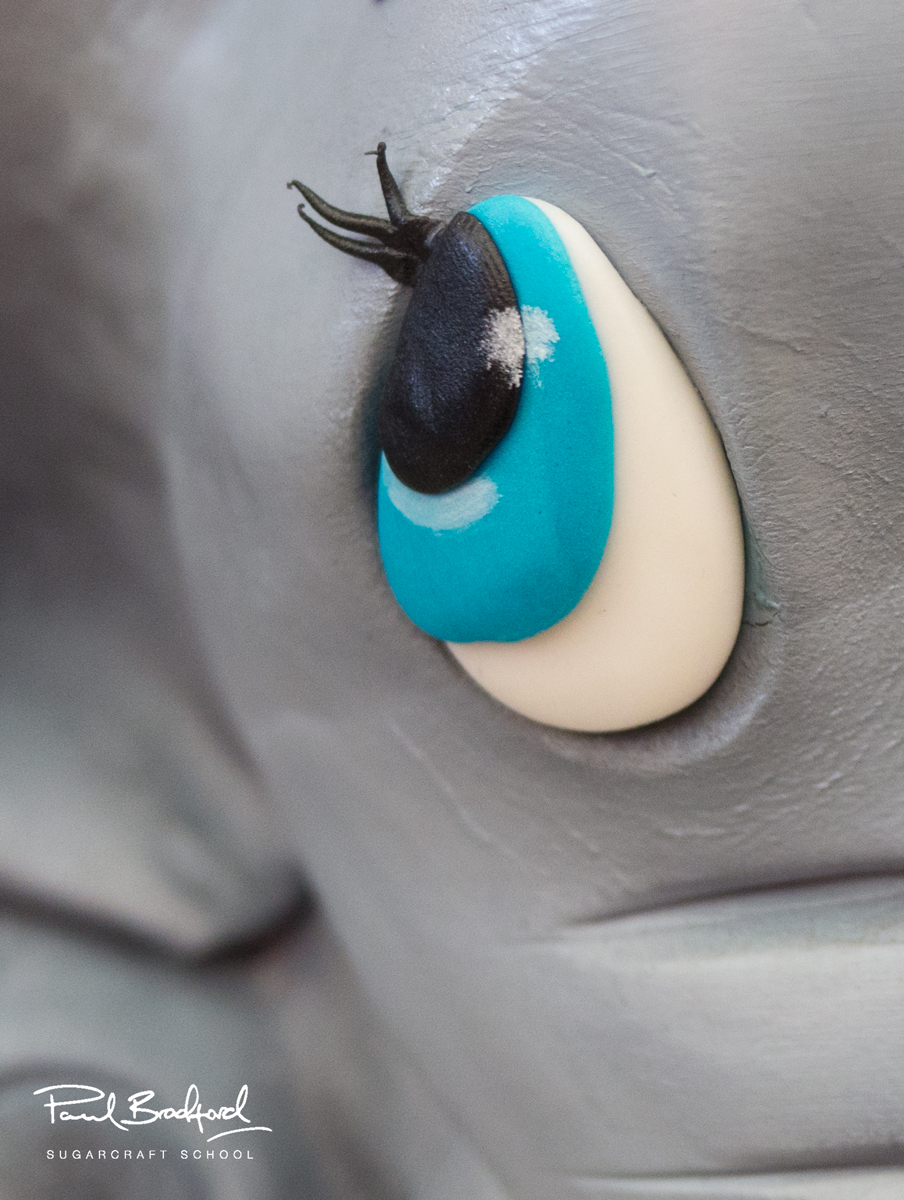
First of all, Paul braves transferring the cake all on his own but recommends having a second pair of hands to help you. To make the eyes, simply make two white tear drop shapes of sugarpaste and flatten them down slightly so they are quite thick. Hold them up to the eyes to make sure they are a good size and are both the same size as each other. Once they look good, paint a little edible glue into the eye socket and then press the whites in place flattening them further to fill the socket. Then it’s simply a case of repeating this with different colours and making smaller discs to create the iris and pupils.
13. Finishing the Eyes and Making the Daisies
Paul starts of by adding eyelashes which really adds to the cuteness of the eyes. To make the eyelashes, simply make three very small and very thin sausages of sugarpaste in the palm of your hand and attach them with a little bit of water and stick them on with a damp paintbrush. Paul then paints a little white onto the eyes to give them a reflective look.
14. Finishing Touches
We’re almost there! Just a few little steps and we are all finished. Paul starts off by making the nightcap and all you need to do is make a large cone shape by making a thick sausage of sugarpaste and then tapering it on one end. Once you have a nice shape, stretch it out at the bottom so it sits nicely on the head and then secure it with a piece of uncooked spaghetti. To hide the top of the spaghetti and to complete the nightcap, roll a small ball of sugarpaste and place it in top. To get rid of the join at the back of the head, Paul cuts a small piece of ribbon and glues it on which finishes it all off nicely.
15. Other Ideas
In this lesson, Paul shares some ideas that you can implement when making this cake to make it unique to you. We’re sure that you will have some of your own brilliant ideas too and we would love to see them – please share your snaps with us on our Facebook Page!
16. Pro Lesson
Paul discusses the cost of making the Baby Elephant Cake as well as what he would charge for the cake – useful tips for every professional cake designer.
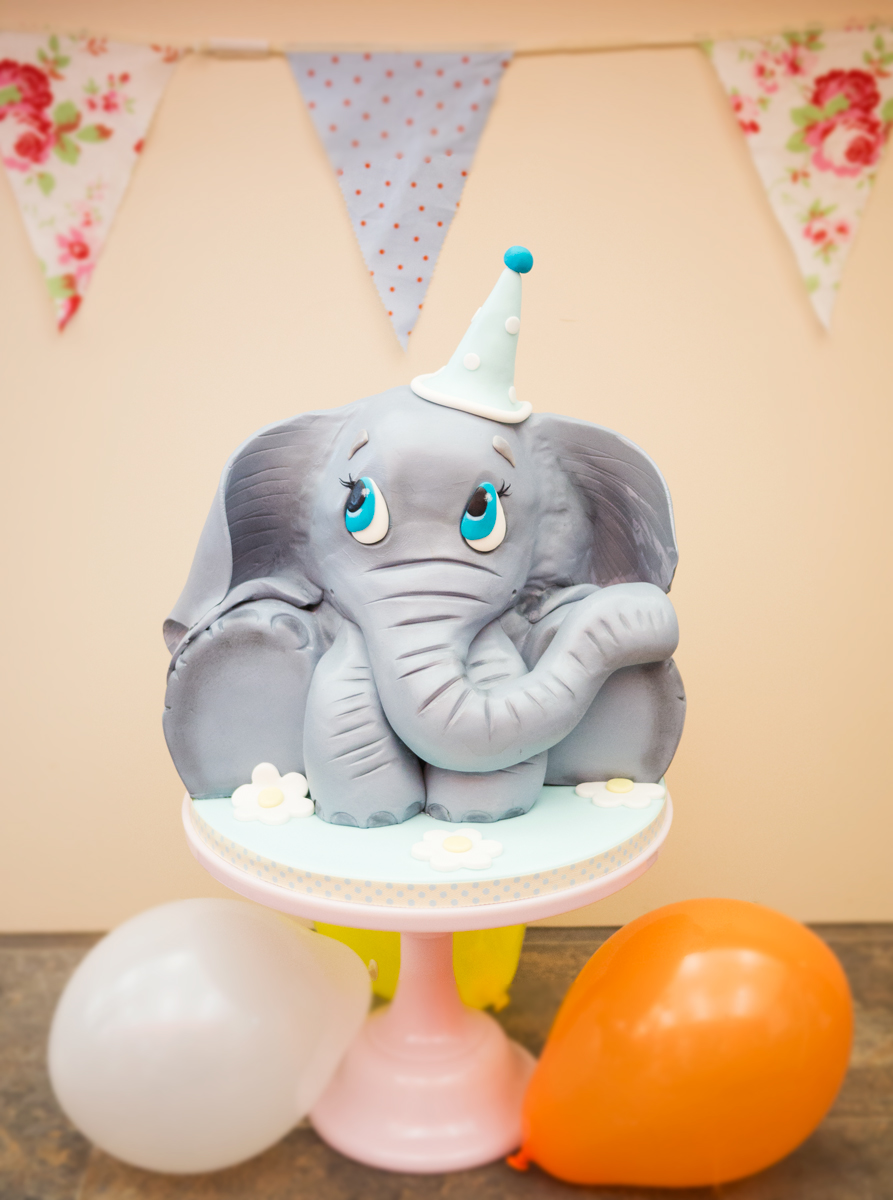
Paul introduces us to his gorgeous Baby Elephant cake decorating tutorial that is fantastic for a boy or girl’s celebration cake. We’re sure this will be a popular one amongst the kids -Baby Elephant cake decorating tutorial is quite irresistible! The cake can easily be adapted to suit any occasion with simple changes of sugarpaste colour and additional decorations. The design includes lots of brilliant techniques that can be used time and time again. This cake is aimed at intermediate level cake decorators and will take two half days to make, allowing for drying time.
Baby Elephants
Baby elephants are some of the most adorable and fascinating creatures in the animal kingdom. Here are some interesting facts about baby elephants:
- Baby elephants are called calves.
- Calves are born after a gestation period of 22 months, which is the longest of any mammal.
- Newborn calves weigh between 200 and 300 pounds (90 and 135 kilograms) and stand about 3 feet (0.9 meters) tall at the shoulder.
- Calves are born with a long trunk, but it is not fully developed and cannot be used for grasping objects until they are about 6 months old.
- Calves are very dependent on their mothers for food, protection, and socialization.
- They nurse from their mothers for up to 3 years, but they begin eating solid food at about 6 months old.
- Calves stay with their mothers for up to 10 years, learning how to survive in the wild.
- Female calves typically stay with their natal herd for life, while male calves eventually leave to form their own bachelor herds.
- Baby elephants are very playful and love to spend their days exploring their surroundings.
- They are also very intelligent and have been known to learn tricks and solve problems.
- Baby elephants are a joy to watch and are a reminder of the beauty and wonder of the natural world.
Don’t forget to share your interpretations of this wonderful cake with Paul and the rest of the CakeFlix Family on our Facebook group.
View hundreds of more world-class tutorials only at www.cakeflix.com.