- You cannot add another "Handbag and Dog" to your basket. View basket Continue shopping
Tutorial Preview
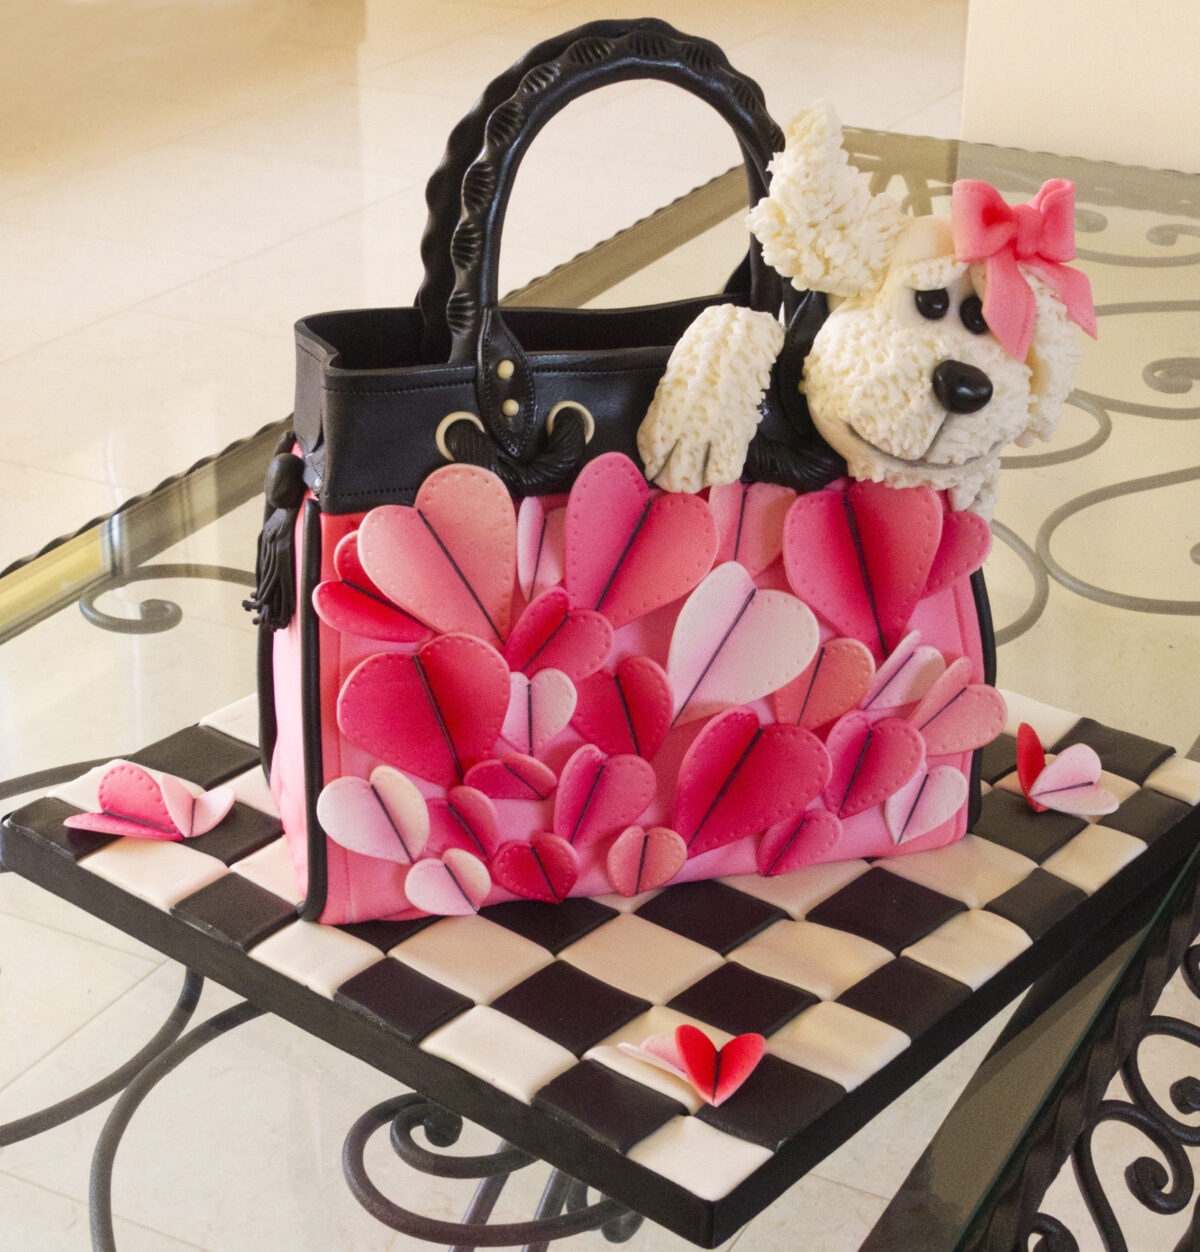
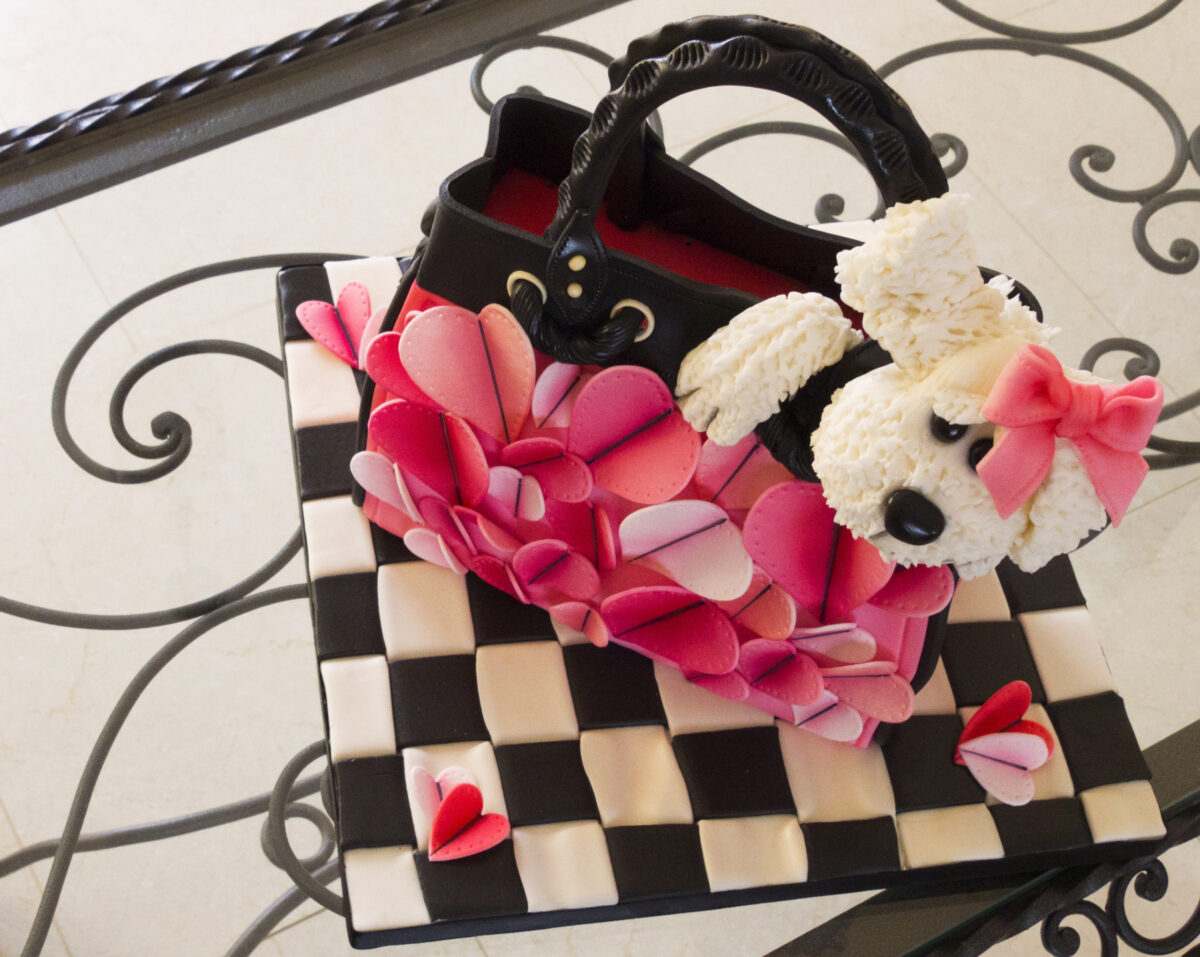
Handbag and Dog
with Paul Bradford
Skill level:
Intermediate
HD Lessons:
18
08:33
1. Carving the Cake
Paul starts off this tutorial off by levelling the 8″ square cake and cuts it in half. The carving then begins to get the shape of the handbag cake. After this, extra height is added by filling each layer with ganache. Paul also covers the cake with ganache and then refrigerates the cake so the ganache firms up.
03:11
2. Ganaching
The ganache can now be neatened off by trimming the sides and brushed with a pastry brush using hot water. Paul proceeds to ganache the sides of the cake and then back to the refrigerator to harden.
10:48
3. Sugarpaste
The cake is ganached and brushed with a pastry brush and hot water for smoothing down again and Paul shows us how to ice this cake with a lovely pink sugarpaste.
11:46
4. Marking and Airbrushing
Once the handbag cake is iced, Paul moves on to adding some details – creases in the bag and stitching details – prior to starting on the airbrushing.
07:53
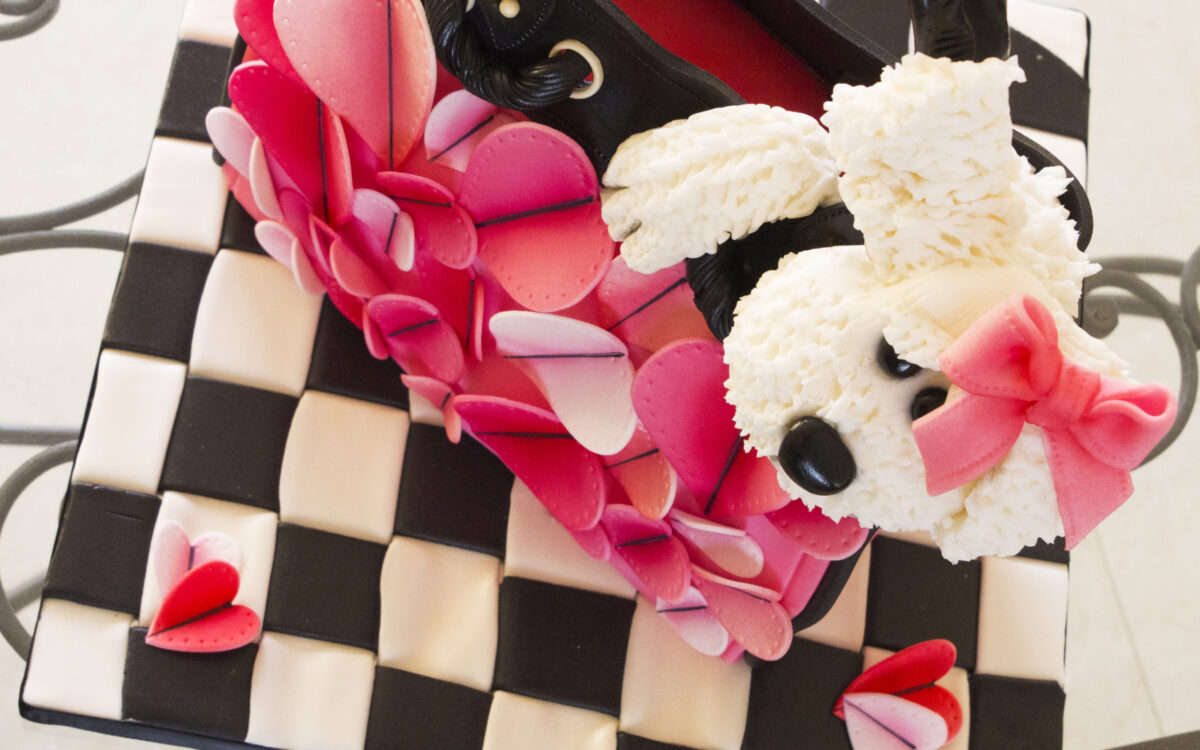
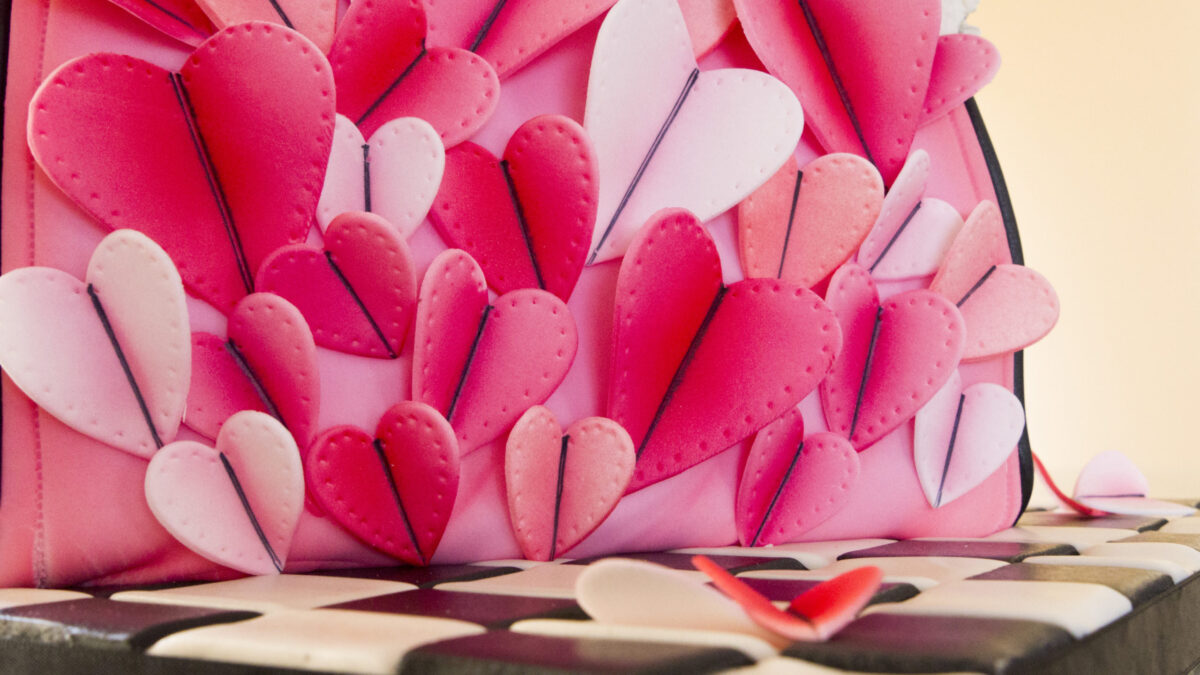
5. Love Hearts
Love hearts are now created to add to the bag (you can make enough for just the front or both front and back if you require) using a love heart cutter and with the help of a pasta machine, pink flower paste love hearts can be created quickly and efficiently.
03:37
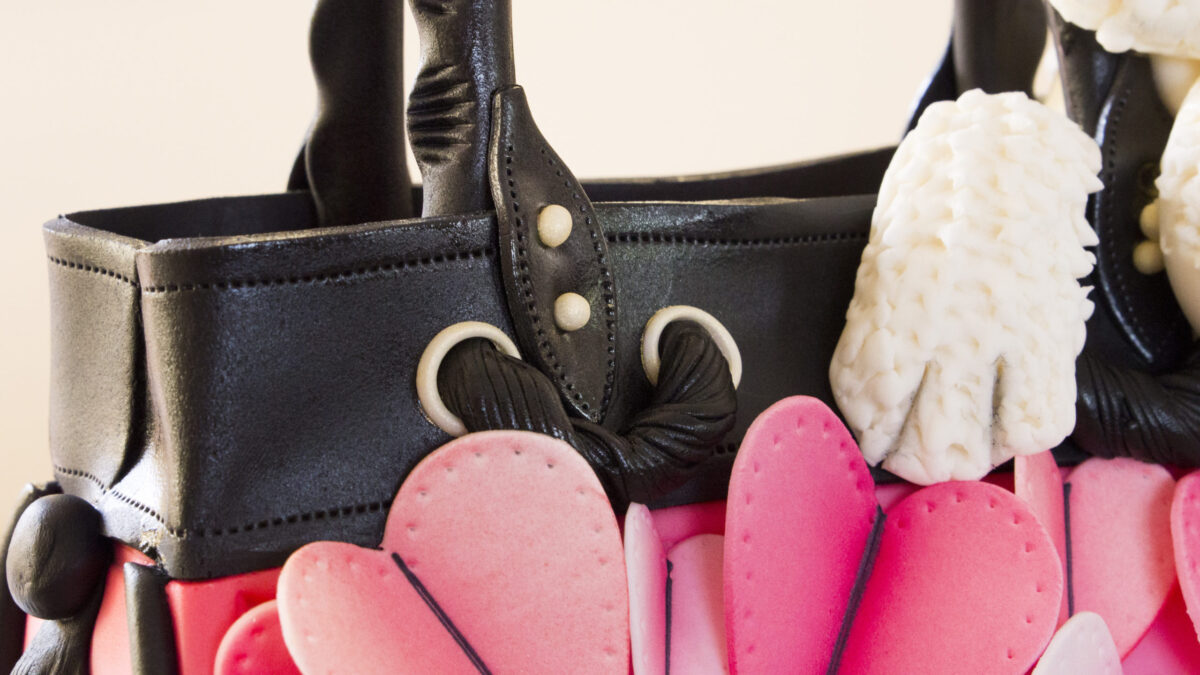
6. Adding the Black Detail Part 1
Using black sugarpaste, details are created to attach to the top of the cake that will add extra realism to the handbag.
11:29
7. Adding the Black Detail Part 2
Paul finds his ruler and also continues with the creation of the black detailed sections and shows us how to attach them to the cake.
12:04
8. Handles
The handles are now added to the cake using the black sugarpaste and Paul makes these nice and strong and shows us how to add some nice details for realism.
09:19
9. Airbrushing the Hearts
Some more use with the airbrush is required to decorate the hearts we made in Lesson 5. A black line is added to the hearts using a black food pen then Paul follows this up with some more airbrushing tips.
12:26
10. Icing the Board
Paul opts for a chequered pattern for the board using black and white sugarpaste. A multi wheel pastry cutter really helps with speed with this method, great for cutting multiple strips of sugarpaste at the same width!
02:14
11. Transferring the Cake
Happy with your chequered board? Now it’s time for the part that everyone fears – transferring the cake to the board! Have no fear and follow Paul’s advice and everything will work out fine.
12:47
12. Finishing the Top Part 1
Eyelet holes are added to the top black section of the cake, using a circular cutter and a nice pastel gold dust so that they fit in nicely with the design. Paul adds some extra ball details to the handles too. Once this is complete, it’s time to repeat the steps for the other side of the cake.
09:47
13. Finishing the Top Part 2
Paul uses a garlic press combined with some black sugarpaste to create some neat tassels to add extra detail to the cake.
08:23
14. Placing the Love Hearts
Paul opts for an edible glue to attach the love hearts to the cake. Royal icing can be used if preferred although some of this may show through behind the hearts.
26:34
15. The Dog
If you wish to add the dog to the cake too, watch and learn! This is a slightly longer lesson at 26 minutes – Paul talks us through how to create the dog from start to finish to ensure that it will sit comfortably (and be well behaved!) in the handbag cake.
07:36
16. Finishing Touches
A decorative pink bow is created to add to the dog using pink flower paste. This is then airbrushed to shade and add realism. A clear glaze is also added to the dogs nose and eyes to bring them to life…and we’re all done!
02:04
17. Other Ideas
Paul shares some other ideas for this cake and how you can approach the design differently. Perhaps a meerkat in the bag?
02:37
18. Pro Members
In this lesson, Paul will take you through how he would create this cake in a commercial environment and what he would charge for it.
One of our most popular cake categories is our lovely handbag selection. So, what goes in this handbag? A cute little doggy, of course! Paul shows us how to make this Handbag and Dog Cake, from start to finish and the design will cover a variety of different techniques and textures to get stuck into. This cake is for intermediate level cake decorators and will take approximately five to six hours to complete.
We would love to see your take on the Owl Handbag Cake – please share your photos with us on our Facebook Page!