Chevron Silver Leaf Wedding Cake Decorating and Baking Tutorial

Tutorial Preview

Join NOW to access 1661 courses Watch Now
14 Day FREE Trial
Chevron Silver Leaf Wedding
with Paul Bradford
Skill level: Intermediate
HD Lessons: 20
Decorating time: Two to Three Days
Now Playing
04:08

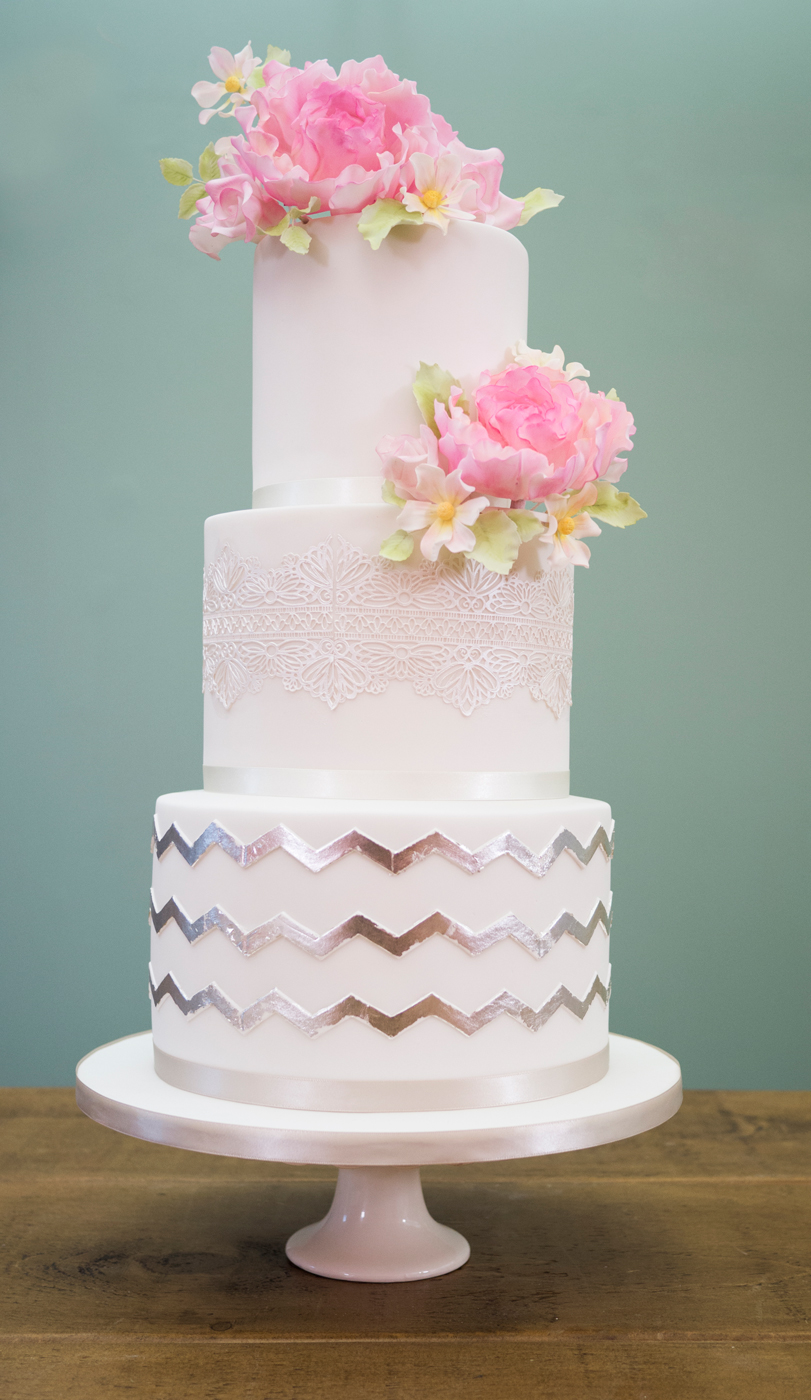
1. The Structure and Design

Short on time? You can watch this whole tutorial in just 16 minutes here.

In this lesson, Paul takes us through the flavours he will be using to create this beautiful wedding cake. Paul is going all out and using fruit cake, sponge cake and lemon cake. Not only that but there’s jam, buttercream and chocolate ganache too. That should make it very tasty, but all together would result in quite a heavy cake – for this reason, Paul decides to replace some of the cake with dummy cakes to avoid any transportation disasters.

Now Playing
17:26

2. Covering the Cake

Paul has now covered the cakes in marzipan as well as icing them and it’s onto covering the cakes in a very high quality sugarpaste. Paul has decided to use Carma Massa Ticino Tropic, which is expensive but well worth it for a very special occasion. It’s also a dream to work with as you will soon see, once you have warmed it up and rolled it out. You may be familiar with the upside down technique for getting that sharp edge – you can opt for this technique, however Paul uses acetate which can be bought or quite easily made from old thin plastic place mats.
Now Playing
15:56

3. Making the Peonies Part 1

Paul shows us how to make very simple peonies which are easy to create and quick to assemble. As you will see, Paul isn’t very strict when it comes to the amount of petals per row and really his rule is “as long as it looks nice”. There is no need to worry about how accuracy here, relax and have fun with it.
Now Playing
10:18

4. Making the Roses Part 1

Now we move onto the roses and again Paul uses a very simple but effective method that will allow you to make pretty roses, fast. There are some similar techniques used in this lesson that were used for the peonies, but there is a treat in store for you that was passed on to Paul from the very talented Mrs. Jones! It only takes seconds to do but adds great volume and realism to the overall look of the rose. And it’s all done with a toothpick and a ball tool, believe it or not.
Now Playing
03:40

5. Making the Roses Part 2

Now that Paul has made the petals, it’s time to assemble the rose. This is a very straight forward process and you can add as many petals as you feel make it look realistic and aesthetically pleasing.
Now Playing
09:06

6. Making the Daisies

The daisies look deceptively easy to create – they’re actually very simple, but they are time consuming due to the amount of petals and leaves you’ll have to make. A stitchy tool and a candle will be required for this lesson. Watch on to see why…
Now Playing
05:44

7. Making the Peonies Part 2

In this lesson, Paul goes back to finish off the peonies now that everything has dried. He shows us how to assemble the flower and gives tips on where to place the petals to give it the correct shape. Now that all the flowers have been completed, we can move onto the cake.
Now Playing
08:58

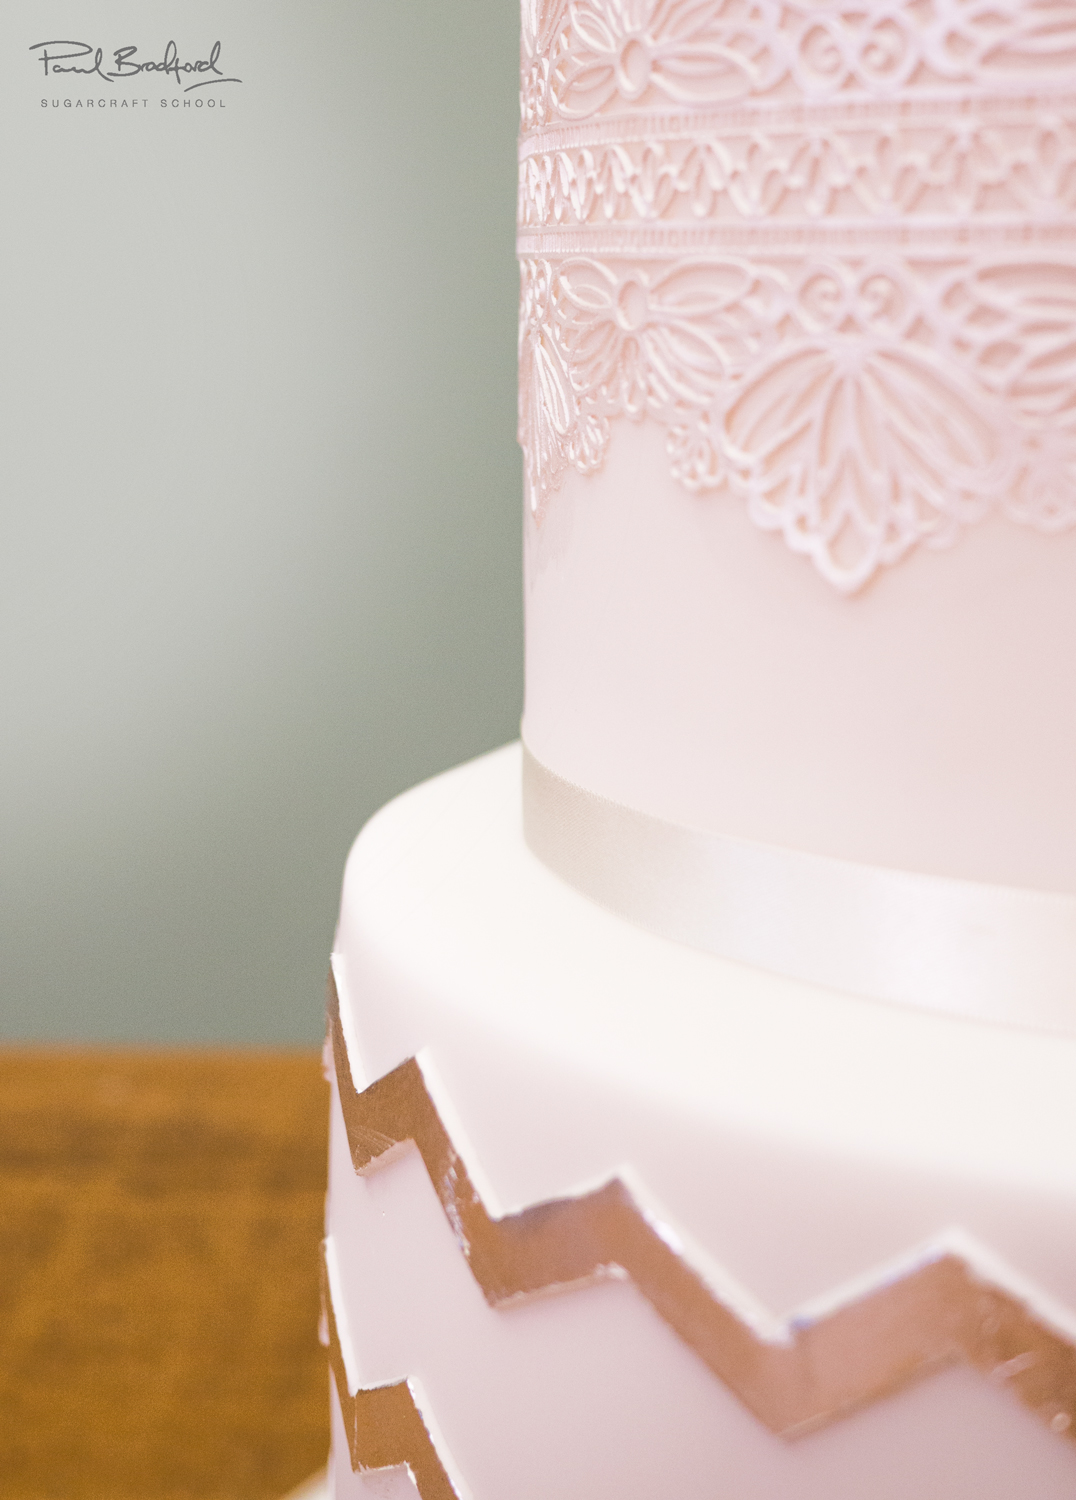
8. Making the Chevron Design

You may have seen the picture of the complete cake and wondered how Paul managed to get such a neat and consistent chevron design all around the cake, not only once but three times… Marvelous Moulds save the day! Paul came across this ingenious design that makes this process so much simpler. Unfortunately, there is no quick and easy way to do it but this is far simpler than any other alternative.
Now Playing
12:35

9. Adding the Chevron Design

Now it’s time to add the chevron design to the cake. While watching the last video you may have had a brainwave and thought “what if I put the chevron mat and the flower paste through the pasta machine at the same time?”. If you had this idea, then you get a gold star! However, be careful not to damage your expensive machine in the process and as always, be generous with that corn flour. For this cake Paul decides to go 1½ inches up the cake each time he adds on the next chevron pattern. The process of adding the design should be fairly simple although it can get tricky when you need to reshape and stretch the chevron design to make sure it’s in line with the line below. Take your time and add one section at a time allowing you to reshape and move the paste without any bother.
Now Playing
09:47

10. Filling the Joins and Adding the Silverleaf

Now that we have the design going all around the cake we just need to neaten it up a little and see if we can get rid of those gaps. It’s very simple and Paul uses a little bit of royal icing and some high percentage alcohol, along with a small brush to smooth them out. Don’t spend too much time making it perfect as it will be hidden completely when we add the silverleaf onto it. Try and resist the temptation to race ahead and add royal icing over every gap and then touch them up, and instead fill them in one by one as the royal icing will become solid and difficult to work with. When applying the silverleaf, be as accurate as you can when adding water to the chevron design so that the silverleaf doesn’t go onto the cake itself. This will take quite a while to do and requires a bit of faith and patience! You may find that the sections where you added royal icing don’t allow the silverleaf to stick as well, as the icing absorbs the water so Paul recommends that you use edible glue as well.
Now Playing
06:02

11. Finishing the Chevron Design and Covering the Board

Now that you have added the silverleaf to the cake, you may find as Paul did that you have quite a lot spare – don’t worry as this can be used up in so many ways so set it aside safely. Now it’s onto icing the board. It might be handy to have a cake turntable when it comes to cutting off the excess and smoothing the edges.
Now Playing
08:36

12. Adding the Second Tier and the Ribbon

When making a two tier cake of this size and weight it’s all about support, so we turn to the trusted cake dowels and some good old royal icing to help stick it down. Then it’s on to adding the ribbon. As you will see this is not always as simple as it sounds as it really can change the overall feel and appearance of a cake so choose carefully and perhaps run your decision by a trusted friend/family member.
Now Playing
07:43

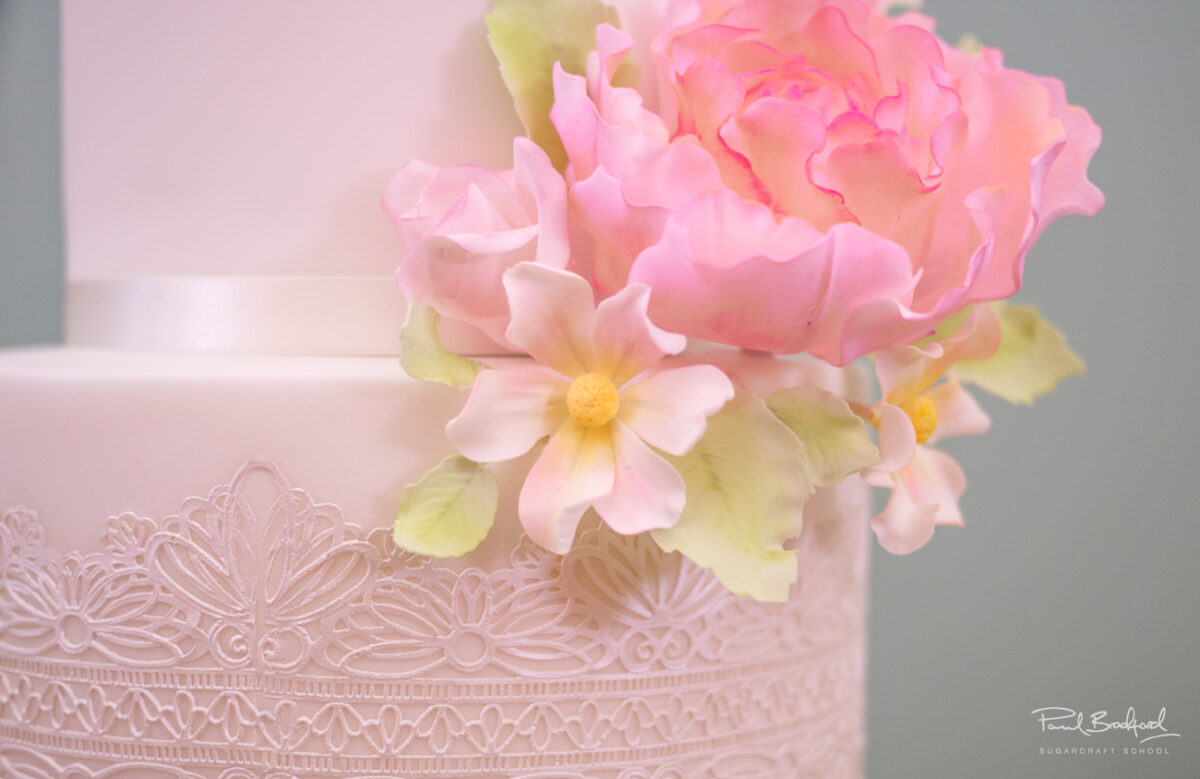
13. Making and Adding the Cake Lace

Lets make some more pretty things! Paul has a lovely Claire Bowman Cake Lace mat which he used and there are a whole host of other designs that can be used too.

This is an incredibly satisfying process and one which requires only a little effort for beautiful results. Do your best not to get too distracted once you’ve put it in the oven as it is very easy to overheat, causing it to go brittle and crack when taking it out of the mat. So make sure to set your timer to 10 minutes.

Now Playing
03:02

14. Adding the Rest of the Cake Lace

Carefully brush a little bit of water onto the cake as it can easily ruin the look of the lace when you add it and cause it to slip out of place. Aim for a slightly tacky surface. This part is a little tricky as you want as much as possible to give the illusion that the lace is all one piece, so plan ahead and have your scissors at the ready.
Now Playing
03:52

15. Dusting the Roses

Now it’s back to the flowers and adding the finishing touches, which is always fun! Paul dusts the edges of the roses’ petals with some dusky pink mixed with some fuchsia to give a slightly brighter touch.
Now Playing
06:31

16. Dusting the Peonies and the Daisies

It’s now time to dust the peonies and as you will see there are a lot more colours used for this. As Paul is dusting the entire flower, he uses a large and small brush. Remember to lightly dust the petals and add more colour as you get closer to the tips, for the centre of the peonies. For the daisies, Paul uses yellow and just a touch of pink to add a vintage look. Now it’s onto the leaves.
Now Playing
04:33

17. Dusting the Leaves and Glazing the Flowers

For the leaves, Paul uses green and white dust to give it a light powdery colour in pastel tones. Once you have dusted them all, it’s time to glaze all of the leaves and flowers. Paul uses some of Robert Haynes leftover glaze (75% isopropyl alcohol + 25% confectioners liquid glaze = ¼ glaze strength), for petals and leaves that require no shine. This creates a matt finish which is what you want for these type of flowers and it adds depth to the colours. To get rid of the excess, find a large plastic tub or cardboard box to lightly spin them in.
Now Playing
18:06

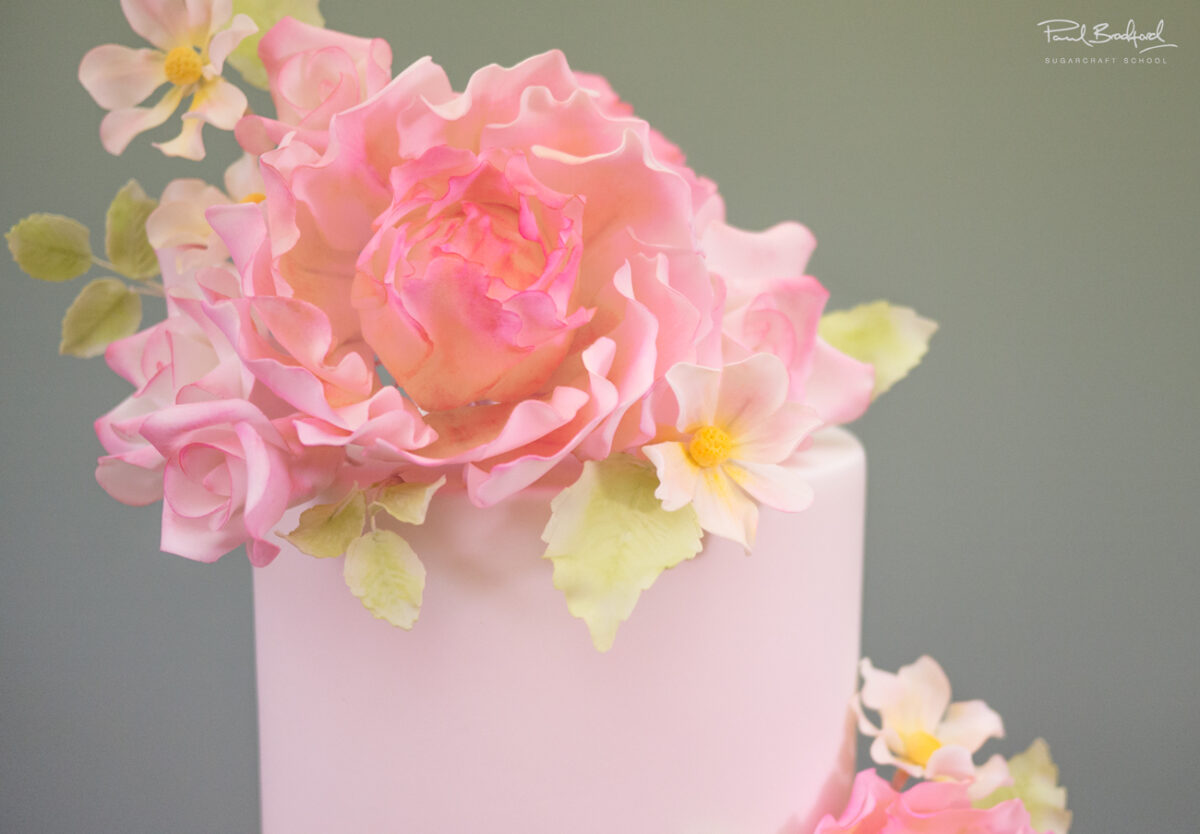
18. Arranging the Flowers on the Cake

We are on to the final stage! This requires an artistic eye as well as a bit of forward planning. As always, don’t feel you have to do exactly what Paul does – have fun but do your best to map it all out before committing to adding anything as you don’t want to make unwanted holes in your cake! Less is definitely more here.

Now Playing
01:36

19. Other Ideas

In this lesson, Paul shares his thoughts on how the design can be adapted, allowing you to make it unique. We would love to see your take on this cake, so feel free to hop on over to our Facebook Page and share your snaps with us!
Now Playing
15:31

20. Fast Forward

If time is of the essence, watch the entire course in under 16 minutes!
Paul’s Chevron Wedding Cake mixes the contemporary with the classic – the chevron design gives it a modern feel, while maintaining an elegant aesthetic with the silver leaf and delicate cake lace wrapped around the second tier. A lovely mix of pastel coloured daisies, roses and peonies are used to decorate the cake. Paul recommends allowing yourself two to three days to make this cake and it is most suitable for intermediate to advanced cake designers.

There are some techniques that are assumed knowledge and are therefore not listed as lessons within this tutorial, but they can be found by following the links to Icing Round Cakes, Ganaching Cakes and Stacking Cakes which are within our Free Beginners section. Feel free to ask for any advice at any time.

We would love to see your take on this cake, so feel free to hop on over to our Facebook Page and share your snaps with us!

Paul Bradford

Paul Bradford

Paul Bradford´s mission is to ‘Empower people to achieve their cake decorating dreams’ by providing a range of cake decorating courses and online tutorials through their website, which currently teaches 195,000+ students.  
14 Day Free Trial