- You cannot add another "Top Table Wedding Cake" to your basket. View basket Continue shopping
Tutorial Preview
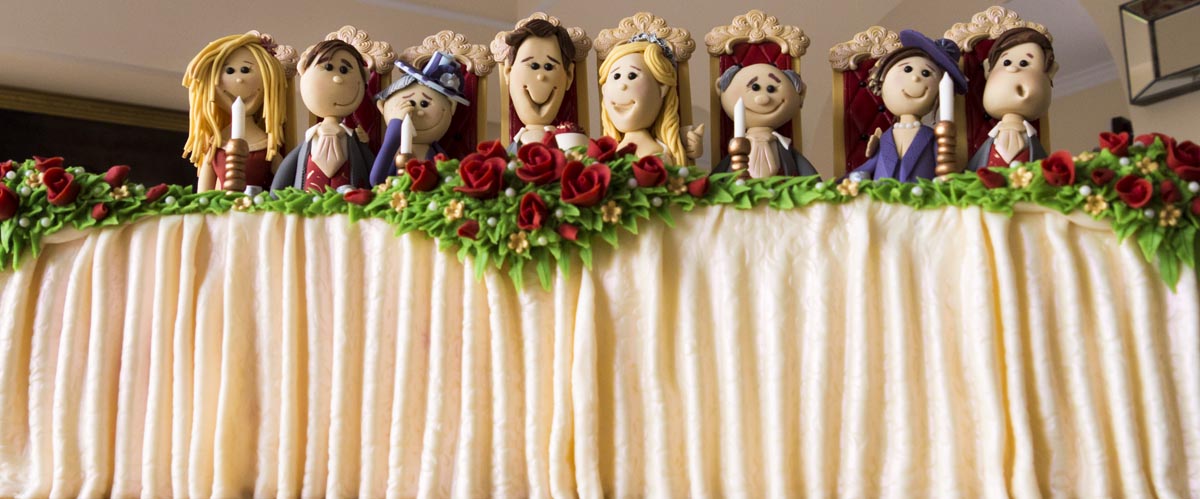
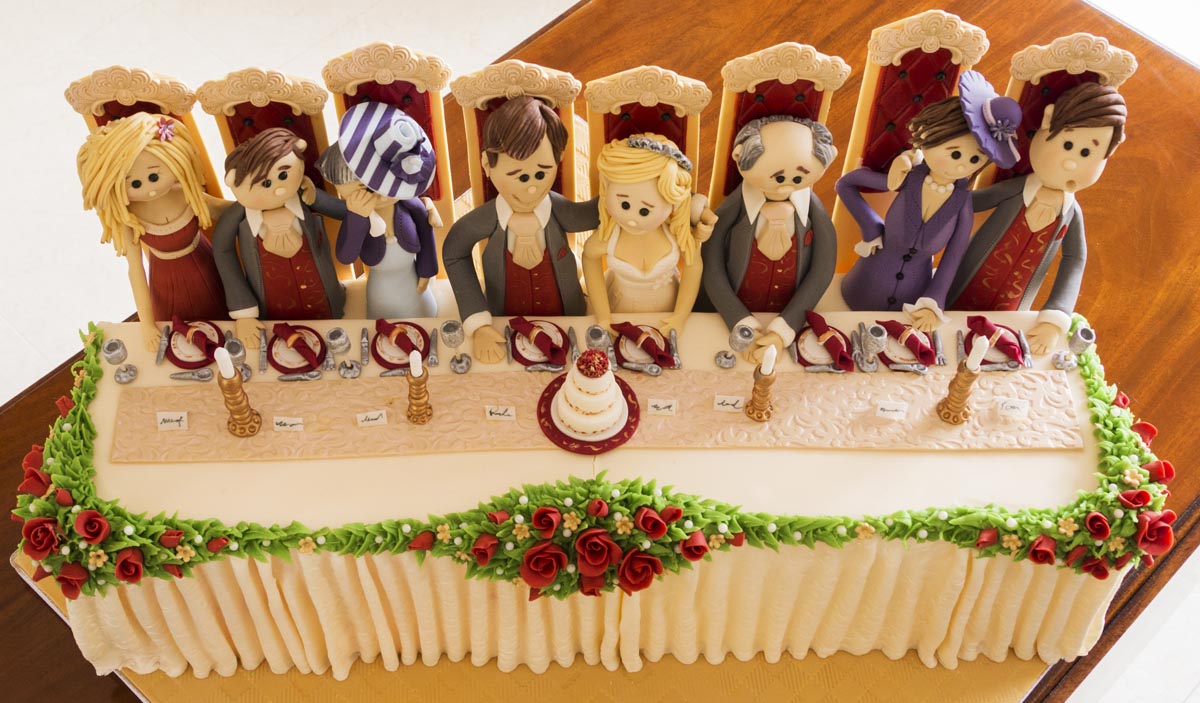
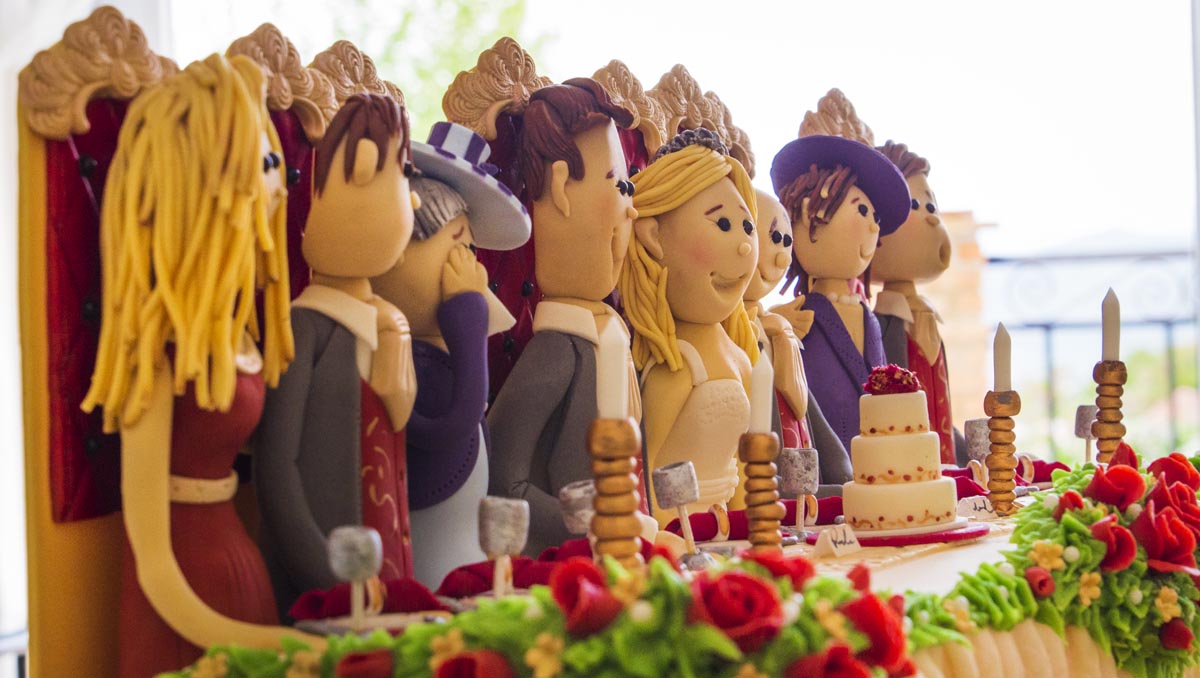
Top Table Wedding
with Paul Bradford
Skill level:
Intermediate
HD Lessons:
29
05:55
1. Top Table - Icing the Board
A slightly different start to the norm with this cake as Paul shows you how to Ice the Board first ready for the Top Table cake. Paul uses a textured sheet to add a texture to the iced cake board to give it that carpet look.
01:35
2. Top Table - Texturing the Board
Continuing from Icing the board, Paul adds a gold shimmer to the ‘carpet’ to highlight the pattern and should take away any icing sugar marks.
07:19
3. Top Table - Placing and Icing the Cake
Paul shows you how to ice the cake and how to transfer the cake to the board (Paul’s using polystyrene as his cake but the procedure is the same with real cake!).
05:51
4. Top Table - Preparing the Panels
The pleats around the side of the cake really help give it that genuine wedding table look. Flower paste can also be used for this task although Paul shows you how to achieve the results with normal sugarpaste.
04:55
5. Top Table - Placing the Panels
Seamlessly attach the pleated panels to the table by following Paul’s advice shared in this lesson.
09:34
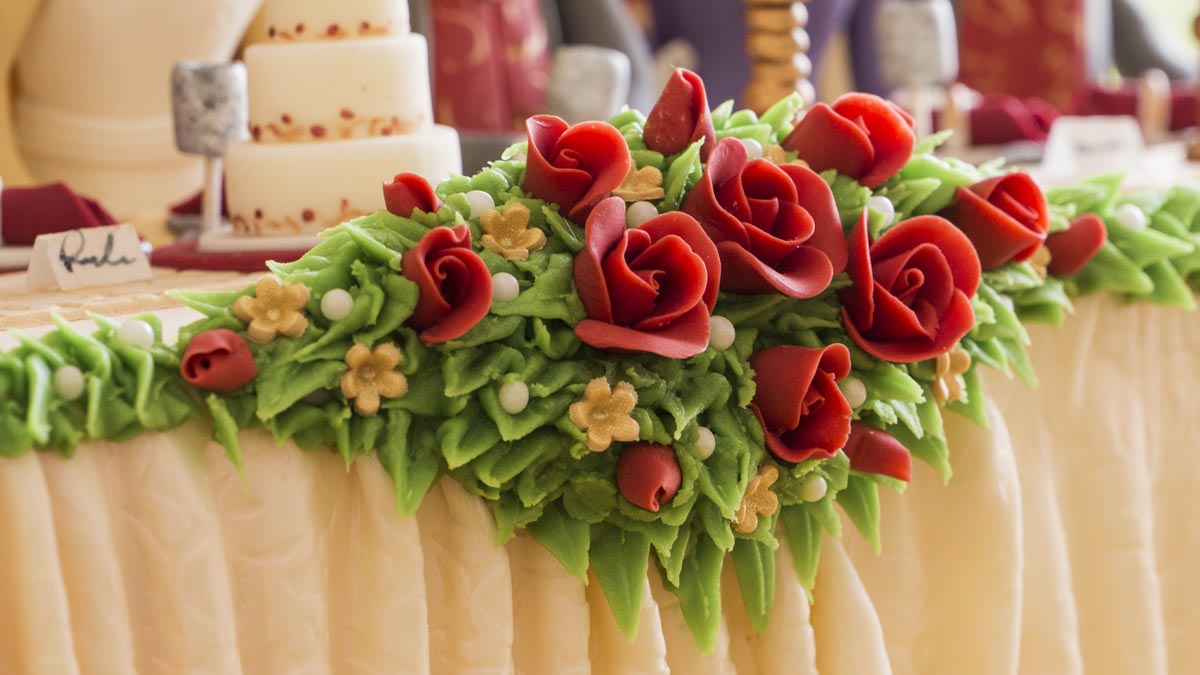
6. Top Table - Making the Flowers
In this lesson, Paul starts to add some flowers to the wedding scene.
04:12
7. Top Table - Making Roses
Once your leaves are in place there’s plenty of roses to make, follow Paul’s advice on creating these beautiful tiny roses.
05:16
8. Top Table - Placing Roses and Pearls
After the creation of the roses, use the pen tool to lift the roses and get them in place on the cake. Use a small paintbrush to open the petals up for more realism. The addition of some gold flowers adds an element of class to the wedding table.
05:28
9. Top Table - Platform for the Back of the Cake
Using a platform for the back of the cake is essential as it allows you to keep the models when cutting the cake, this can be made from polystyrene, an actual cake or follow the lesson to see how Paul did it!
04:47
10. Top Table - Icing the Back of the Cake
The platform you just created is now iced so you can’t tell it’s made of cardboard, just follow Paul’s advice in this lesson to achieve this with ease.
03:36
11. Top Table - Back of the Seats
Learn to make and shape the backs of the chairs ready for the (sugarpaste) wedding guests to sit down comfortably!
NOTE: Make the chairs 7cm taller than Paul mentions!
03:19
12. Top Table - Table Runner
Using the spare flower paste from the back of the chairs Paul shows you how to make a neat table runner (this uses the same colour as the board was iced in).
05:53
13. Top Table - Back of the Chairs
The guests need to be sitting comfortably for the big day, so adding detailed cushions to the chairs is essential.
10:18
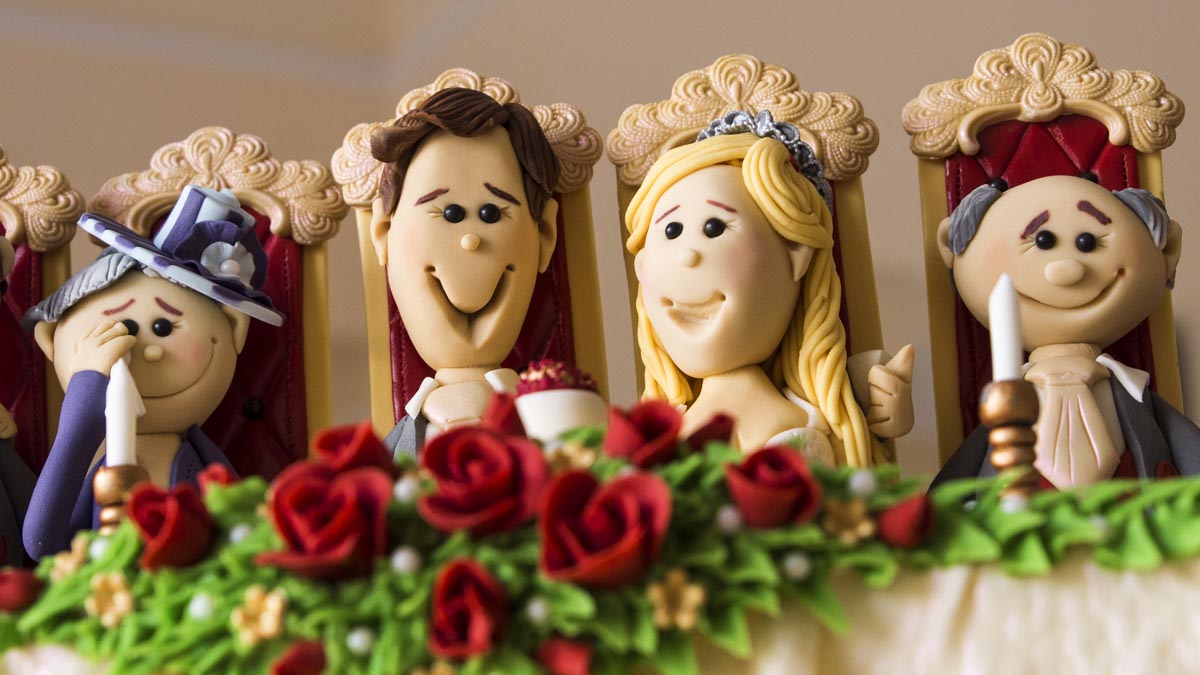
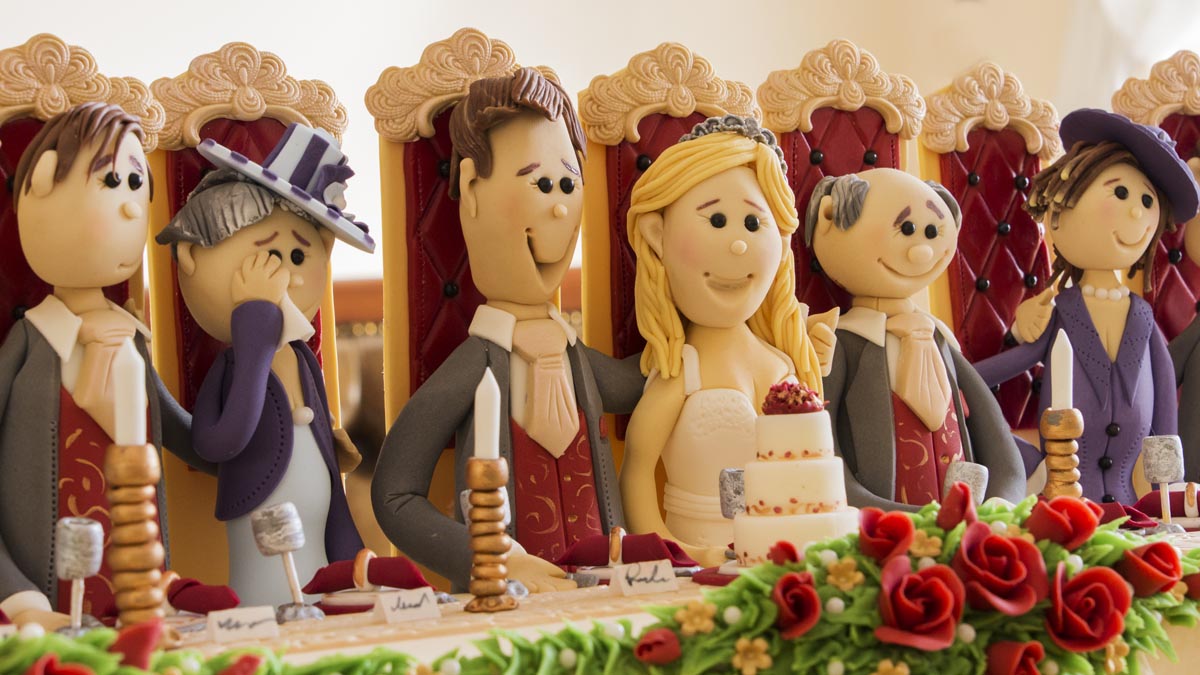
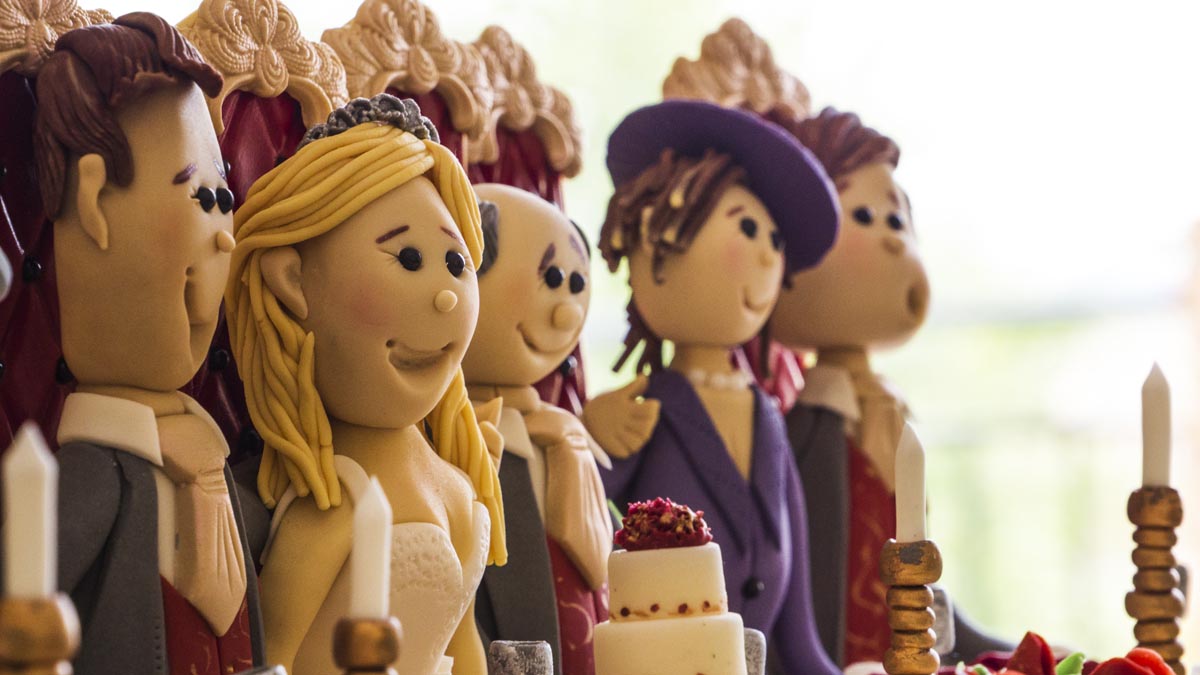
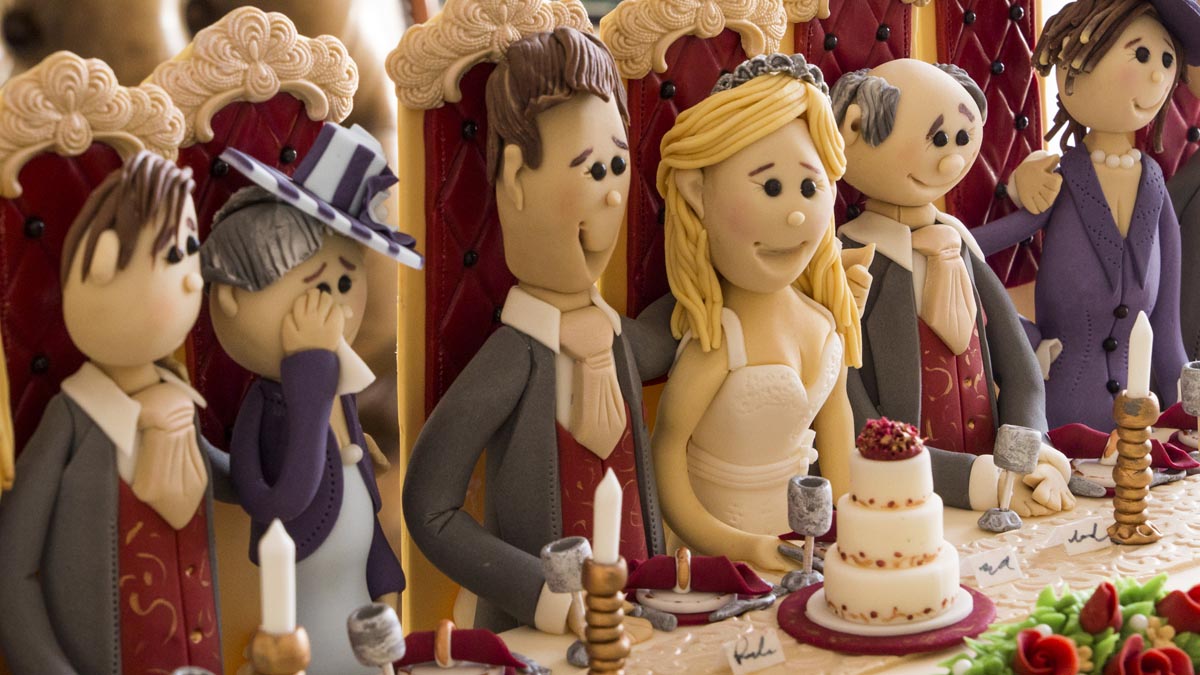
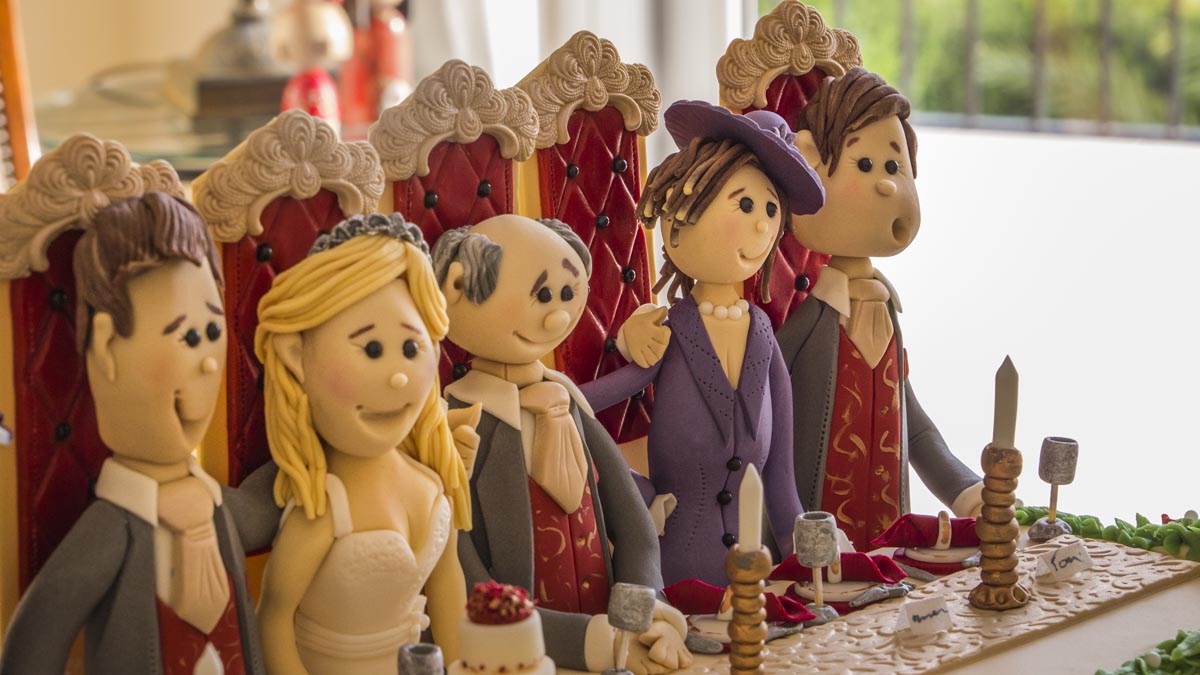
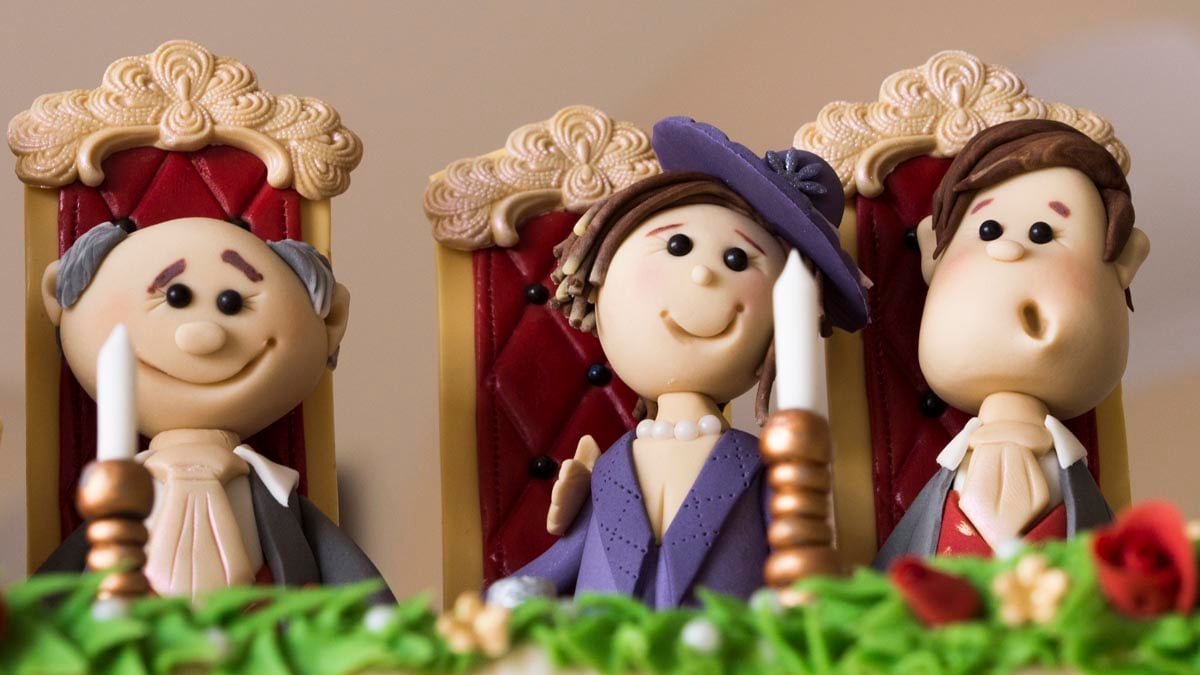
14. Top Table - Making the Heads
A wedding isn’t a wedding without the guests! Now it’s time to make the heads, you can of course aim to make these a likeness of the people that will be sat at the top table for an actual wedding.
16:45
15. Top Table - Making the Bodies - Part 1
Lesson 15 covers the creation of the bodies for all the heads you’ve just made in lesson 14.
10:04
16. Top Table - Making the Bodies - Part 2
Paul continues to create the bodies for the wedding guests.
10:36
17. Top Table - Bride's Arms and Hair
Sizing the bodies to fit the cake properly is simply done by trimming the models down. We then cover the creation of the Bride’s hair and arms as well as sitting her in place comfortably…
13:16
18. Top Table - Groom's arms and Hair
This lesson covers the assembly of the Groom as well as some of the other family members sat at the table.
04:19
19. Top Table - Rosy Cheeks and Tiara
The Bride gets a wedding day makeover with rosy cheeks and a tiara also includes some added touches to the other models.
10:47
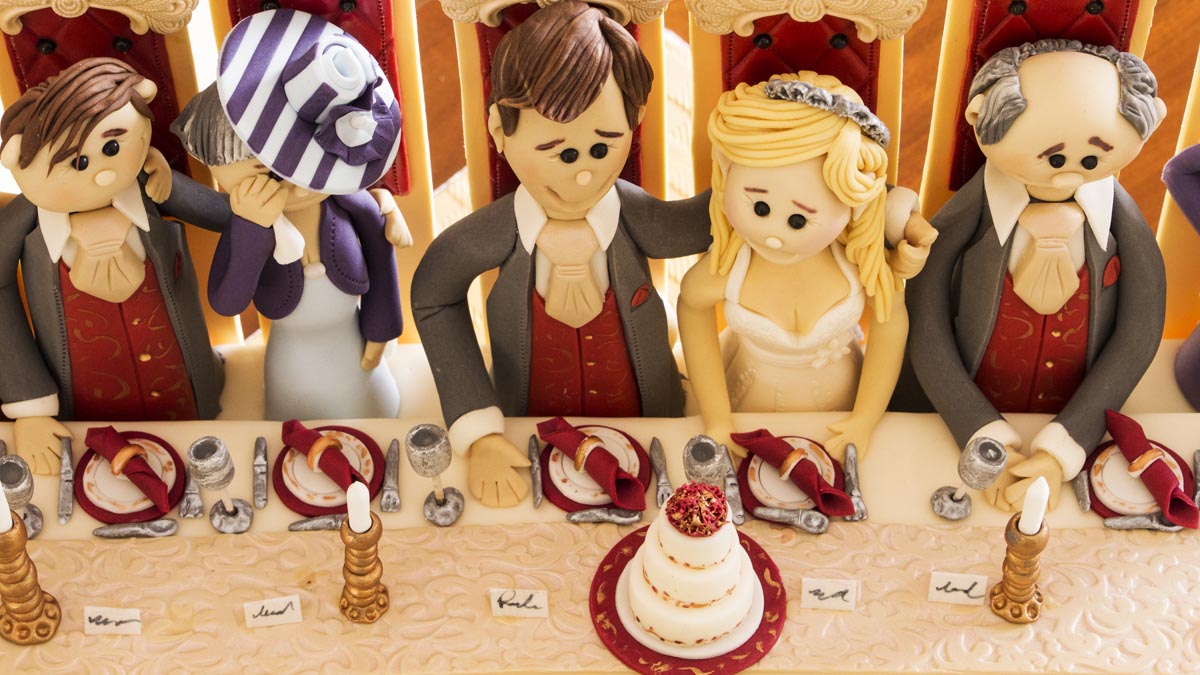
20. Top Table - Dressing the Table
People are looking hungry so we need to dress the table with some elegant plates and of course…cutlery.
08:29
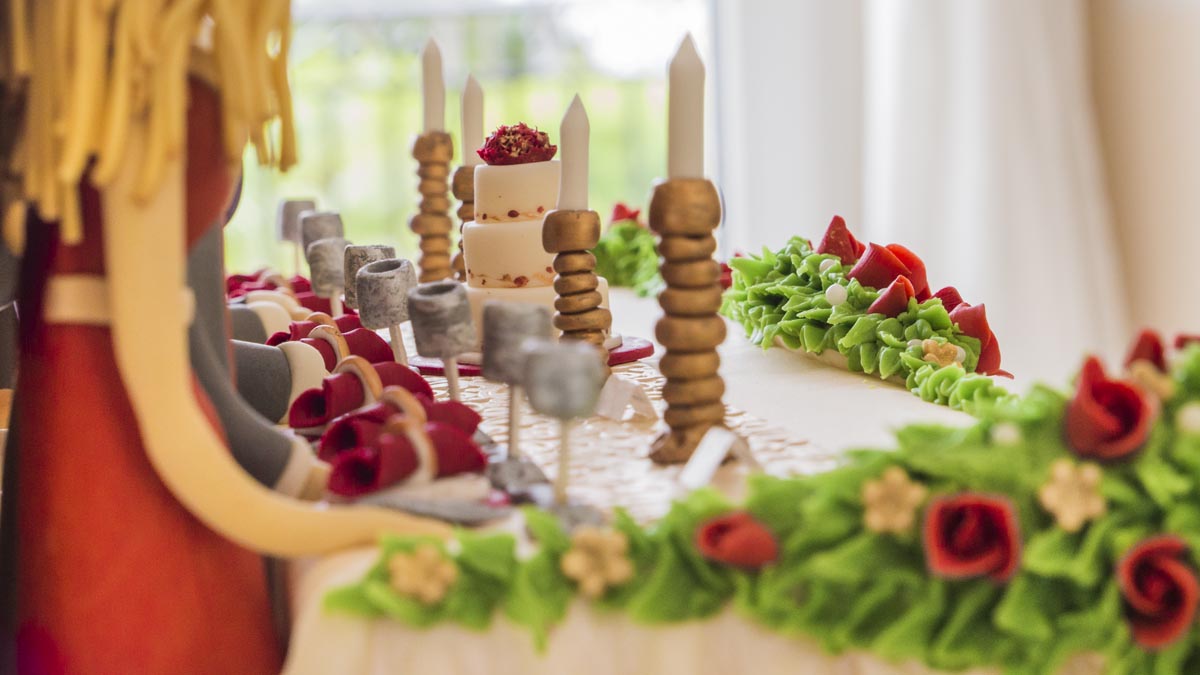
21. Top Table - Glasses and Candlesticks
Next are the glasses and candle sticks, Paul uses sticks of spaghetti for the stems of the glasses so they’re nice and sturdy.
06:19
22. Top Table - Napkins
Learn to make some rolled napkins and napkin rings ready to add to the top table.
07:34
23. Top Table - Wedding Cake
Time to make a miniature wedding cake to use as the centre piece of the table, Paul opts for an elegant 3-tier cake, this cake should retail at around £400..although you won’t get many servings from this one 
04:44
24. Top Table - Painting
First the candle stick holders are painted with a ‘dark gold’ edible paint. Remember to let things dry prior to painting as this will make life so much easier. Glasses are painted in a pearlescent white colour.
04:55
25. Top Table - Finishing Touches - Part 1
You’re almost there! It’s time for the finishing touches, this includes creating some names for on the table and adding the plates etc…
06:54
26. Top Table - Finishing Touches - Part 2
More finishing touches covered in this lesson including the candle sticks + holders and the setting out of the name cards….don’t forget the backs of the chairs Paul!
11:12
27. Top Table - Finishing Touches - Part 3
Attaching the chairs is one of the very final touches, Paul’s original measurements were a bit off but luckily we can improvise a little on this as it’s not a real cake (remember to make your chairs around 7cm taller than stated originally).
02:23
28. Top Table - Pro Lesson
The Pro lesson covers costs for the cake (and the difficulty of estimating them) and also some tips on selling this sort of cake.
02:36
29. Top Table - Other Ideas
As you can imagine there are many ways you can adapt this cake to suit the wedding it’s being made for.You could always add an extra tier to the cake to feed more guests!
Learn to make this fabulous Wedding ‘Top Table’ cake, perfect as a novelty wedding cake and ideal for those couples that want a less conventional and more fun cake!